• Skip to primary navigation
  • Skip to main content
  • Skip to primary sidebar
  • Skip to footer

How Did You Cook That

  • Recipes
    • Main Dishes
      • Street Corn Soup
      • Maple Ginger Chicken and Asparagus
      • Homemade Gnocchi with Garlic and Parmesan
      • Loaded Baked Potato Soup
      • Beef Bourguignon
      • Grilled Salmon Tacos
      • Thai Inspired Shrimp Curry Soup
      • Chicken and Sausage Gumbo
      • Cast Iron Skillet Pizza
        • Vegetarian
          • Creamy Sweet Potato Curry
          • Pan Tossed Vegetarian Noodles
          • Zucchini & Mushroom Bucatini
          • Stir Fried Baby Bok Choy
          • Roasted Red Pepper and Tomato Soup
          • Potato Leek Soup
          • Portobello “Steak” and Potatoes
          • Cheesy Cauliflower & Carrot Soup
    • Companions
      • Roasted Garlic Tomatoes with Thyme
      • Crisp Green Salad with Sweet Honey Vinaigrette
      • Zucchini Fritters
      • Easy Flat Bread
      • Animal Style French Fries (Copy Cat Version)
      • Cheesy Jalapeno Cornbread
      • Buffalo Cauliflower Bites
    • Breakfast
      • Chilaquiles Rojos with Eggs
      • Sour Cream and Onion Biscuits
      • Dutch Baby with Blueberries
      • Blueberry Lemon Muffins with Streusel Topping
      • Egg In A Jar
      • Creamy Acai Bowls
      • Baked Irish Oats with Cream
      • Fluffy Buttermilk Pancakes
      • Original French Crepes
      • Vanilla Spiced Overnight Oats
      • Seriously Delicious Waffles
      • Southern Buttermilk Biscuits
    • Sauces
      • Creamy Thousand Island Dressing
      • Spicy Mango Salsa
      • Favorite Avocado Recipes
      • Loquat Marmalade
      • Adobo Chile Aioli
    • Desserts
      • Number One Ice Cream
      • Loaded Trail Mix Cookies
      • Toasted Candied Pecans
      • Angel Food Loaf Cake
      • Easy Banana Zucchini Bread
      • Triple Chocolate Cake with Whipped Ganache Frosting
      • Key Lime Cheesecake
      • Cinnamon Sour Cream Coffee Cake
      • Zach’s Chocolate Chip Cookies
      • Strawberry Rhubarb Galette
      • Spiced Cheesecake
      • Berry Fruit Crumble
      • Banana Cinnamon Crunch Bread
    • Thirst Quenchers
      • The Forager Cocktail
      • Cucumber Cilantro Gin Tonic
      • Sunrise Glow Smoothie
      • Three Day Ginger Beer
  • Experiences
    • Los Angeles Pop Ups – Zoe Food Party
    • Los Angeles Bread Crawl
    • The Great Outdoors (A Basic Pantry List)
  • Food Muse
    • A Note About Sugar
    • No More Plastic!
    • Best Buttermilk Substitutions
    • Prepping and Storing Cilantro
    • Home Roasted Coffee
  • Sugar Loaf
    • How to Feed a Sourdough Starter
    • Sourdough Pancakes
    • Sourdough Country Bread Loaf
  • About
  • Navigation Menu: Social Icons

    • Facebook
    • Instagram

Desserts

Number One Ice Cream

July 22, 2021 by How Did You Cook That

Number One Ice Cream

Simple Pleasures

I love to make ice cream in the summer. And the winter. Just about any time at all, really. I’m a sucker for its creamy, rich, frosty deliciousness. Pretty much any flavor will do to satisfy my craving when it hits. Number One Ice Cream is my easy recipe base for all my ice cream experiments.

What's In This Stuff

The options for flavors are as varied as your imagination. Cone or cup? Dairy, non-dairy or sorbet? All fair game. And if you make your own ice cream you can control the amount of sugar to add. Bonus!
Additionally, your own homemade ice cream will have low or no saturated fats and preservatives. You get to remove all the nasties that you’d find in a bucket of cream from the local market. What’s not to love about making it yourself? Trust me, the effort is sooo worth it.

Mixing It Up

I make ice cream using a very simple Cuisinart ice cream maker. I’ve had this model for several years. It’s easy to use and has very few parts, making it a breeze to clean up. I’ve had a few ice cream machines throughout my life. In fact, my kids got me one as a gift for Mother’s Day one year. In all honesty, they gave it to me in anticipation of me making them a batch of ice cream as a Mother’s Day treat…for them!

Every time I make a new flavor of ice cream I start with this same base. Once you have it down, you’ll find it’s very easy to gather the ingredients for your recipe each time. With this number one ice cream recipe as the base, you’re covered. From here you can create, adjust, alter and omit to your heart’s content. Of course, you can always add nothing to it and dig in to the sweet cream goodness of this ice cream base just as it is.

Ice Cream Churn
Print Pin

Number One Ice Cream

A creamy rich custard base for any flavor ice cream
Course Dessert
Keyword Ice Cream
Cook Time 25 minutes minutes
Chill Time 2 hours hours 15 minutes minutes
Servings 10

Equipment

  • Ice Cream Maker

Ingredients

  • 5 large eggs, separated, use yolks only save the egg whites for an omelet later
  • 1 cup whole organic milk
  • 2 cups organic heavy cream
  • ⅔ cup raw organic sugar Use less sugar if desired. Especially if your add-in flavors are fruit or chocolate with added sugars.
  • 1 Tbsp pure vanilla extract
  • 1½ tsp salt
  • 2 Tbsp bourbon or vodka Tip: Adding alcohol to homemade ice cream lowers its freezing point. Added alcohol increases the proportion of liquid syrup to solid fat and ice, which will make your ice cream soft and scoopable, not frozen solid. You can add more than 2 tablespoons if you wish but adding more than 5-6 tablespoons will cause your ice cream to not freeze much at all and remain soupy.

Instructions

  • Whisk egg yolks together in a medium bowl or large 4 cup glass measuring cup until creamy and bright. Set aside.
  • In a heavy bottomed sauce pan add the milk, heavy cream, sugar, vanilla and salt.
  • Stir on medium low until sugar is dissolved and milk is just beginning to get hot. Do not let it boil or create a film on the top.
  • Note: If you've never made a custard before, you might wonder about "tempering."
    This recipe is a custard which means it has eggs in it. It is not a vegan ice cream.
    When eggs get hot, they cook. We DO NOT want our eggs to scramble. We DO want them to become silky smooth and help the hot cream become a thick rich custard. Tempering is the process of very slowly warming the eggs to the temperature of the hot milk without scrambling them.
  • Temper the egg yolks by very slowly drizzling or ladling 1 cup of the hot milk mixture into the egg yolks, whisking constantly. Once the milk and eggs are fully incorporated, slowly add the tempered egg and milk mixture back into the saucepan of remaining hot milk.
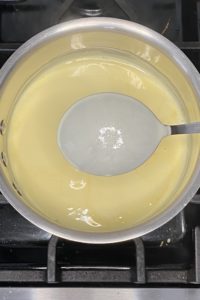
  • Turn the heat up to medium and stir constantly until the custard coats the back of a spoon.
    Custard
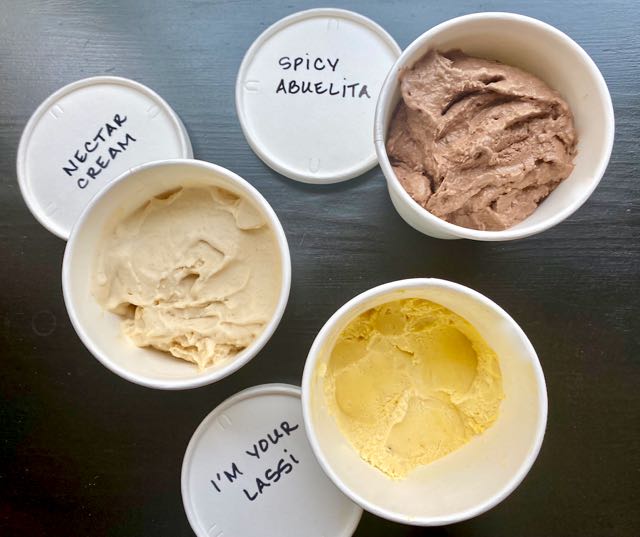
  • Turn off the heat and allow to cool. Once ice cream is cool stir in alcohol, if using. This is also the time to stir in any flavors that you want to add. (Ideas: Chopped strawberries, peaches, bananas, berries, cream cheese, chocolate, cocoa, chocolate chips, espresso powder, macha, nuts, marshmallows. The options are endless.)
  • Cover the pot and put it into the refrigerator.
    (I like to do this to continue to slowly drop the temperature of the custard. This keeps ice crystals from forming too fast and making your ice cream icy. Slow chilling before churning makes for a creamier cream.)
    Allow to chill for an hour or overnight.
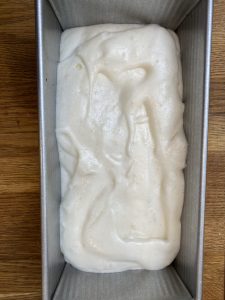
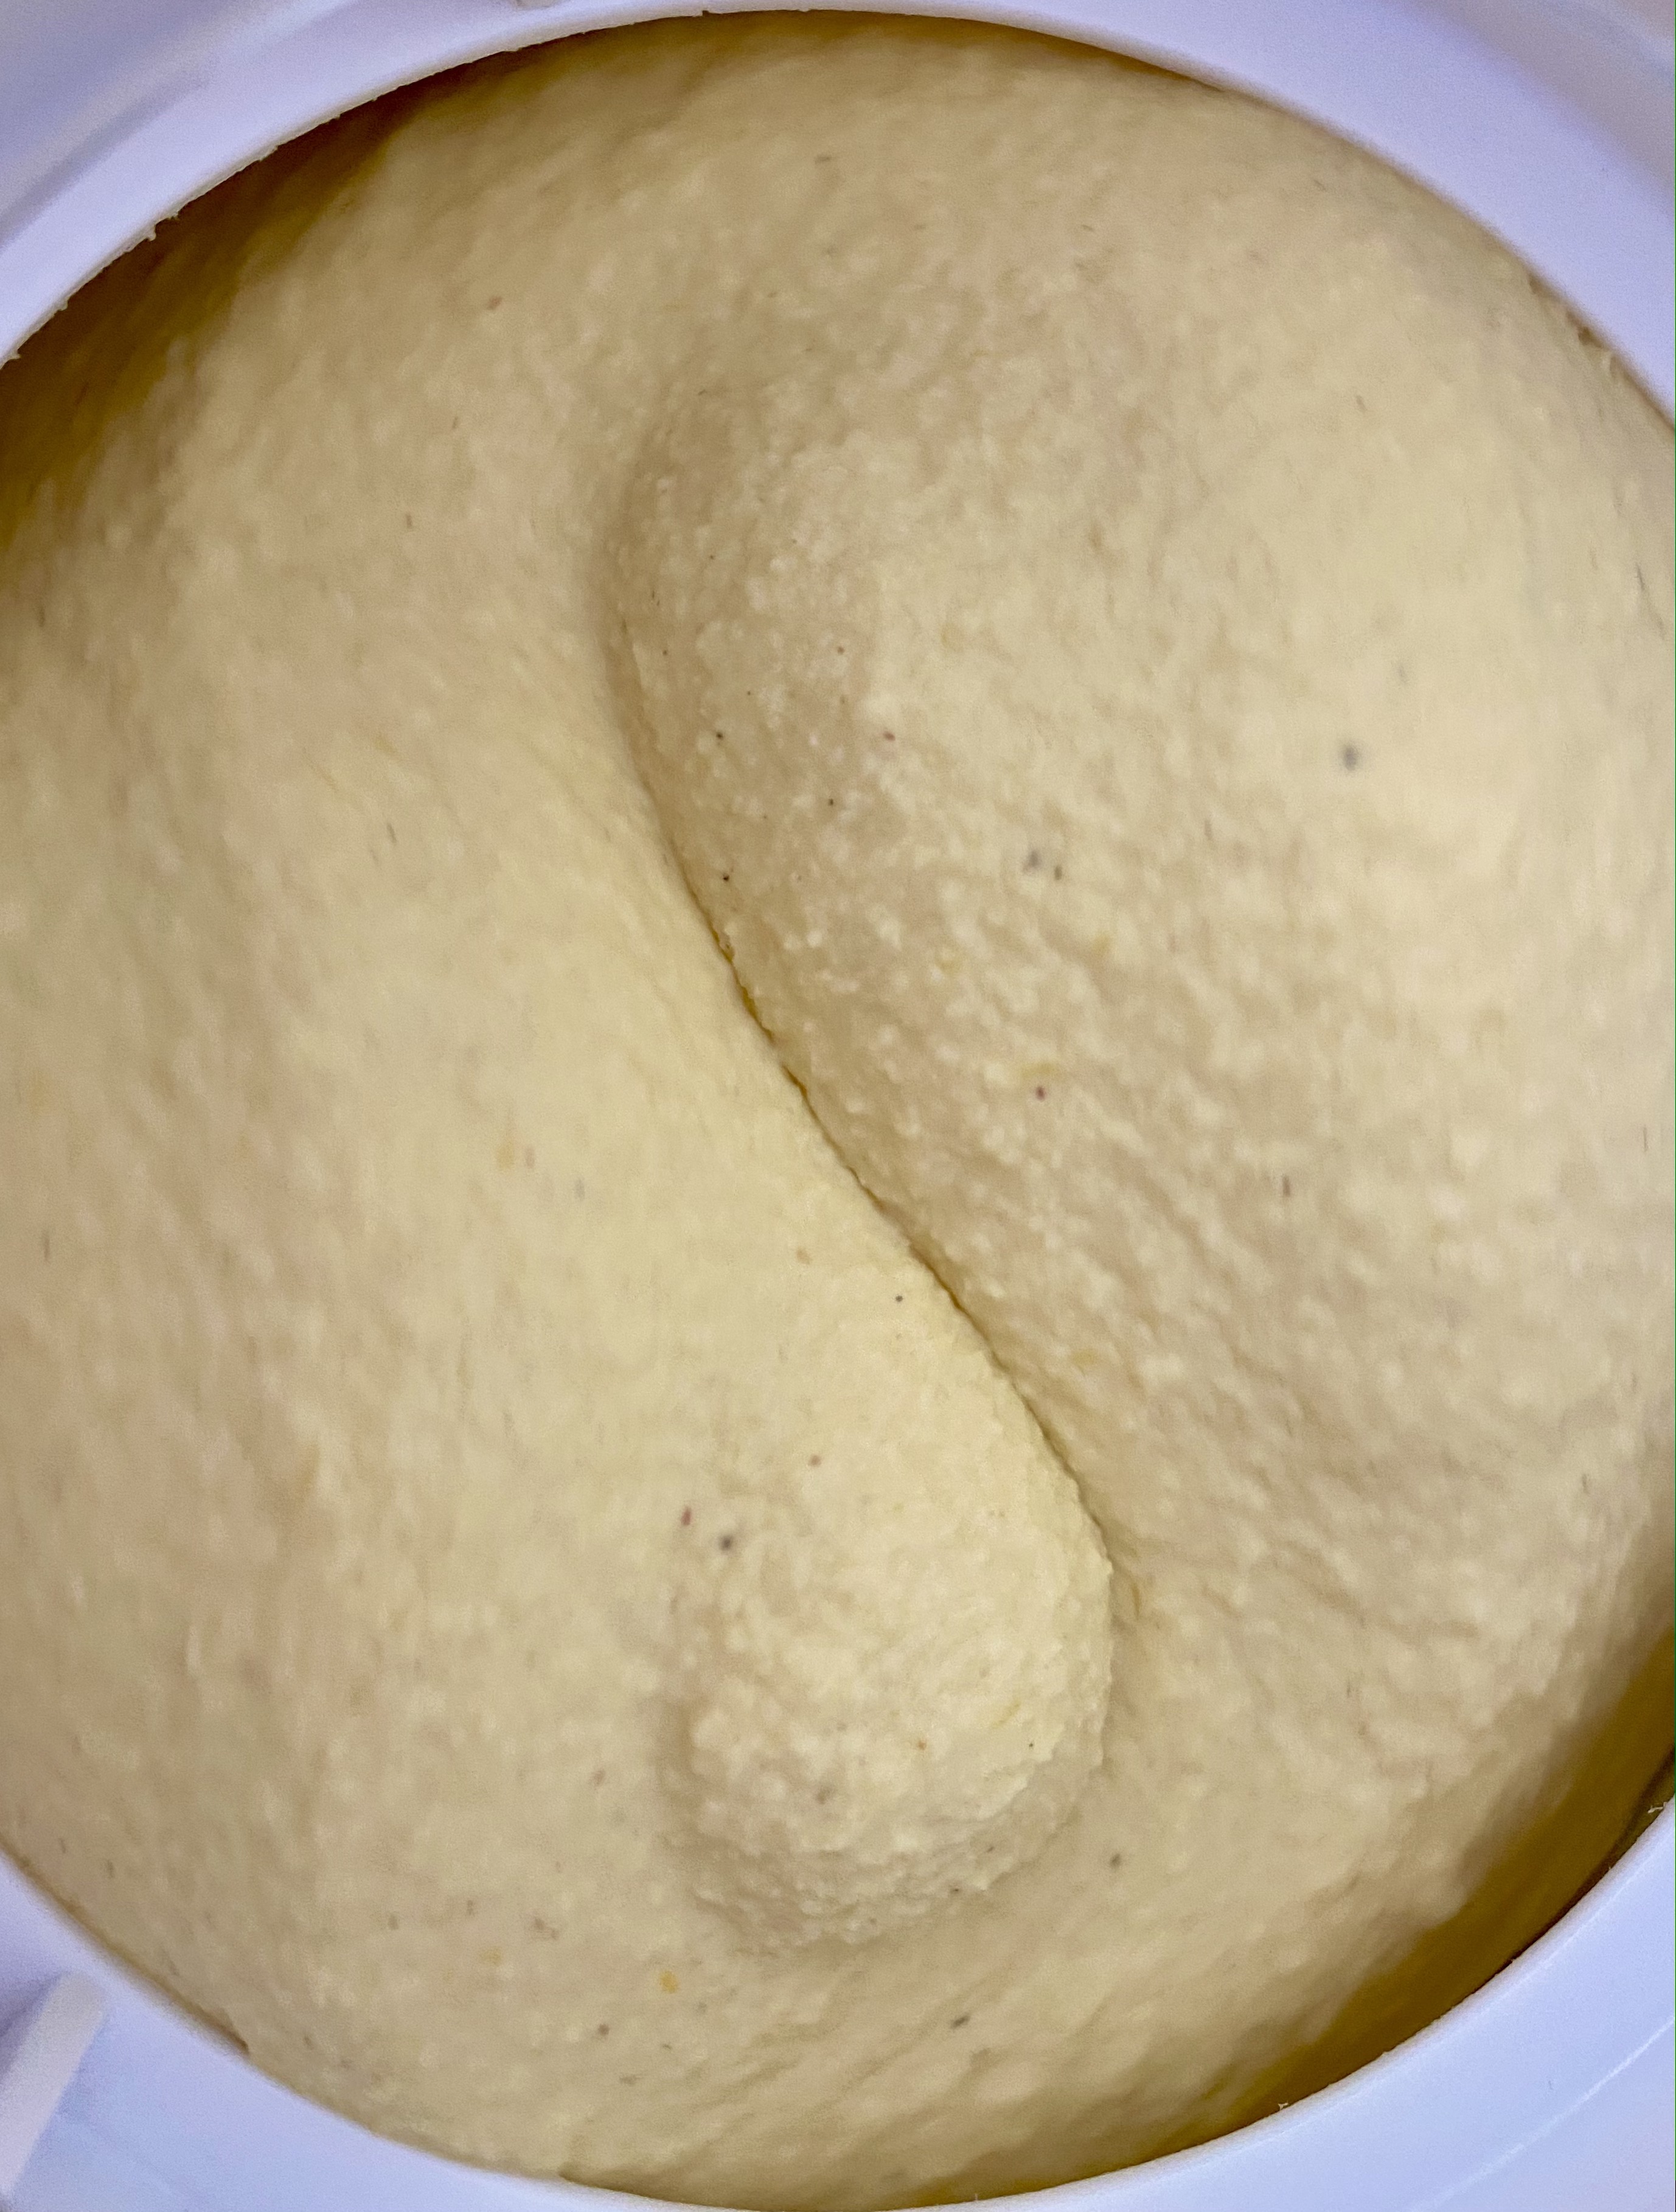
  • Pour the chilled cream mixture into prepared ice cream maker. Churn according to manufacturer instructions.
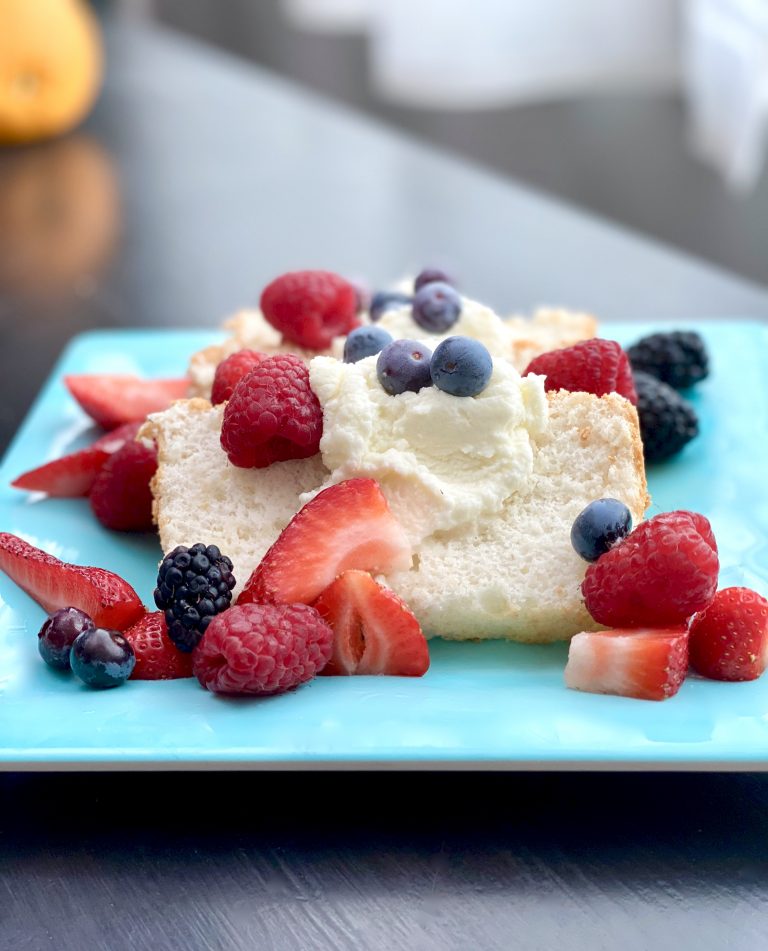
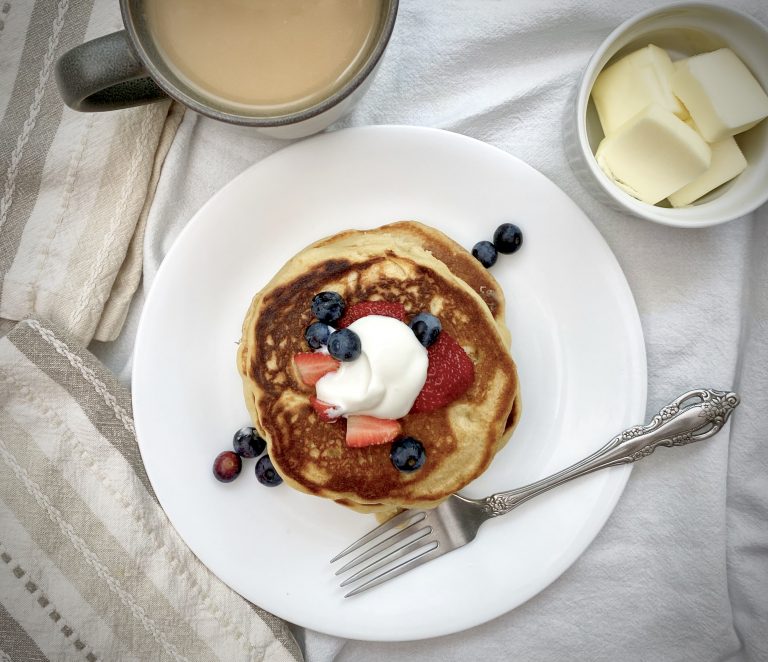
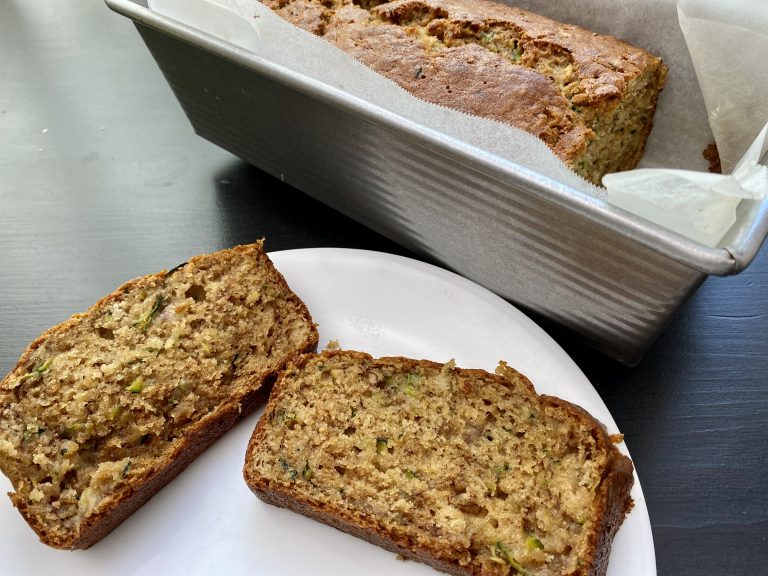
  • Scoop into bowls and be happy.

Freezing Tip! Grab a loaf pan and cut out a piece of parchment paper the same size as the top of the pan. Scoop churned ice cream into the loaf pan. Then cover with the parchment paper, letting the parchment paper lay directly on the ice cream. Finally, slide the entire loaf pan into a gallon size zip top bag, squeeze all the air out of it, zip and freeze. This process will ensure that your ice cream stays scoopable for days to come. You can modify this tip to do with any container you store the ice cream in.

    Filed Under: Desserts

    Mardi Gras King Cake

    February 16, 2021 by How Did You Cook That

    Mardi Gras King Cake

    King Cake – A Very Brief History

    If you’ve never had a bite of King Cake, today is your lucky day. Mardi Gras King Cake is a multi-colored, sugar-sprinkled giant cinnamon roll treat traditional in New Orleans. Mardi Gras or Carnival is celebrated throughout the American South and around the world but King Cake is traditionally a part of the festivities in New Orleans. You can only get your hands on this delicious purple (justice), green (faith) and gold (power) pastry during the Mardi Gras season. The dates of Mardi Gras are specific, with the first day to buy a King Cake in New Orleans beginning with the feast of Epiphany. Usually in early January. The last day to buy a King Cake in New Orleans is Fat Tuesday, the day before Ash Wednesday, which signals the first day of Lent.

    During my days in New Orleans Gambino’s, Randazzo’s and Haydel’s were the go-to bakeries for Mardi Gras King Cake. In those days it never crossed my mind to bake my own sticky-gooey roll of delicious sweet bread at home. Let alone bake a tiny plastic baby into the center of it. Yes, there really is a baby baked into a King Cake.

    Make It Yourself

    Then I moved to California. That first February when I ordered a King Cake from the local French Bakery I almost cried. It was basically just a bundt cake with purple, green and gold frosting!  I ended up ordering from Haydel’s in New Orleans out of desperation. At nearly $100 for the cake, plus shipping, I totally blew my monthly food budget. So, I determined the next year to have a much better solution.

    I scoured Southern Living, Cooking Light, Food & Wine and every southern cookbook I could find. This recipe is a compilation of the very best traditional recipes from that search. It is also a result of my effort to recreate my favorite King Cakes from the bakeries in New Orleans. 

    Most recently I added a spin on the gooey white icing after falling in love with Alison Roman’s Brown Butter-Buttermilk Cake. The brown butter icing on top of her cake is to die for. Literally! The icing gets a nice shell on it and has an incredible buttery flavor that makes it a perfect icing for King Cake. Just be sure to get your sprinkles onto it while the frosting is still wet so they stick to the cake.

    I hope you’ll find this King Cake as close to the NOLA OG as you can get when baking one from scratch. Let me know if you try the recipe. I’d love to hear about your results.

    Mardi Gras King Cake
    Print Pin

    Mardi Gras King Cake

    Brightly colored, sugar-sprinkled giant sticky-sweet cinnamon roll treat unique to New Orleans and all of Louisiana during Mardi Gras season.
    The instructions for this cake are long, but don't let that deter you. This is a pretty easy recipe to master and the instructions are intended as tips to keep you from making many of the mistakes that I made when learning to make it. Seriously, this cake is definitely worth making. Your family and friends will lose their minds when you share this cake with them. Laissez les bons temps rouler!
    Course Dessert
    Cuisine American, Creole, French
    Keyword Baking, Bread, Cake, Dessert
    Prep Time 35 minutes minutes
    Cook Time 15 minutes minutes
    Rise 1 hour hour 30 minutes minutes
    Total Time 2 hours hours 15 minutes minutes
    Servings 16 servings

    Ingredients

    For the Cake

    • 8 oz sour cream
    • 4 Tbsp sugar
    • 2 Tbsp butter
    • 1 tsp kosher salt
    • 1 envelope active dry yeast equivalent to 2¼ tsp
    • ¼ cup warm water
    • 1 Tbsp sugar
    • 1 egg lightly beaten
    • 3 cups bread flour if you only have all-purpose flour that's OK. Your cake will be a bit denser and more cake-like using all-purpose.
    • 5 Tbsp butter softened
    • ¼ cup brown sugar
    • 2 tsp ground cinnamon

    Butter Icing

    • 3 Tbsp unsalted butter
    • 2 cups powdered sugar
    • 2-3 Tbsp buttermilk

    Decorations

    • colored sprinkles (purple, yellow, green)
    • plastic baby You can find plastic babies on the baby shower aisle of your local craft store or party store. I bake mine right into the cake and they NEVER melt. The cake is only in the oven for 15-20 minutes so the temperature doesn't get hot enough to melt your baby. 😀
    • Mardi Gras beads and dubloons (colored coins)

    Instructions

    • In a small saucepan heat sour cream, 4 Tbsp sugar, 2 Tbsp butter and 1 tsp salt. Stir till melted and combined. Turn off heat and let cool to 110° or below.
    • In a small bowl or glass measuring cup mix yeast with ¼ cup warm water plus 1 Tbsp sugar. Stir until dissolved and let sit, for about 5 minutes, until foamy.
    • In the bowl of a stand mixer beat the cooled sour cream mixture with the yeast mixture. Add egg and 1 cup flour mixing to incorporate. Reduce speed to low and gradually add remaining 2 cups of flour. The dough should start to become soft and form a ball, still slightly sticky and not too dry or dense. If it is too sticky add more flour 1 Tbsp at a time.
    • Turn dough out onto a lightly floured surface. Knead for about 10 minutes until smooth and elastic.
    • Butter the sides of a large glass bowl and place the dough inside, turning to cover dough in butter. Cover the bowl with a tea towel and let it rise in a warm place for about an hour or until dough doubles in size.
    • After dough has risen for an hour punch it down. Then roll out into a 22" x 12" rectangle. Spread the 5 Tbsp softened butter evenly over the dough leaving about 1" un-buttered around the edge. Stir together ¼ cup brown sugar and cinnamon, and sprinkle evenly over butter.
    • Here's the OPTION part: I braid my dough, but you don's need to do that. You can just roll it up and bake in the oven as a single roll. I will give you both methods.

    Braided King Cake

    • Cut the dough length-wise into 3 equal strips. Place the baby on top of one of the strips, press it right down into the buttery dough. Then begin rolling each strip of dough up, enclosing the butter and sugar. (and the baby in one!) Pinch the seams together. Lay each rope seam side down.
      King Cake Baby
    • Place 3 ends of the dough together on top of each other and press them all together so that they become sealed at the end. braid the 3 ropes together, end-over-end until you get the the bottom. This is a sturdy dough so you can stretch and twist it to get the braid the way you want it. Be sure to keep the seams toward the middle of the cake, hidden inside.
    • When you get the end of the braid, pinch the 3 ends together and place on a parchment or foil-lined baking sheet. (Parchment or foil will catch all the melted butter that may seep out of your cake while baking)
    • Bring the ends of the roll together to form an oval ring, pinching edges together to seal. Just get in there and stretch and squeeze it together really well. You won't hurt this dough.
    • Cover and let rise in a warm place (85°), free from drafts, 20 to 30 minutes or until doubled in size.
    • Bake at 375° for 14 to 16 minutes or until golden. Slightly cool cake on the pan on a wire rack.
    • While the cake is baking and cooling make the brown buttermilk icing.

    Jelly Roll King Cake

    • Place your plastic baby anywhere in the rectangle of dough. Starting at one long end, roll up the dough, jelly-roll style, enclosing the butter, sugar and baby inside. Pinch seam together.
    • Place roll, seam side down, on a parchment or foil-lined baking sheet. (Parchment or foil will catch all the melted butter that may seep out of your cake while baking) Bring the ends of the roll together to form an oval ring, pinching edges together to seal. Just get in there and stretch and squeeze it together really well. You won't hurt this dough.
    • Cover and let rise in a warm place (85°), free from drafts, 20 to 30 minutes or until doubled in size.
    • Bake at 375° for 14 to 16 minutes or until golden. Slightly cool cake on the pan on a wire rack.
    • While the cake is baking and cooling make the brown buttermilk icing.

    Brown Buttermilk Icing

    • In a small saucepan heat 3 Tbsp unsalted butter on medium, swirling and watching constantly. As soon as it gets foamy and starts to brown, turn off heat. It should have a nutty buttery aroma. Let it cool slightly.
    • Whisk the powdered sugar, buttermilk and browned butter together, scraping out all of the browned butter bits into the mixture.
    • Drizzle the icing over the top of the cake. Sprinkle immediately with the colored sugars, alternating colors to form bands.
      Mardi Gras King Cake
    • Allow to cool completely before slicing. Tradition says that the person who gets the slice of King Cake with the baby inside buys or bakes the next King Cake for the group. Be sure to pay it forward and have fun with this festive cake and tradition.

    Notes


    Filed Under: Baking, Desserts

    Holiday Sugar Cookies

    December 30, 2020 by How Did You Cook That

    Christmas Sugar Cookies are simply tradition. This Holiday Sugar Cookie recipe turns out cookies as tasty as they are pretty.

    I’ve been baking and decorating cookies at Christmas time since I was a little girl. My mom would buy rolls of Pillsbury Sugar Cookie dough and my brother and I would press out shapes with her antique metal cookie cutters. We’d pop em in the oven and start mixing up powdered sugar and milk for the frosting. Drop, drop, drop of Schilling food coloring and then pile on the sprinkles. Crunching the nonpareils and laughing with green and red stained teeth. Oh, the memories!

    And the many years of tradition continued. I threw holiday sugar cookie baking parties with friends and roommates as I got older and continued the festive activity with my children, year after year. The kids are adults now and we still decorate together on FaceTime or when they come to visit. I’m back to throwing holiday cookie parties with friends, laughing, sharing stories and toasting each tasty-cute creation.

    Print Pin

    Holiday Sugar Cookies

    A Holiday Sugar Cookie recipe that turns out cookies as tasty as they are pretty.
    Course Cookies, Dessert, Snack
    Cuisine American
    Keyword Baking, Cookies
    Prep Time 2 hours hours 15 minutes minutes
    Cook Time 12 minutes minutes
    Decorating Time 2 hours hours
    Servings 24 cookies

    Ingredients

    • ¾ cup unsalted butter at room temperature
    • ¾ cup granulated sugar
    • 1 large egg
    • 2 tsp pure vanilla extract
    • ⅛ tsp almond extract optional but it will take your cookies to a whole new level of yummy.
    • 2 ¼ cup all-purpose flour
    • ½ tsp baking powder
    • ½ tsp sea salt

    For the Icing

    • 1 cup confectioners sugar sifted to remove clumps
    • 2 Tbsp milk, cream or lemon juice you can use water in a pinch
    • food coloring as many drops as necessary to achieve your desired color

    Instructions

    • In a bowl, whisk together flour, baking powder and sea salt. Set aside.
    • Cream together butter and sugar. Add egg, vanilla and almond extract.
    • Add flour, baking soda and salt mixture to the creamed butter. Mix until dough starts to roll around in mixer bowl.
    • Divide dough in half and, with your hands, form into two balls. Set each piece on a sheet of plastic wrap. Flatten down into a ½ inch disc, cover with plastic wrap and refrigerate 2 hours or overnight. Dough will keep in the freezer for 2 weeks.
    • When you are ready to bake, preheat oven to 325°.
    • On a piece of parchment paper, roll out 1 disc to about ⅛ inch thick. Thinner cookies will be more crisp. (Leave the other dough ball in the fridge until you are ready to press out the next cookies.) Cut out cookies with desired shapes using excess dough pieces to re-roll and cut out more cookies until dough is all used up.
      Place cookies on cookie sheets and put in the oven. Bake for 12 minutes rotating them about half way through to get evenly browned.
      Take the other ball of dough out of the fridge and press out more cookies. Repeat.
    • Remove cookies from oven and cool completely on a rack.
    • While cookies are cooling, make the icing.
      Put 1 cup powdered sugar in a bowl and slowly drizzle the milk, mixing in a bit at a time until the icing is about the consistency of peanut butter. If it's too thin add more pwdered sugar. Too thick, add more milk.
      Separate into small individual bowls and add food coloring of choice.
    • Decorate cooled cookies your own special way.
      Add friends.
      Eat as you go.

    Filed Under: Baking, Desserts

    Oreo Chocolate Chunk Brownies

    July 10, 2020 by How Did You Cook That

    Oreo Chocolate Chunk Brownies

    Oreo Chocolate Chunk Brownies are a chocolate lovers dream come true. Chewy gooey and chocolatey inside and out. These yummy squares are pure heaven. Consider making two pans if, you know, you’re planning on sharing.

    I grew up taking apart my Oreos and scraping out the filling with my teeth. Always chased with an icy cold glass of milk. No dunking for me, just a chaser. Oreos are also the cookie of choice to leave on the table for Santa on Christmas Eve.

    These brownies require a cold glass of milk too. It’s up to you whether to dunk or chase. No matter how you nosh, these will be the dessert that you add to the top of your list.

    Crushed Oreos
    Oreo Chocolate Chunk Brownies
    Print Pin

    Oreo Chocolate Chunk Brownies

    Ooey gooey delicious brownies. Fudgy heavenly brownies with a rich chocolatey taste and chunks of chocolate and Oreos in every bite.
    Course Dessert, Snack
    Cuisine American, British
    Keyword Brownies, Chocolate, Cookies
    Servings 8

    Ingredients

    • 1 cup unsalted butter (2 Sticks)
    • 1 cup granulated sugar
    • 12 ounces semi-sweet chocolate chunks
    • 2 cups chopped Oreos
    • 3 large eggs
    • 1 Tbsp instant espresso powder
    • 1 Tbsp pure vanilla extract
    • ⅔ cup all-purpose flour
    • 1½ tsp baking powder
    • 1 tsp salt

    Instructions

    • Preheat oven to 350°. Line a 13x9-inch baking pan with parchment paper and extend it past the edges, on at least two sides. Grease paper with butter.
    • In a medium bowl, whisk together flour, baking powder, and salt. Set aside.
    • Set a heatproof, medium-sized bowl over a saucepan of simmering water. Heat butter, and chocolate chunks until melted and smooth. Set aside to cool slightly.
    • In a large bowl, whisk together the eggs, espresso powder, vanilla and sugar. Stir the egg mixture into the slightly cooled chocolate mixture. Cool to room temperature.
    • Add flour mixture to the batter. Stir most of the broken Oreos into the chocolate mixture (save a few for sprinkling on top). Then pour the brownie batter into the prepared baking pan and smooth the top with a rubber spatula. Sprinkle reserved Oreo pieces on top.
    • Bake for 25 to 35 minutes, or until toothpick inserted in center comes out clean with a few crumbs attached. Do not over bake as you want them to be fudgy! Let cool completely, then cover and chill for several hours. Chilling the brownies makes them easier to cut. Invert the chilled brownie pan onto a cutting board, peel off the parchment paper and cut into squares.

    Filed Under: Baking, Bites and Tastes, Desserts

    Loaded Trail Mix Cookies

    June 12, 2020 by How Did You Cook That

    Loaded Trail Mix Cookies

    Two of my favorite snacks, trail mix and chocolate chip cookies, come together in the ultimate healthy treat. I take these loaded trail mix cookies with me on hikes for a delicious energy boost. And they make a yummy fun snack for the kids on a day at the beach. Chewy nutty trail mix and cookie all in one.

    This loaded healthy snack is sweet, savory, crunchy, and chewy. Trail mix cookies satisfy any craving.  And if you ask me, a cookie is much easier to grab than a handful of trail mix. You can toss any dried fruit, nuts chocolate or seeds into the mix you have satisfying mix. Overloading these cookies with crunchy goodness is encouraged. 

    They store easily in the freezer to grab out whenever you need quick energy and crave-worthy satisfaction.

    Loaded Trail Mix Cookies
    Print Pin

    Loaded Trail Mix Cookies

    Chewy nutty trail mix and healthy oatmeal cookie all in one.
    Course Dessert, Snack
    Keyword Baking, Cookies
    Prep Time 2 hours hours 15 minutes minutes
    Cook Time 15 minutes minutes
    Total Time 2 hours hours 30 minutes minutes
    Servings 8

    Ingredients

    • 1 cup raw nuts, assorted
    • ½ cup rolled oats
    • ¾ cup bittersweet chocolate (or carob chips)
    • ¼ cup sunflower seeds, flax seeds, pine nuts
    • ¾ cup dried fruit, chopped into ¼ inch pieces
    • ¼ cup shredded coconut, unsweetened
    • ½ cup all-purpose flour
    • ½ tsp baking soda
    • 1 tsp Kosher salt
    • 2 Tbsp Bob's Red Mill GF Egg Replacer, equal to one large egg
    • ¼ cup brown sugar, lightly packed
    • 1 Tbsp granulated sugar
    • 4 Tbsp coconut oil, (or butter) melted
    • 2 tsp vanilla

    Instructions

    Mix Dough

    • Preheat oven to 350°. Toast nuts, seeds and oats on a rimmed baking sheet, tossing once, until golden brown, 10–12 minutes. Toasting can also be done on the stove top in a skillet. Transfer nuts and seeds to a medium bowl; let cool.
    • Mix egg replacer, melted coconut oil, brown sugar, granulated sugar, vanilla, salt, and baking soda in a large bowl. Let sit while nuts cool (this will make for a chewier cookie).
    • Add dried fruit, shredded coconut and chocolate to cooled nut mixture. Toss to combine.
      Give egg mixture another stir, then mix in flour.
      Mix in nut mixture, smashing it against the sides of the bowl with a rubber spatula, until combined and trail mix-ins are evenly coated in dough.
      It will look like you have way too much trail mix. That's great. Dough will come together while it chills.
      Cover bowl and refrigerate at least 2 hours.
      Dough can be refrigerated up to 3 days. You can pop em in the oven whenever you feel like having a quick wholesome snack.

    Bake Cookies

    • When dough is chilled and you're ready to bake cookies, preheat oven to 350°.
      Line 2 baking sheets with parchment paper or use silicon baking sheets.
      Use a ¼ - ⅓-cup measure to scoop out dough into 12 even balls. Place 6 balls on each baking sheet and press each ball down into ¾ inch disks. Sprinkle with coarse salt or coconut flakes if desired.
    • Rotate baking sheets top to bottom and front to back one time during baking. Bake until golden brown and no longer gooey-looking, about 12–15 minutes.
      Allow to cool on baking sheets. They fall apart easily when they are too hot and you use a spatula on them. Try to be patient. 🙂
    • Pack your knapsack and hit the trails!
      Toasted Trail Mix Cookies

    Filed Under: Baking, Desserts

    Toasted Candied Pecans

    June 11, 2020 by How Did You Cook That

    Candied Pecans

    Many candied pecans recipes call for baking in the oven. Toasted candied pecans are far quicker with just a few easy steps. And you can make them any time of year without heating up the kitchen.

    I’ve been making candied pecans on the stove since I learned to make them in New Orleans. Toasted candied pecans have a crackle candy coating rather than a chewy caramel or sugary praline coating. They are perfect sprinkled over ice cream or as a sweet crunchy topping for salads.

    You can make these in large or small batches so easily on the stove top. It’s a great recipe when cooking for one or two. To be honest, if you keep too many of these around, you’ll never be able to keep your hands off of them. They are that good.

    Toasted Candied Pecans
    Print Pin

    Toasted Candied Pecans

    Candied pecans with a crunch; a hard candy coating rather than a chewy caramel or sugared praline coating. Perfect sprinkled over ice cream or as a sweet crunchy topping for salads.
    Course Dessert, Snack
    Keyword Pecans, Snack, Sweet
    Prep Time 5 minutes minutes
    Cook Time 5 minutes minutes
    Servings 4

    Ingredients

    • 1 cup whole pecans
    • ½ cup brown sugar
    • 1 tsp Kosher salt
    • ½ tsp ground cinnamon
    • 2 Tbsp water

    Instructions

    • Toast pecans in a skillet, tossing with a spatula or wooden spoon, until fragrant and just toasted but not too brown or blackened. Set aside.
    • In a medium or large saucepan, combine sugar, salt, cinnamon and water.  Cook over medium heat for a minute or two, until the sugar dissolves and the mixture is really bubbling.
      Check the temperature of sugar mixture with a candy thermometer. It should read 300° in order to achieve a crackle coating on the pecans. If the temperature is too low you will have chewy, sticky pecans. (See notes below.)
    • Add the toasted pecans and cook for an additional 3 minutes, stirring to coat the pecans in the glaze.
    • Remove from the heat, and spread the pecans out on a baking sheet lined with parchment paper. Let the pecans cool completely.
    • Break apart, and enjoy.
    • Try adding a dash of cayenne to the sugar mixture or combine different spices, like cardamom, nutmeg or cloves. It's a very adaptable recipe and can easily be doubled to make larger batches.
    • Toasted candied pecans can be stored in an airtight jar for about one week. A quick and easy foodie gift to take to a host or give for the holidays.

    Notes

    Hard Crack:
    The hard-crack stage is the highest temperature you are likely to see specified in a candy recipe. At these temperatures, there is almost no water left in the syrup. Syrup dropped into ice water will separate into hard, brittle threads that break when bent.
    Hard-Crack Stage
    300° F–310° F
    /148° C–154° C
    sugar concentration: 99%
    https://www.craftybaking.com/howto/candy-sugar-syrup-temperature-chart
     

    Filed Under: Bites and Tastes, Desserts

    Blueberry Lemon Muffins with Streusel Topping

    May 18, 2020 by How Did You Cook That

    Lemon Blueberry Streusel Muffins

    These Blueberry Lemon Muffins are decadently fluffy and loaded with blueberries. With just a hint of lemon zest and a crown of super tasty, crumbly streusel topping, these little treats are hard to resist. I love these gorgeous muffins served warm from the oven with a steaming cup of coffee.

    For added visual appeal, skip the muffin liners and wrap each well of a muffin tin with parchment paper. Blueberry muffins come out of the oven looking so special and all dressed up for Sunday brunch.

    Lemon Blueberry Streusel Muffins
    Print Pin

    Blueberry Lemon Muffins with Streusel Topping

    Decadent, delicious and oh, so pretty. These blueberry muffins with lemon zest and a streusel topping will keep you coming back for more. This adaptable recipe works well with fresh or frozen blueberries. Try it with raspberries or blackberries too.
    Course Breakfast, Dessert
    Keyword Baking, Muffins
    Prep Time 25 minutes minutes
    Cook Time 20 minutes minutes
    Servings 8

    Equipment

    • muffin pan
    • parchment paper or muffin liners (optional)

    Ingredients

    Streusel Topping

    • ½ cup all-purpose flour
    • ¼ cup sugar
    • 1 tsp cinnamon
    • ½ tsp nutmeg
    • 3 Tbsp butter melted

    Muffins

    • 2½ cups all-purpose flour
    • 1 Tbsp baking powder
    • 1 tsp baking soda
    • ½ tsp salt
    • 2 large eggs
    • 1 cup sugar
    • ½ cup butter melted
    • 1 tsp lemon zest
    • 3 Tbsp lemon juice
    • 1 cup whole milk or buttermilk I use Saco Buttermilk Powder
    • 1 Tbsp vanilla extract
    • 2 cups blueberries if using frozen, do not thaw

    Instructions

    Streusel Topping

    • In a medium bowl, whisk together the flour, sugar, cinnamon and nutmeg.
    • Drizzle in the melted butter and toss until crumbles form. Set aside.

    Blueberry Muffins

    • Adjust the oven rack to just above center.
      Preheat oven to 400º.
      To make parchment paper liners cut 5" x 5" squares of parchment paper and line your muffin pan. (Check out this great how-to at The Kitchn)
      If not using cupcake/muffin liners, make sure to spray the cupcake tin generously with baking spray.
      Lemon Blueberry Streusel Muffins
    • In a large bowl, whisk together the flour, baking powder, baking soda, and salt. Set aside.
    • In a separate bowl, whisk together the eggs, sugar, melted butter, lemon zest, and lemon juice. Add milk/buttermilk and vanilla.
    • Gradually add the dry ingredients to the wet mixture and stir with a rubber spatula until just combined. Lumps are ok. Gently fold in the blueberries.
    • Divide the batter into the muffin cups (about 2½ Tablespoons in each) Top with extra blueberries. Evenly sprinkle streusel over each muffin.
    • Bake for 20-25 minutes at 400º. You can do a toothpick test at 20 minutes and see if it comes out clean.
      Remove from the oven and cool for 5 minutes before removing muffins from the pan.
    • Serve warm. In the rare chance that you have any left over, they will keep in the refrigerator for up to 1 week.

    Filed Under: Baking, Bites and Tastes, Breakfast, Desserts

    Angel Food Loaf Cake

    May 18, 2020 by How Did You Cook That

    Angel Food Cake

    Angel food cake is one of my favorite desserts. It’s light, springy and has a addictive chewiness at the edges. Plus you can eat an entire cake in a single sitting (I know I can!) and not even feel it. Heavenly. Angel Food…oh, I get it.

    But if you think angel food cake requires a bundt pan, I’m here to tell you, there’s another way. Angel Food Cake baked in a loaf pan.

    Angel Food cake requires egg whites. I make a lot of ice cream custard that uses plenty of egg yolks. I’ve usually got a lot of leftover egg whites multiplying in my fridge.  And my dog can only eat so many of them. In that case, I needed another solution, other than wasting a bunch of egg whites…I really hate wasting food. That said, my small kitchen doesn’t have room for a bundt pan that I’d use only a couple of times a year. My favorite alternative is this Angel Food Cake. In a loaf pan.

    This cake is topped with whipping cream shaken up in a jar and fresh strawberries, blueberries, and raspberries from the garden. But you can whip your cream with a mixer.

    I used a standard 9 x 5 loaf pan. And here’s a tip: Do NOT grease the pan and DO NOT line it with parchment paper. Angel food cake really needs to stick to the pan for better rise in the oven. Sticking to the pan is important so that the cake stays in the pan when you turn it upside down to cool. 

    Another tip: Whip your egg whites at room temperature for maximum loft and fluff. Use cream of tartar, lemon juice or distilled vinegar when whipping. Whichever you have on hand.

    You must invert angel food cake while it’s cooling so it maintains its loft. Otherwise it will just be a flat, dense loaf. I simply turn the cake over onto a couple of food cans then come back in an hour to take it out of the pan.

    Top angel food cake with your favorite fruit and cream or drizzle with chocolate.

    Angel Food Loaf Cake
    Print Pin

    Angel Food Loaf Cake

    Make this airy fluffy light cake easily in a loaf pan. Use the berries you have available and enjoy this sweet summer treat with jam or homemade whipped cream.
    Course Dessert
    Keyword Baking, Berries, Cake
    Prep Time 25 minutes minutes
    Cook Time 35 minutes minutes
    Cooling Time 1 hour hour
    Total Time 2 hours hours
    Servings 6

    Equipment

    • 9 x 5 loaf pan

    Ingredients

    • ¾ cups sugar divided
    • ½ cup cake flour All-purpose is ok
    • 1 Tbsp cornstarch
    • 6 real egg whites (not from a carton)
    • 1 Tbsp cream of tartar, lemon juice OR distilled vinegar
    • ¼ tsp salt
    • whipping cream
    • fresh berries

    Instructions

    • Pre-heat oven to 325°
    • Whisk together flour, cornstarch and ¼ cup of the sugar. Reserve ½ cup sugar for the next step.
    • In a clean bowl of a mixer with the whisk attachment, beat the egg whites on medium speed with the cream of tartar (or lemon juice or distilled vinegar if using instead), vanilla, and salt until foamy. About 1 minute.
    • Increase the speed to high and gradually add in the remaining 1/2 cup sugar, 1 tablespoon at a time. Beat until soft hilly peaks form about 3-4 minutes. Do not beat into stiff peaks.
    • Use a rubber spatula to gently fold in the flour ingredients. Add about 1/4 at a time to the egg whites. You want to incorporate all of the flour without deflating the egg whites. Take your time and gently fold. You may have a few small lumps, just make sure there is no dry flour left.
    • Gently pour/spoon the batter into the loaf pan and evenly spread. Bake at 325° for 35-40 minutes or until golden brown and no longer sticky on top.
      Angel Food Cake Batter
    • Turn the pan upside down and rest on top of two jars or cans. Cake must cool upside down for at least 1 hour. Angel food cake will deflate if it cools right-side up.
      Cake cooling hack

    Whipping Cream

    • Chill a mixing bowl (or bowl of a stand mixer) in the refrigerator for 30 minutes.
    • Pour 1 cup of very cold heavy whipping cream and 1 Tbsp sugar into the chilled bowl.
    • Using a mixer with whisk attachment, mix the cream and sugar on high until rich and creamy. Do not over-mix or cream will become a dry clump that scoops rather than dollops.
    • To serve, carefully run a butter knife around the edges. Lay the pan on its side and carefully pull the cake out with your knife. You can use an offset spatula and run it under the bottom of the cake to gently pull it from the bottom and sides.
      TIP: Slice the angel food cake with a serrated knife. Gently "saw" down into the cake rather than pushing it down and smashing the cake.
      Serve with fresh strawberries, blueberries, and homemade whipped cream.

    Filed Under: Baking, Desserts, Tips

    Sourdough Pancakes

    May 10, 2020 by How Did You Cook That

    Sourdough Pancakes

    Anyone who knows me knows how much I love to bake bread. My friends and family are now used to the jars of fermenting yeast on my kitchen shelves. But sometimes, those jars of wild yeast seem to multiply and the discarded sourdough often gets…well…discarded.

    I really hate that. Reuse, re-purpose, recycle is my mantra and I try to stick to that principle whenever I can. One of the ways I re-purpose my discarded wild yeast is to make sourdough pancakes. I feed my wild yeast starter in the morning, so using it for that day’s breakfast makes perfect sense to me.

    If you make sourdough bread at home and have a starter or two on the shelf, try this recipe and see how you like the flavor of your pancakes. They are yeasty-good and a bit heavier than typical pancakes. That’s because sourdough starters are often fed with heavier flours like rye and whole wheat. You can always lighten it up a bit by adding less starter and a bit more all-purpose flour.

    Sourdough Pancakes
    Print Pin

    Sourdough Pancakes

    Prep Time 10 minutes minutes
    Cook Time 10 minutes minutes
    Total Time 20 minutes minutes
    Servings 4
    Cost $8

    Ingredients

    • 2 large eggs
    • maple syrup
    • 1½ cups whole milk reduced fat is ok too
    • ¼ cup Greek yogurt or sour cream optional
    • 1 cup sourdough starter stirred down
    • 1 tsp vanilla
    • 1½ cups all-purpose flour also use whole wheat, einkhorn or any mix of flours you like
    • 1 tsp baking soda
    • 1 tsp baking powder
    • 2 tsp Kosher salt
    • ⅛ cup granulated sugar or raw, brown sugar-very lightly packed
    • ¼ cup (½ stick) butter melted

    Instructions

    • Heat the maple syrup. Because pouring cold syrup over a stack of steaming hot pancakes makes no sense at all!
    • Sift together flour, baking soda, baking powder, salt, and sugar.
    • Beat eggs in a medium bowl. Add milk, yogurt or sour cream, sourdough starter, and vanilla to the eggs. Mix just to combine. Do not over mix.
    • Add dry ingredients to the egg mixture, stirring to combine. Lumps are ok. They help to create the pockets of air that make pancakes fluffy.
    • Stir in melted butter. Set bowl aside and wait about 30 minutes to let the batter rise a bit.
    • Make some coffee, gather up some toppings or take a shower. 🙂
    • Lightly spray a skillet and heat on medium high until sizzling. Turn heat down to medium and drop the batter in spoonfuls onto the skillet. Cook until light brown and bubbles start to appear on top, then flip to cook the other side, about 1 minute. Flip only once.
    • You might need to adjust the amount of milk depending on the stiffness of your sourdough starter and your preferred batter consistency. The above ingredients work well for my sourdough starter; if you’re using a stiff starter, you might want to add around 1/2 cup more milk.

    Filed Under: Baking, Breakfast, Desserts

    Easy Banana Zucchini Bread

    May 7, 2020 by How Did You Cook That

    Banana Zucchini Bread

    This Easy Banana Zucchini Bread recipe lives up to its name. And it’s so moist and delicious, you might just eat the whole pan in one sitting. 

    This quick bread is easy to make and the added spices will make your kitchen smell heavenly. You’re gonna love this recipe.

    Banana Zucchini Bread packs a one-two punch using your over-ripe bananas and the surplus of zucchini in the garden at the same time.

    I love this time of summer in the garden.  It’s when I get to bake up loaves of delicious banana zucchini bread to share with friends.

    Banana Zucchini Bread
    Print Pin

    Easy Banana Zucchini Bread

    Easy Banana Zucchini Bread is the perfect way to use up all that zucchini in the garden plus any over-ripe bananas on the counter.
    Course Brunch, Dessert, Snack
    Keyword Banana, Cake
    Prep Time 10 minutes minutes
    Cook Time 50 minutes minutes
    Total Time 1 hour hour

    Ingredients

    • 1¾ cup all-purpose flour
    • 1½ tsp baking powder
    • ½ tsp baking soda
    • 1 tsp Kosher salt
    • 1 Tbsp ground cinnamon
    • ½ tsp cardamom
    • 2 ripe bananas
    • 2 cups grated zucchini
    • 3 Tbsp coconut oil
    • 2 large eggs lightly beaten
    • 1 tsp vanilla extract
    • ¾ cup granulated sugar

    Instructions

    • Preheat oven to 355 °.
    • Prepare 9x5 bread pan. Cover with parchment paper and lightly coat with butter or baking spray. Dust with flour. Set aside.
    • In a bowl combine flour, cinnamon, cardamom, baking soda, baking powder and salt. Set aside.
    • In a medium bowl mix together sugar and eggs until well combined.
    • In a large bowl mash the bananas with a fork. Grate the zucchini and add to the bowl. (No need to press out the water from the zucchini. You want that for a super moist bread)
      Add sugar and eggs. Stir to combine. Add coconut oil and vanilla. Give it one more stir to combine all the ingredients.
    • Gradually add the flour mixture while stirring and mix together to combine. Don't over mix. It's ok if there are a few lumps.
    • Pour batter into prepared loaf pan. Bake 40-50 minutes until top is brown and slightly splitting. It should spring back when touched. Or do the toothpick thing and see if it comes out clean.
    • Let bread cool before slicing. This quick bread will keep in the refrigerator for about 4 days. It freezes easily and will keep frozen for up to 4 months.

    Filed Under: Baking, Bites and Tastes, Breakfast, Desserts

    • Page 1
    • Page 2
    • Page 3
    • Go to Next Page »

    Primary Sidebar

    Hi food lovers. Welcome to my kitchen.

    If you're looking for simple dishes made with wholesome, seasonal ingredients, you've come to the right place. Grab a fork and take a bite. Dig In →

    Coriander Seeds
    Strawberry Rhubarb Galette
    Coconut Peach Popsicles

    Categories

    Favorite Resources

    Cook Books

    What’s New

    • Roasted Garlic Tomatoes with Thyme
    • Crisp Green Salad with Sweet Honey Vinaigrette
    • Number One Ice Cream
    • Street Corn Soup
    • Egg In A Jar

    Footer

    • Email
    • Facebook
    • Instagram
    • YouTube

    Find Recipes

    Never Miss a Recipe

    Copyright © 2025 How Did You Cook That on the Foodie Pro Theme