• Skip to primary navigation
  • Skip to main content
  • Skip to primary sidebar
  • Skip to footer

How Did You Cook That

  • Recipes
    • Main Dishes
      • Street Corn Soup
      • Maple Ginger Chicken and Asparagus
      • Homemade Gnocchi with Garlic and Parmesan
      • Loaded Baked Potato Soup
      • Beef Bourguignon
      • Grilled Salmon Tacos
      • Thai Inspired Shrimp Curry Soup
      • Chicken and Sausage Gumbo
      • Cast Iron Skillet Pizza
        • Vegetarian
          • Creamy Sweet Potato Curry
          • Pan Tossed Vegetarian Noodles
          • Zucchini & Mushroom Bucatini
          • Stir Fried Baby Bok Choy
          • Roasted Red Pepper and Tomato Soup
          • Potato Leek Soup
          • Portobello “Steak” and Potatoes
          • Cheesy Cauliflower & Carrot Soup
    • Companions
      • Roasted Garlic Tomatoes with Thyme
      • Crisp Green Salad with Sweet Honey Vinaigrette
      • Zucchini Fritters
      • Easy Flat Bread
      • Animal Style French Fries (Copy Cat Version)
      • Cheesy Jalapeno Cornbread
      • Buffalo Cauliflower Bites
    • Breakfast
      • Chilaquiles Rojos with Eggs
      • Sour Cream and Onion Biscuits
      • Dutch Baby with Blueberries
      • Blueberry Lemon Muffins with Streusel Topping
      • Egg In A Jar
      • Creamy Acai Bowls
      • Baked Irish Oats with Cream
      • Fluffy Buttermilk Pancakes
      • Original French Crepes
      • Vanilla Spiced Overnight Oats
      • Seriously Delicious Waffles
      • Southern Buttermilk Biscuits
    • Sauces
      • Creamy Thousand Island Dressing
      • Spicy Mango Salsa
      • Favorite Avocado Recipes
      • Loquat Marmalade
      • Adobo Chile Aioli
    • Desserts
      • Number One Ice Cream
      • Loaded Trail Mix Cookies
      • Toasted Candied Pecans
      • Angel Food Loaf Cake
      • Easy Banana Zucchini Bread
      • Triple Chocolate Cake with Whipped Ganache Frosting
      • Key Lime Cheesecake
      • Cinnamon Sour Cream Coffee Cake
      • Zach’s Chocolate Chip Cookies
      • Strawberry Rhubarb Galette
      • Spiced Cheesecake
      • Berry Fruit Crumble
      • Banana Cinnamon Crunch Bread
    • Thirst Quenchers
      • The Forager Cocktail
      • Cucumber Cilantro Gin Tonic
      • Sunrise Glow Smoothie
      • Three Day Ginger Beer
  • Experiences
    • Los Angeles Pop Ups – Zoe Food Party
    • Los Angeles Bread Crawl
    • The Great Outdoors (A Basic Pantry List)
  • Food Muse
    • A Note About Sugar
    • No More Plastic!
    • Best Buttermilk Substitutions
    • Prepping and Storing Cilantro
    • Home Roasted Coffee
  • Sugar Loaf
    • How to Feed a Sourdough Starter
    • Sourdough Pancakes
    • Sourdough Country Bread Loaf
  • About
  • Navigation Menu: Social Icons

    • Facebook
    • Instagram

Bites and Tastes

Roasted Garlic Tomatoes with Thyme

July 29, 2021 by How Did You Cook That

Fresh summer tomatoes don’t last forever. But there are a few tricks and tips to keep them around for most of the fall and winter.

Last year I bought Alison Roman’s book, Dining In. It’s a great cookbook. Especially for those of us with small kitchens. In the book she has this fabulous recipe for slow roasting vine-ripened tomatoes for her Roasted Tomato and Anchovy Bucatini. I now use a variation of her recipe when I have an abundance of fresh tomatoes. They keep in the freezer for up to 6 months. Mine never last that long. I eat ’em up waaaayyyy before that.

Try this recipe on for size and keep enjoying your harvest of summer tomatoes all autumn long.

Roasted Garlic Tomatoes
Print Pin

Roasted Garlic Tomatoes with Thyme

Slow roasted tomatoes seasoned in a confit of garlic, thyme and olive oil.
Course Dinner, Lunch, Snack
Keyword Roasting, Tomatoes, Vegetables
Total Time 3 hours hours
Servings 4

Ingredients

  • 5 lbs small vine-ripened tomatoes (or as many as you have;)
  • ½ cup olive oil
  • 5 large garlic cloves, minced
  • ¼ cup fresh thyme, stripped from stems
  • Kosher salt
  • ground black pepper

Instructions

  • Preheat oven to 225°.
  • Rinse tomatoes, remove stems and cut in half through the middle.
  • Lay tomatoes, cut side up, side by side on a baking sheet. You may need a few baking sheets for this project.
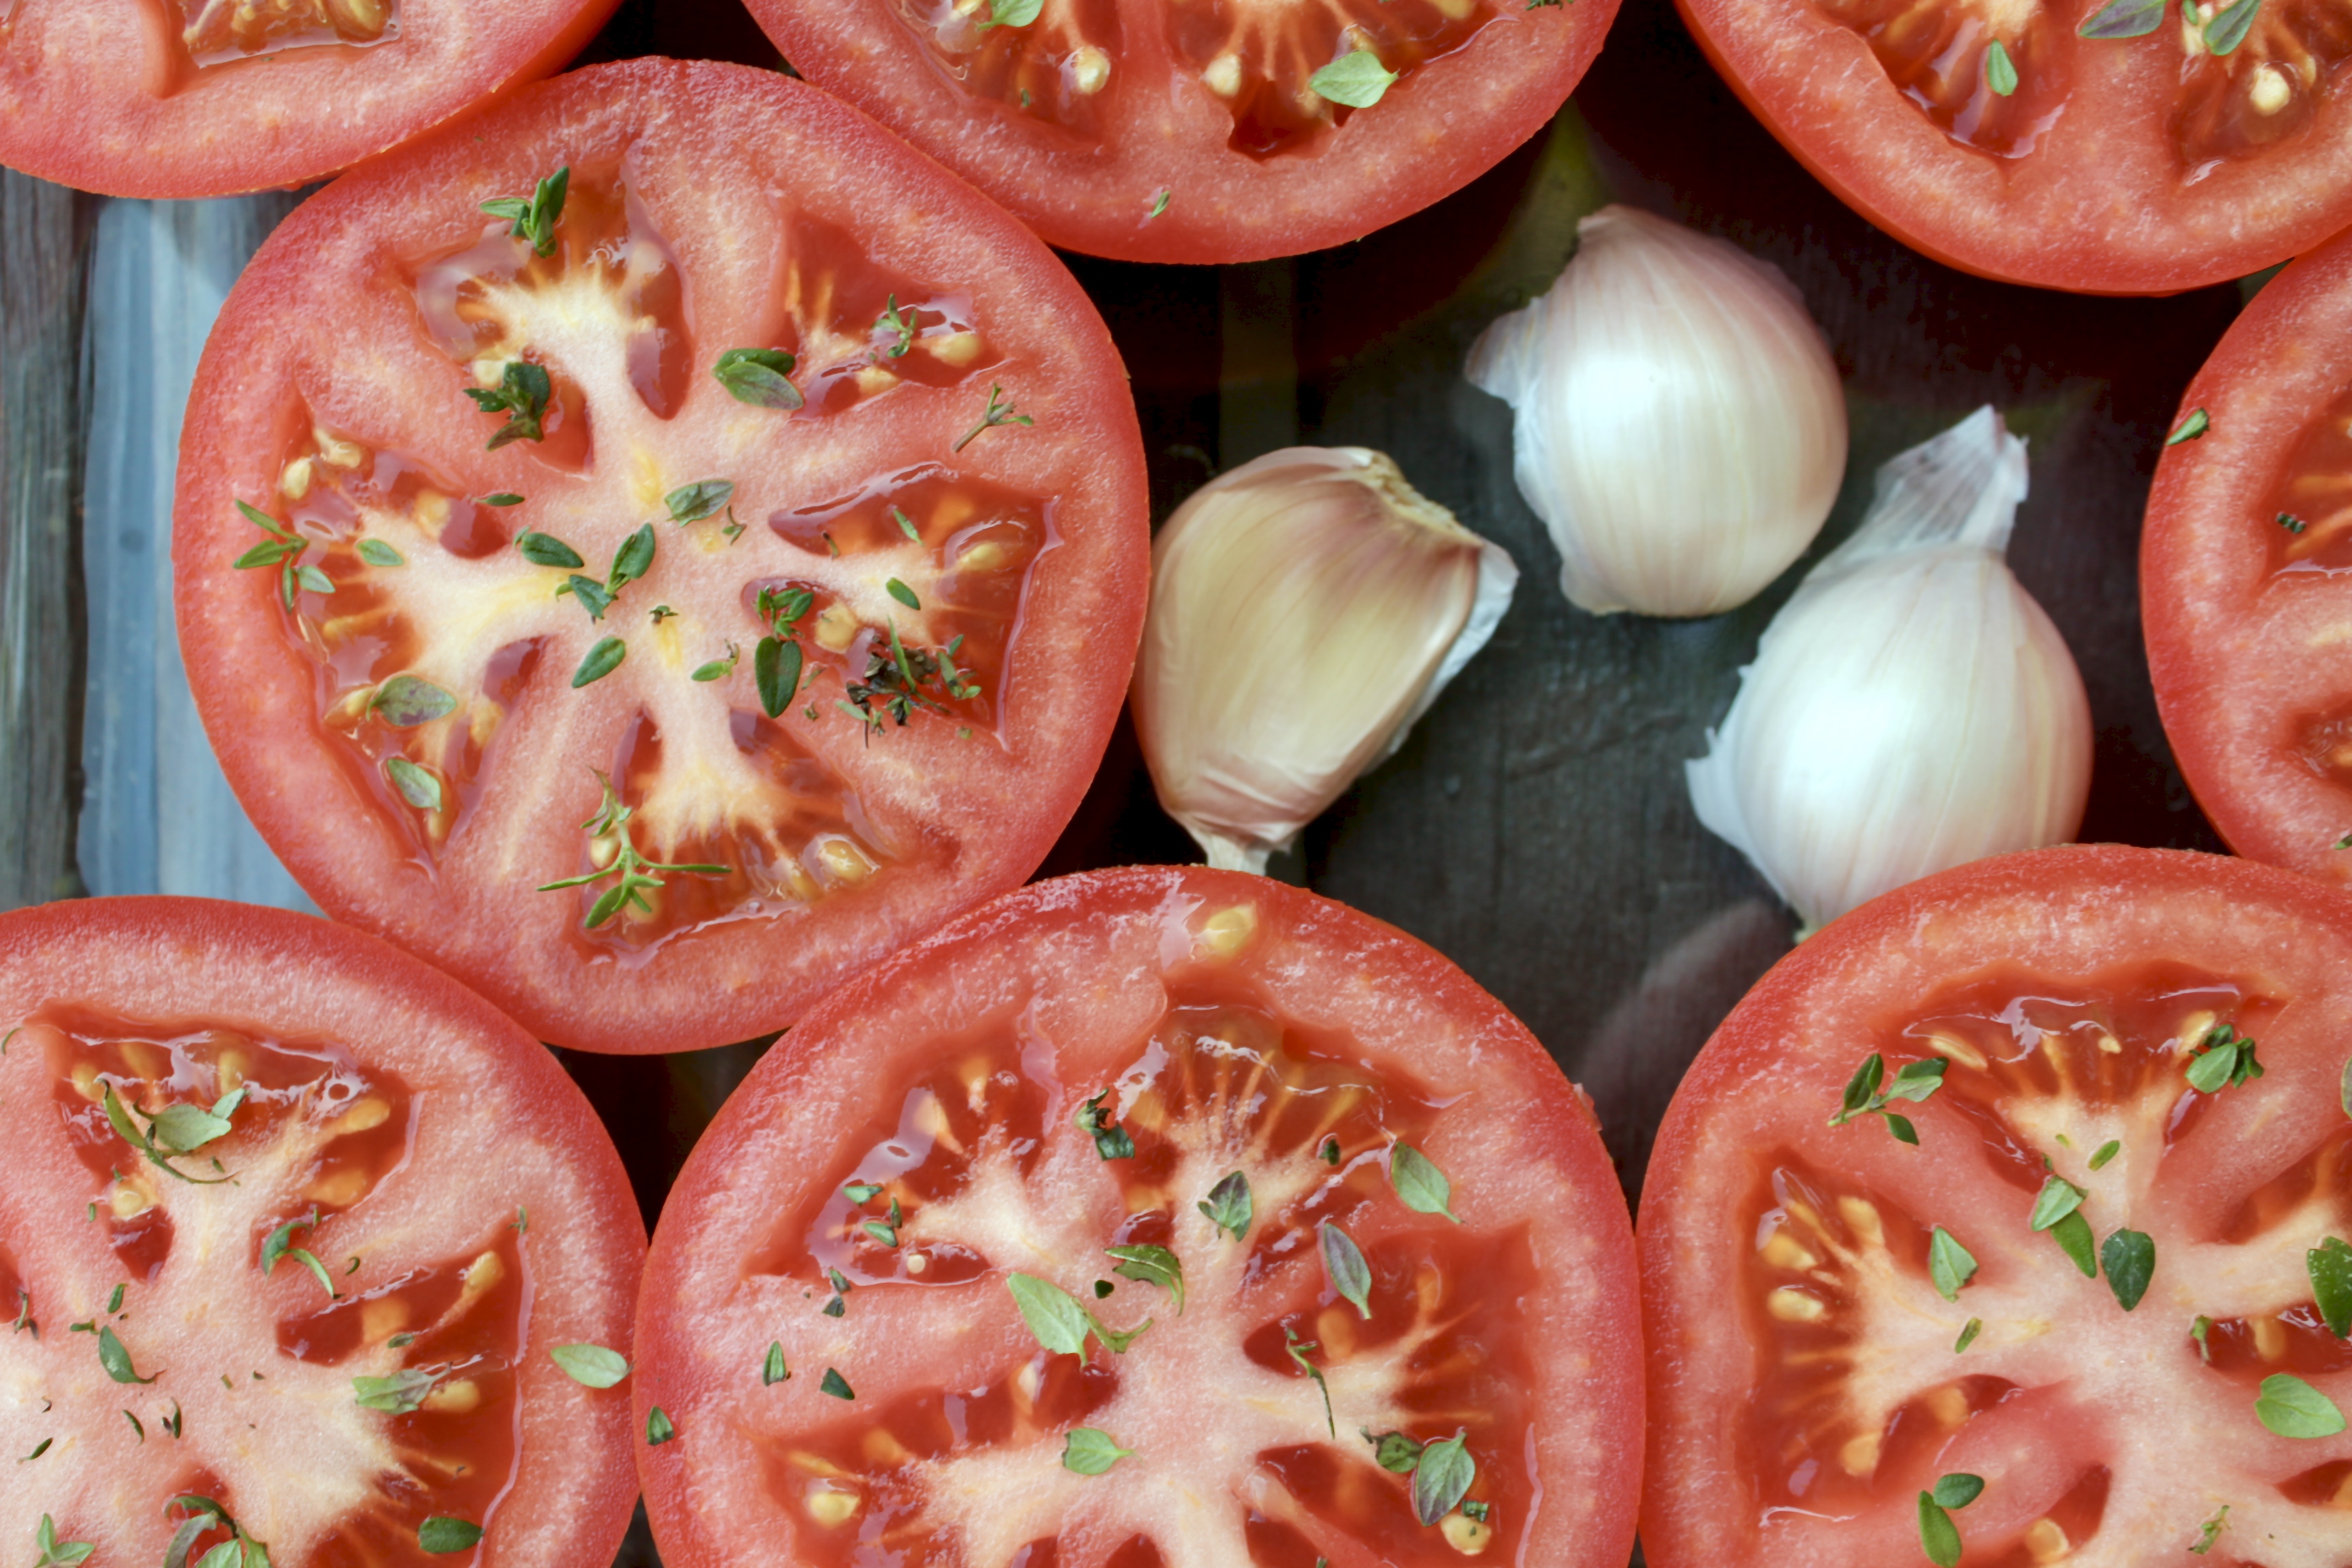
    Tomatoes and Garlic
  • Drizzle tomatoes with olive oil. It will flow down and fill the baking sheet.
  • Evenly distribute garlic and thyme among each of the tomatoes, sprinkling over the tops. Season generously with salt and pepper.
  • Roast in the oven for 2½-3 hours, rotating the baking sheets every hour. The tomatoes with shrivel up and your house will smell like heaven. (Be sure to turn on your oven vent.)
  • Remove from oven. Use immediately.
  • If freezing, allow to completely cool. Divide evenly into freezer safe storage containers, making sure to pour the olive oil and any bits of thyme in with each group of tomatoes. The oil is what makes these little roasters shine. Put the date on the containers and freeze.
  • Roasted tomatoes keep in the freezer for up to 6 months.
Filed Under: Bites and Tastes, Companions, Sauces

Crisp Green Salad with Sweet Honey Vinaigrette

July 27, 2021 by How Did You Cook That

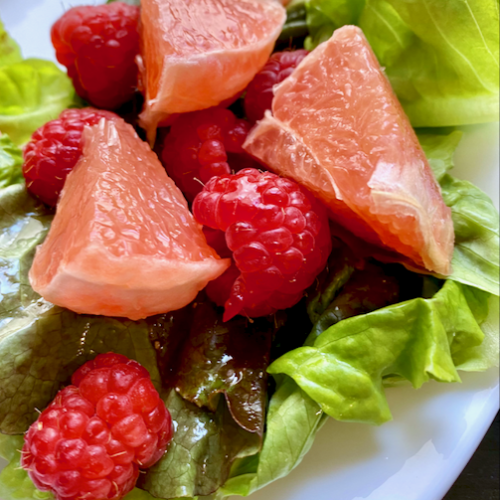
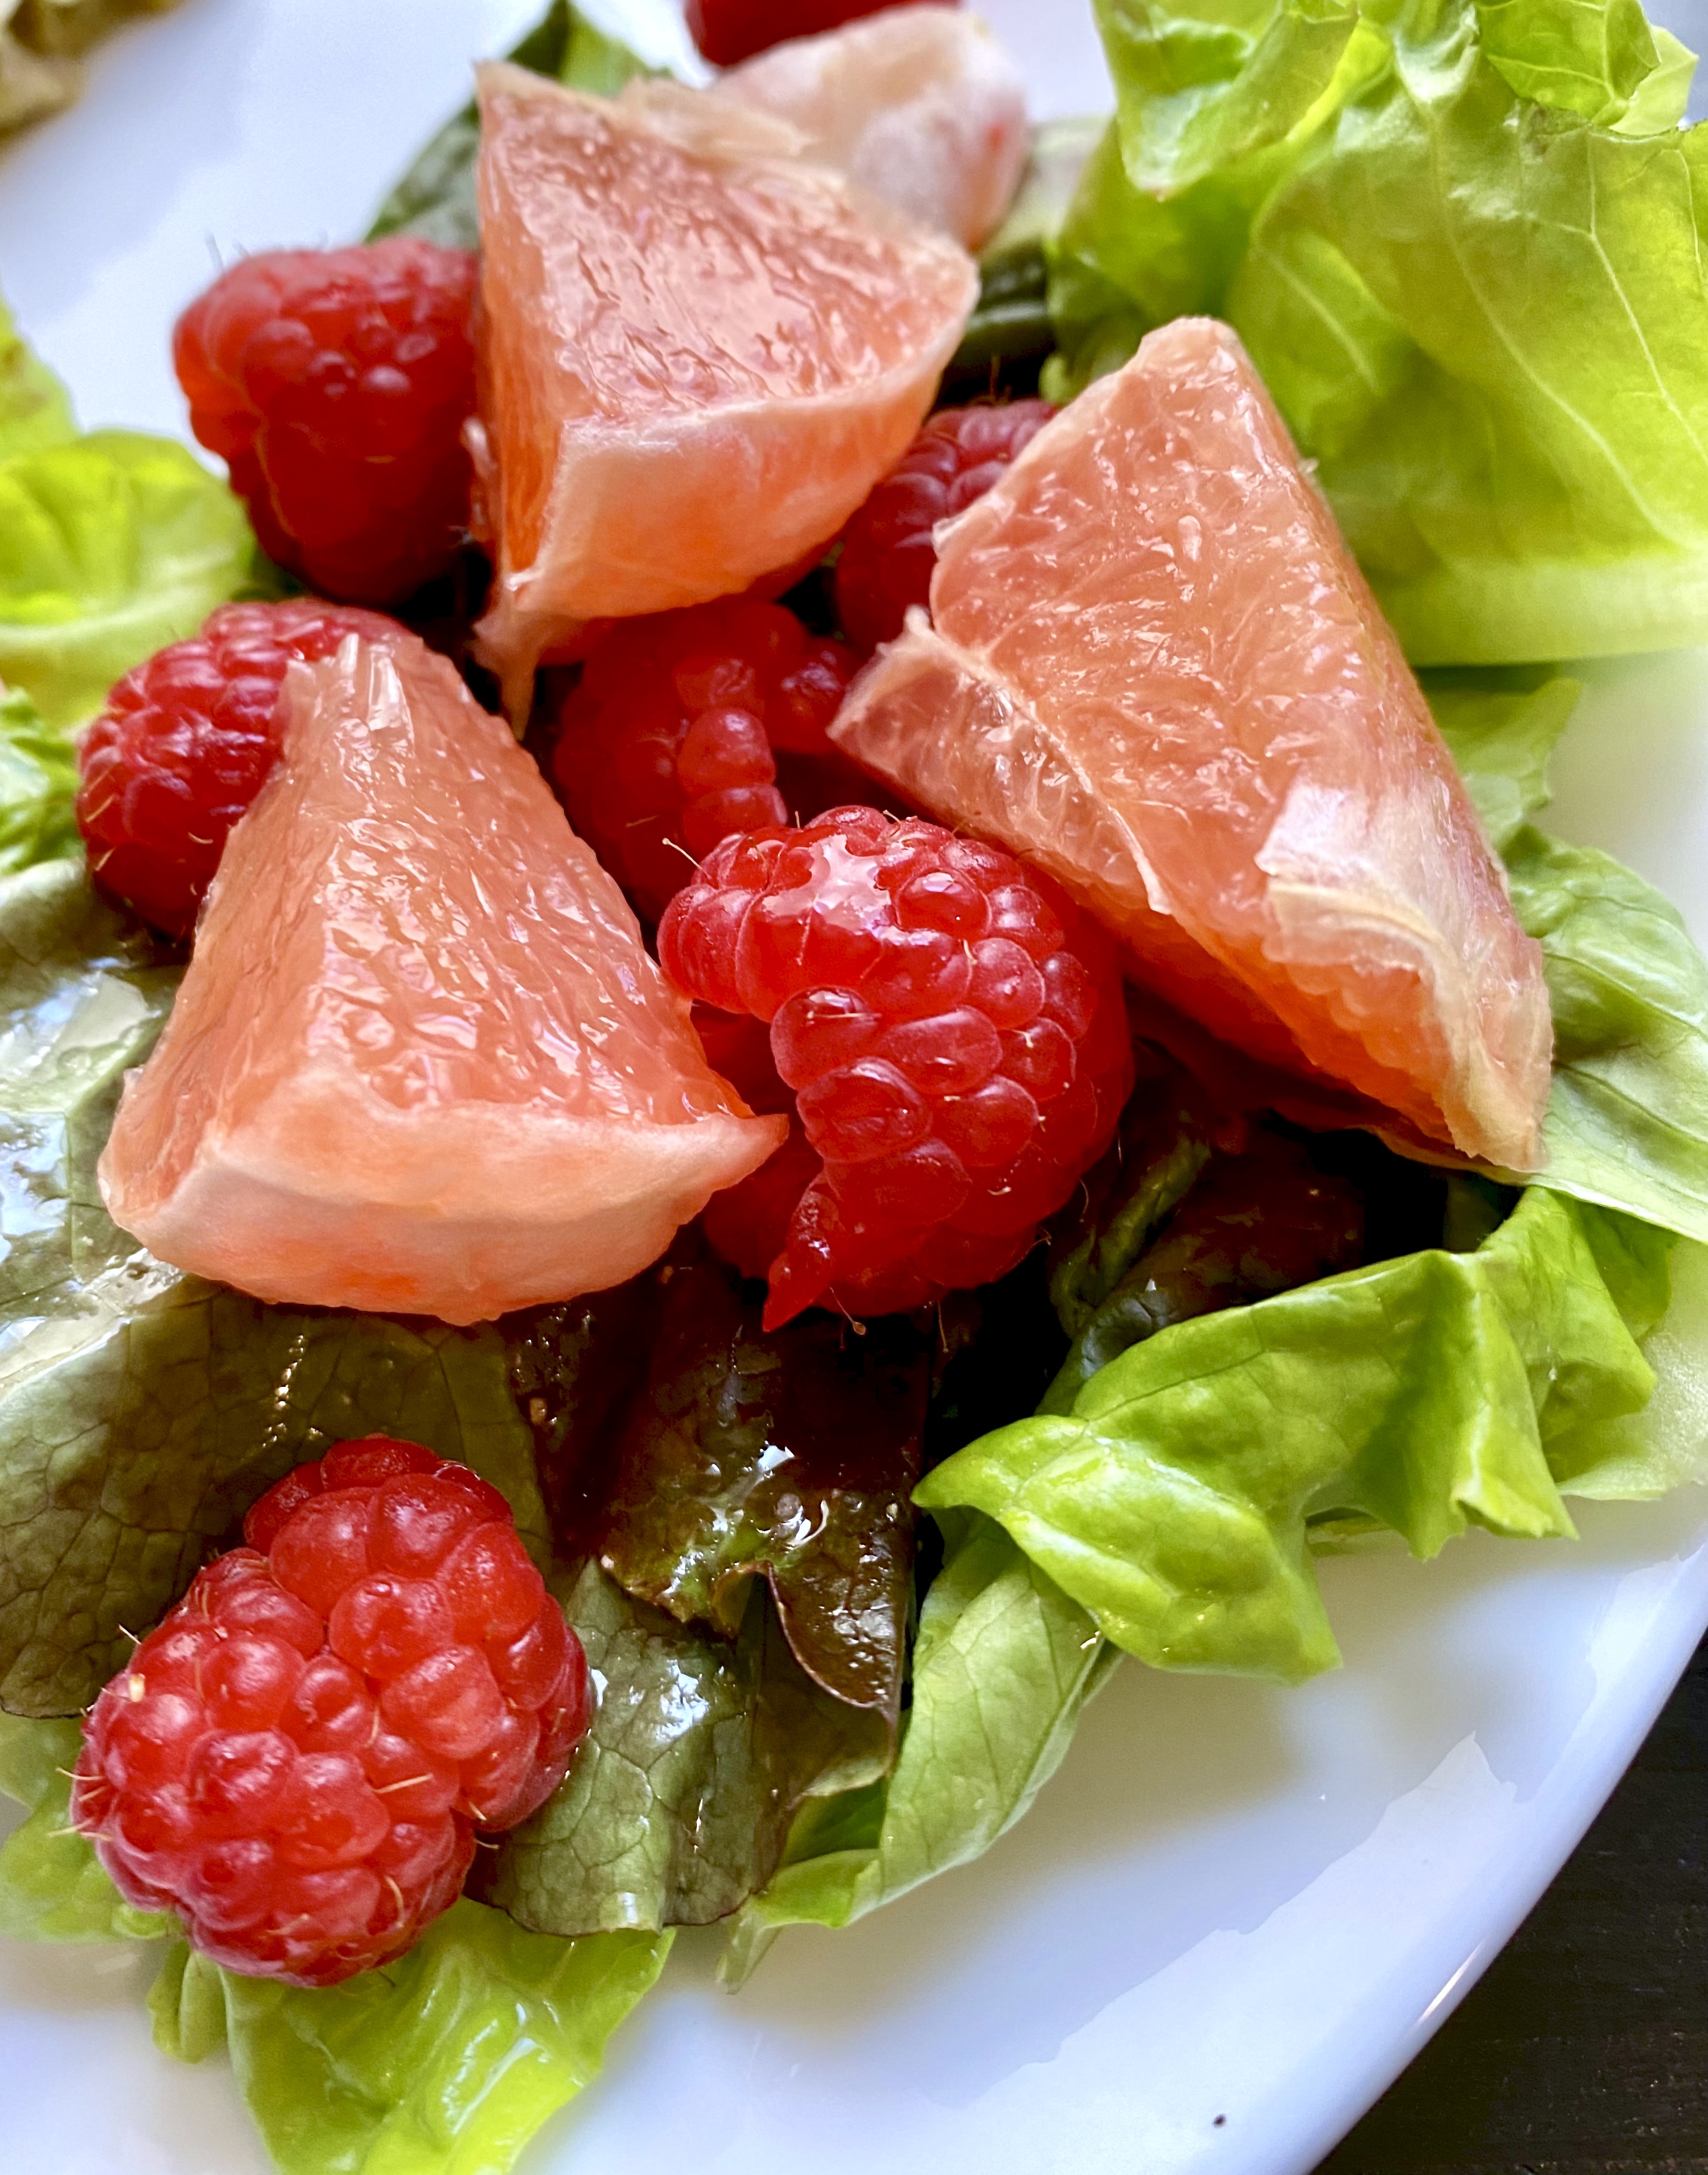
Citrus Salad

Simple green salads with fresh fruit look so beautiful and taste divine. This fresh crisp salad is no exception. Here are a couple of tricks to add to your arsenal that’ll ensure your salad is bright and super tasty.

Most importantly, you gotta get the dressing into all the right places without weighing down the fresh fruits and lettuces. In order to do this just layer and drizzle, layer and drizzle. No tossing of this salad.

You can make this salad with or without berries. The real magic here is in the prep. For example, each leaf of lettuce gets washed and brown ends removed. It may seem like a tedious step but it yields an amazing salad.

The vinaigrette had just a simple few ingredients that you probably have on hand in your pantry. When added all together your salad will scream, “eat me now!”

Green Salad
Print Pin

Crisp Green Salad with Sweet Honey Vinaigrette

Crisp green salad with sweet honey vinaigrette. Make it with or without fresh fruit.
Course Main Course, Side Dish
Keyword Salad, vegan, Vinaigrette
Total Time 20 minutes minutes
Servings 4

Ingredients

Lettuces

  • 2 heads butter bibb lettuce organic
  • 2 large Belgian endive organic
  • 1 Romaine heart organic
  • 1 large grapefruit, peeled, sectioned and cut into ½ inch pieces (optional)
  • 1 pint fresh berries (optional)
  • ideas for added fruit: fresh peaches, avocado, apple (optional)

Vinaigrette

  • 1 large shallot, minced can use a red onion if shallots are not available
  • 2½ Tbsp sherry vinegar
  • 1 Tbsp Dijon mustard
  • pinch red chile flakes
  • 1 Tbsp warm water
  • ¾ cup extra virgin olive oil
  • 1 Tbsp honey
  • 2 sprigs fresh thyme, stripped
  • 1 large clove garlic, grated
  • Kosher salt and ground black pepper

Instructions

  • IMPORTANT: How to wash the lettuces. This step is important to wash off any residual soil or possible contaminants used in packaging. Trust me, you'll notice the difference.
    Fill a large bowl with lukewarm water. Remove wilted and browned leaves from the lettuces.
    Trim each head at the root. Leave butter-lettuce leaves whole. Cut large leaves of romaine and endive in half, then drop into water. Swirl lettuces in water, then drain. Fill bowl again with clean cool water and wash twice more. Rinse one more time with cold water, then transfer to a salad spinner to dry. Gently wrap in paper towels or clean dish towels. Set aside.
  • Rinse minced shallot with cold water. Drain, then place in a medium bowl. Add vinegar and warm water. Let sit for 2 minutes, then whisk in oil, mustard, honey, thyme, garlic and a large pinch of salt. Taste, and adjust salt and vinegar as needed.
  • In a large salad bowl carefully pile a generous handful of the washed lettuces. Add fruit (if using) Sprinkle with salt and pepper. Add a generous drizzle of vinaigrette. Add another handful of salad, more fruit (if using) salt, pepper and vinaigrette. Repeat until lettuces (and fruit) are all in the bowl. Add another drizzle of dressing.
    Serve.
    This salad is best fresh. Be sure to make it just before serving.

Filed Under: Bites and Tastes, Companions, Vegetarian

Egg In A Jar

July 16, 2021 by How Did You Cook That

Egg In A Jar
Egg In A Jar

On a recent trip to visit friends in Los Olivos we stopped at a cute cafe for breakfast one morning. And discovered Eggs In A Jar.

My friend and I both ordered the same dish, neither of us ever having tried eggs in a jar before. And it was very special. The presentation itself was delightful. The ingredients were all farm fresh and local from the surrounding Santa Ynez Valley. We were both hooked and I took every bite deciphering how to recreate it in my kitchen when I got home.


How To Make Egg in a jar

The thing that makes this dish stand out is the addition of purple potatoes instead of regular golden or Russet. Although, if Yukon or Russet is what you’ve got available, by all means, use them. 

Purple potatoes can be found at local farmers markets and, here in Southern California, they can be found in the produce section of stores like Whole Foods, Sprouts and other specialty-type grocery stores. They are high in antioxidants and minerals. Additionally, purple potatoes may help lower blood pressure and have a lower glycemic load than regular potatoes. They taste exactly the same as regular potatoes, but they look prettier. If you can find them, give them a try.

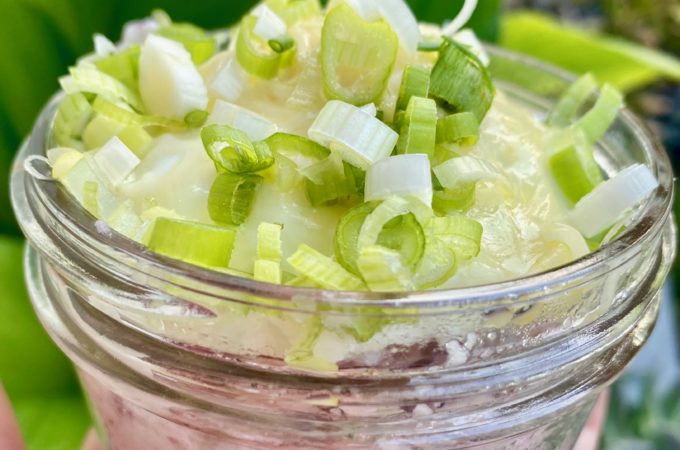
If you have small clear jars, they work best for this dish. For starters, they are cute, but the clear jar really highlights the layers of ingredients. The potatoes, cheese, eggs and scallions. Total eye-candy. (Tip: repurpose jelly jars, small condiment jars, etc. for an eclectic look of different jars on the table. Save the planet, save your money.) Instead of jars, try a small clear glass or cup.

The gist of the whole thing is simple: Herby mashed potatoes topped with gruyere (or cheese of your choice), a dollop of sour cream, a poached egg and chopped chives or scallions. It’s a tasty breakfast or brunch full of healthy ingredients plus it’s fun to eat. What more could you ask for? Maybe coffee or mimosas

Egg In A Jar
Print Pin

Egg In A Jar

Soft poached egg atop creamy, herby mashed purple potatoes. Served with a dollop of creme fraiche or sour cream, grated gruyere and chopped scallions. The whole thing fits perfectly into 4 ounce jars for a super fun breakfast or brunch.
Course Breakfast, Brunch
Cuisine American
Keyword Cheese, Eggs, Herbs, Potatoes
Total Time 35 minutes minutes
Servings 2

Ingredients

  • 8-10 petite purple potatoes, peeled, cut into 1 inch pieces
  • 5 scallions, finely chopped use white and green parts
  • 2 Tbsp shallots, minced
  • 2 organic eggs large
  • 2 tsp white vinegar
  • 1 tsp kosher salt, for poaching water
  • 4 Tbsp creme fraiche or sour cream
  • 2-4 Tbsp grated gruyere
  • salt, to taste
  • pepper, to taste

Instructions

Mashed Purple Potatoes

  • Fill a pot of water. Add 2 Tbsp kosher salt. Drop in peeled potato cubes and heat to boiling or until potatoes are fork-soft. (Tip: potatoes cook from the outside in so be sure to drop your potatoes into cold water and heat them up with the water. That way you won't have hard centers as the hot water boils the outside first.)
  • Drain potatoes and return to pan, keeping heat on lowest setting. Add 2 Tbsp butter or vegan substitute. Mash until smooth, or if you're like me, slightly chunky.
  • Stir in ½ of the chopped scallions and 1 Tbsp creme fraiche or sour cream. Salt and pepper to taste.
  • Scoop potato mixture into cups. Sprinkle with grated gruyere.
  • Set aside or in a warm oven until your eggs are poached.

Poaching Eggs

  • Fill a small sauce pan about 2 inches up the side with water. Add vinegar and 2 tsp kosher salt.
  • Heat water to just under boiling, to the point where tiny bubbles collect on the bottom of the pan.
  • While water is heating, crack each egg into an individual ramekin or small custard cup. Careful not to break the yolk.
  • When water is ready, swirl it around rapidly with a spoon to create a whirlpool, then gently slide each egg into the middle of the whirlpool. (Note: You'll need a bigger saucepan if you're poaching more than 1 or 2 eggs.) The whites will swirl around a bit but the whirlpool should contain it. RESIST the urge to touch or coax the eggs.
  • Immediately turn off the heat, cover your pan and set a timer for 5 minutes. DO NOT LIFT THE LID OR STIR THE EGGS. Trust the process and in 5 minutes you'll have perfect poached eggs.
  • After 5 minutes remove the eggs from the water with a slotted spoon and slide each one onto the top of the mashed potato mixture in the cups.
  • Top eggs with remaining creme fraiche and chopped scallions.

Filed Under: Bites and Tastes, Breakfast

Shrimp Po’boy Sandwich

February 16, 2021 by How Did You Cook That

Fried Shrimp Po'boy Sandwich

The New Orleans Po’Boy

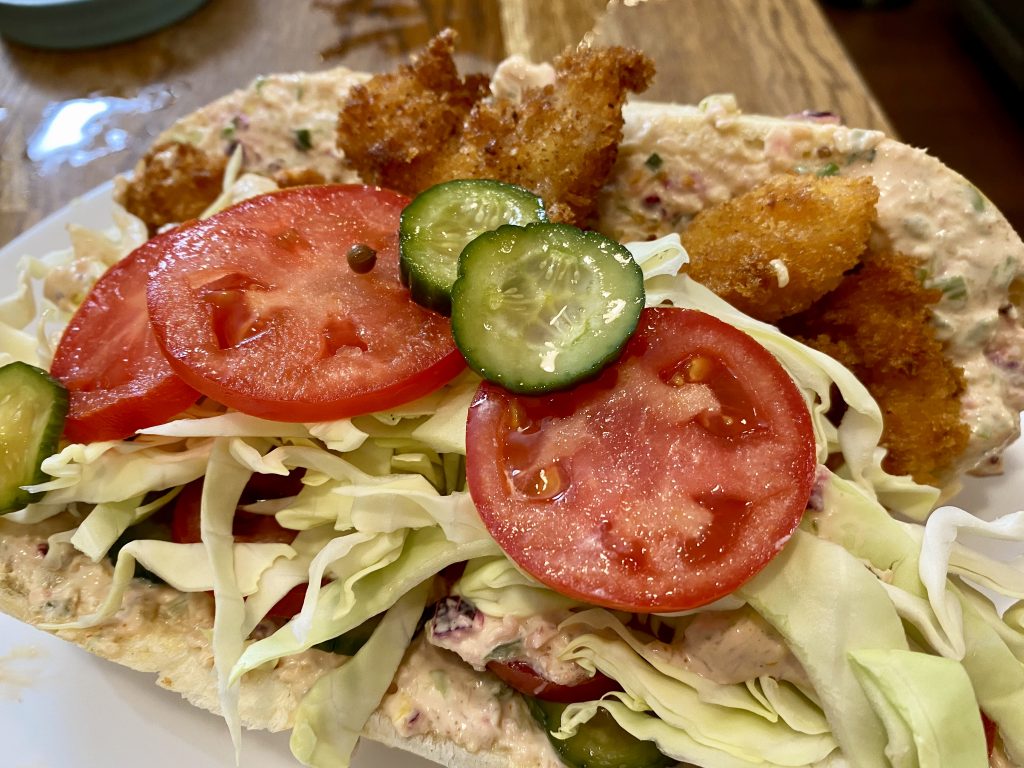
Sinking your teeth into a crispy Cajun fried shrimp po’boy is an experience of a lifetime. Plump and spicy, battered and fried shrimp piled on a perfectly crisp French baguette and dripping with creamy remoulade sauce. That’s what I call living.

This sandwich is called a po’boy because it was originally sold to striking streetcar workers in New Orleans in the 1920s. They were tasty and cheap and quickly got the name, “poor boy” sandwich. They soon became famous among NOLA’s working class dockworkers and tradesmen and because they are so damn delicious they found their way into every corner of society in New Orleans. 

The best po’boy sandwich I’ve ever eaten can be found at Domilise’s Po’boy and Bar along the River in New Orleans.  Grab a bag of Zapp’s chips from the bar, an ice cold bottle of Abita beer or root beer and call it a day.

What makes that sandwich so good? In my humble opinion, it’s the bread. Or the fresher than fresh Gulf Shrimp caught just down the road. But then…there’s the sauce, the remoulade sauce. Definitely the sauce. And it could just be the fact that I was in New Orleans, eating with the locals, my friends and family. A fried shrimp po’boy just feels like “home”.

What’s in a Po’Boy?

Actually, you can order just about any kind of filling for your po’boy. Fried catfish is a local favorite as well as fried oysters and roast beef.

Once you’ve chosen your filling, you’ll need to decide if you want it “dressed” or not. “Dressed” in New Orleans speak means it’s topped with lettuce, juicy tomatoes, sliced dill pickle rounds, and mayo. And if you wanna go for the maximum flavor punch, add a healthy slather of remoulade sauce. Just a fancy name for spiced up mayo. And totally worth the plunge.

Make Your Own Po’Boy

Ok, so you can’t quite get to New Orleans this weekend for a sammy. What to do? Let me tell you, it’s easier than you think. You just have find the right ingredients. And the freshest.

The bread is important and I have found that the best place to get it is a the local Vietnamese Bakery. It’s also the same place I do to buy bread to make Banh Mi sandwiches. Vietnamese baguettes have the perfect combination of lightly crispy crust with a fluffy, chewy crumb. Necessary for a po’boy.

The shrimp is also pretty important. Be sure to get the freshest you can find in your local area. If all you can get your hands on is frozen, that’s ok. Rinse and clean them really well and they’ll do just fine after swimming around in the spicy batter.

I sometimes use shredded cabbage instead of iceberg lettuce, the traditional greenery used on po’boys. The reason for my deviation from the traditional is simply texture. I love a good crunch to my sandwich. Crunchy lettuce is definitely important.

And then there is the remoulade. I’ve made mine borrowing ingredients from the recipes of my favorite sandwich shops. It’s a bit of hybrid and you can do the same with yours to make it your own style.

I fry the shrimp using the same batter recipe and frying method that I use for my Crunchy Fried Dill Pickles. It’s easy and light, super crunchy coating on the shrimp.

Potato chips, icy cold beer or a root beer will take this sandwich over the top. Perfect companions for a dreamy, creamy crunchy concoction that will make you feel like you’re on vacation.

Fried Shrimp Po'boy Sandwich
Print Pin

Fried Shrimp Po'boy

Course Dinner, Lunch
Cuisine Cajun, Sandwich
Keyword Cajun, Sandwich
Servings 2

Ingredients

Remoulade Sauce

  • 1 cup good mayonnaise
  • 3 Tbsp dill pickle relish or chop up some of the bread and butter pickles you're using for the dressing.
  • 1 small to medium shallot minced
  • 1 Tbsp chopped parsley
  • 1 Tbsp freshly squeezed lemon juice
  • 1 Tbsp Tabasco or Crystal hot sauce
  • 1 Tbsp Dijon mustard
  • 1 tsp Worcestershire sauce
  • 1 tsp paprika
  • ¼ tsp cayenne

Shrimp Batter

  • 35-40 raw 16/20 count shrimp peeled and deveined, tails removed
  • 1 cup all-purpose flour
  • 2 Tbsp onion powder
  • 1 tsp baking powder
  • 1 Tbsp Kosher salt
  • 2 tsp cayenne
  • 2 tsp smoked paprika
  • 1 large egg
  • 1 cup milk or buttermilk
  • 1 cup Panko breadcrumbs
  • canola oil for frying

Dress the Po'Boy

  • 4 8"-12" long french rolls, sliced in half French baguettes work very well for the bread.
  • shredded iceberg lettuce or cabbage
  • fresh sliced tomatoes
  • bread and butter dill pickles

Instructions

Remoulade

  • In a medium-sized mixing bowl add all the ingredients and stir like the dickens till they are well incorporated. Set aside in the refrigerator until ready to use.

For the batter

  • In a pie plate, or shallow pyrex dish, mix together all dry ingredients up to the Panko bread crumbs.
    Pour the Panko bread crumbs into a separate pie plate or dish. Season with salt and pepper and extra cayenne if you want to add a little kick to your po'boys.
  • Make a well in the center of the flour mixture and mix in the egg. Then add the buttermilk and stir until smooth.

Fry em up

  • Fill a skillet to about 1" up the sides with canola oil. Line a baking sheet with paper towels.
  • Rinse the shrimp and pat dry. Toss them into the wet batter and let them hang out in there for about 10 minutes or so. Then toss them into the Panko crumbs and let them hang out there for another 10 minutes. The wait time allows the batter and crumbs to really stick onto the shrimp.
  • While your shrimp is hanging around in the batter and seasonings, heat up the oil in the skillet. Heat to shimmering, but not smoking. Be sure to let the oil get hot enough to shimmer or the shrimp will stick to the bottom of the skillet.
  • Carefully drop the battered and breaded shrimp into the hot oil and fry for about 2-3 minutes then flip and fry on the other side for another minute until golden brown.
  • Remove fried shrimp to paper towel-lined baking sheet.

Dress the Sandwich

  • Working quickly while the shrimp is still hot, spread plenty of remoulade sauce on both sides of each French roll. Pile on the fried shrimp. Top with shredded iceberg lettuce or shredded cabbage, then add fresh sliced tomatoes and dill pickle coins.
    Serve hot with a side of potato chips and beer.

Filed Under: Bites and Tastes, Main Dishes

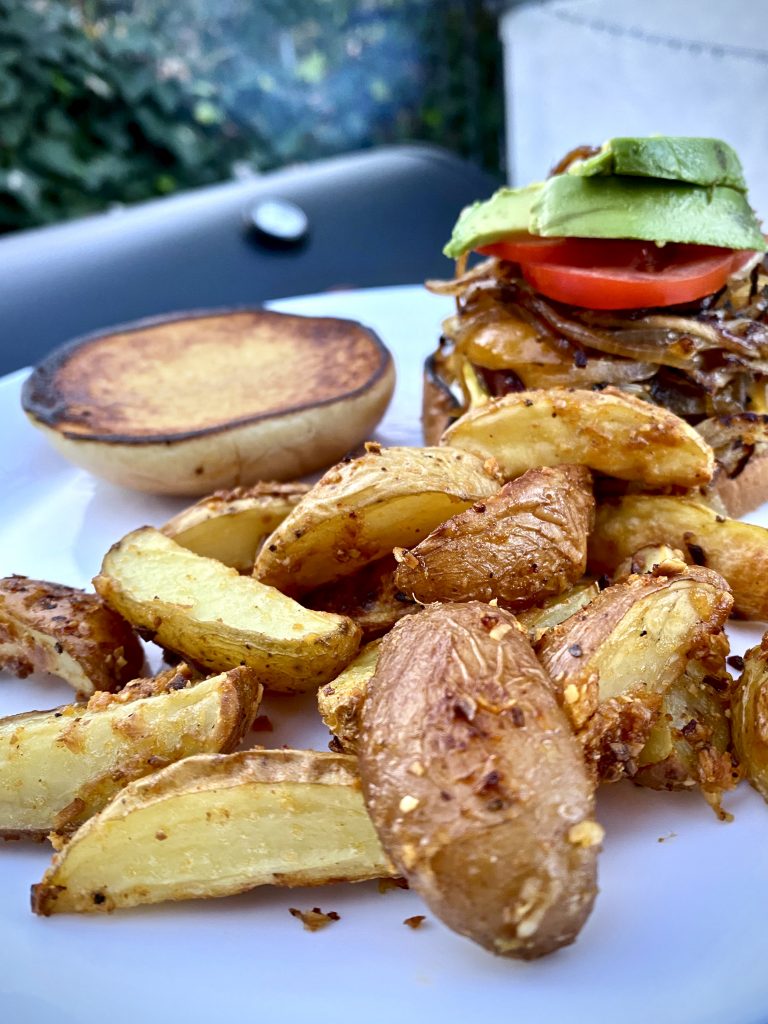
Garlic Baked Potato Wedges

February 11, 2021 by How Did You Cook That

Garlic Baked Potato Wedges

Crispy on the outside, soft and creamy on the inside, Garlic Baked Potato Wedges are a prefect side for all things BBQ.  I bake these wedges so they turn out crispy and garlicky with no trace of oily paper towels or fingers. So, the only thing sticking to your fingers will be the sauces you bring to the table for dipping.

Goodbye frozen, store-bought potato wedges. These easy garlic baked potato wedges can be tossed together using ingredients you probably already have in your kitchen. Then pile on the garlic for an added spicy kick.  Plus Parmesan cheese for…well…because everything should have a sprinkle of Parmesan on it, right?

Get creative and throw in your favorite condiments to wow everybody at your next barbeque. Or just make em for dinner tonight. What the heck.

Garlic Baked Potato Wedges
Print Pin

Garlic Baked Potato Wedges

Crispy on the outside, soft and creamy on the inside, Garlic Baked Potato Wedges are the prefect side to any dish.
Course Appetizer, Side Dish
Keyword Homemade, Potatoes
Prep Time 15 minutes minutes
Cook Time 35 minutes minutes
Servings 4

Ingredients

  • 4 large Russet potatoes Use Russet or Yukon Gold. They are drier inside and will result in a crispier potato.
  • ¼ cup olive oil
  • 2 Tbsp minced garlic
  • 1 Tbsp kosher salt
  • 1 Tbsp paprika
  • 1 Tbsp fresh black pepper
  • 1 tsp onion powder
  • ⅔ cup grated or shredded Parmesan cheese divide in half
  • 2 Tbsp fresh rosemary, minced

Instructions

  • Preheat oven to 400°. Line a baking sheet with parchment paper.
  • Cut each potato in half along the length, then cut each half in half along the length again, and cut each quarter in half along the length once more. You should have 8 equal sized wedges.
  • In a small bowl, combine the oil, garlic, onion powder, salt, rosemary, pepper and paprika. Pour the mixture over the potatoes and toss with your hands to coat evenly.
  • Arrange potato wedges in a single layer on a large baking sheet, skin-sides-down. Sprinkle with half of the Parmesan cheese and extra salt and pepper if you're feeling like it.
  • Bake for 20 minutes, then turn wedges with a spatula so all the sides get golden and crisp. Bake for another 15 minutes then test with a fork to see if they are soft indide.
  • Sprinkle with remaining Parmesan cheese and serve hot.

Filed Under: Bites and Tastes, Companions

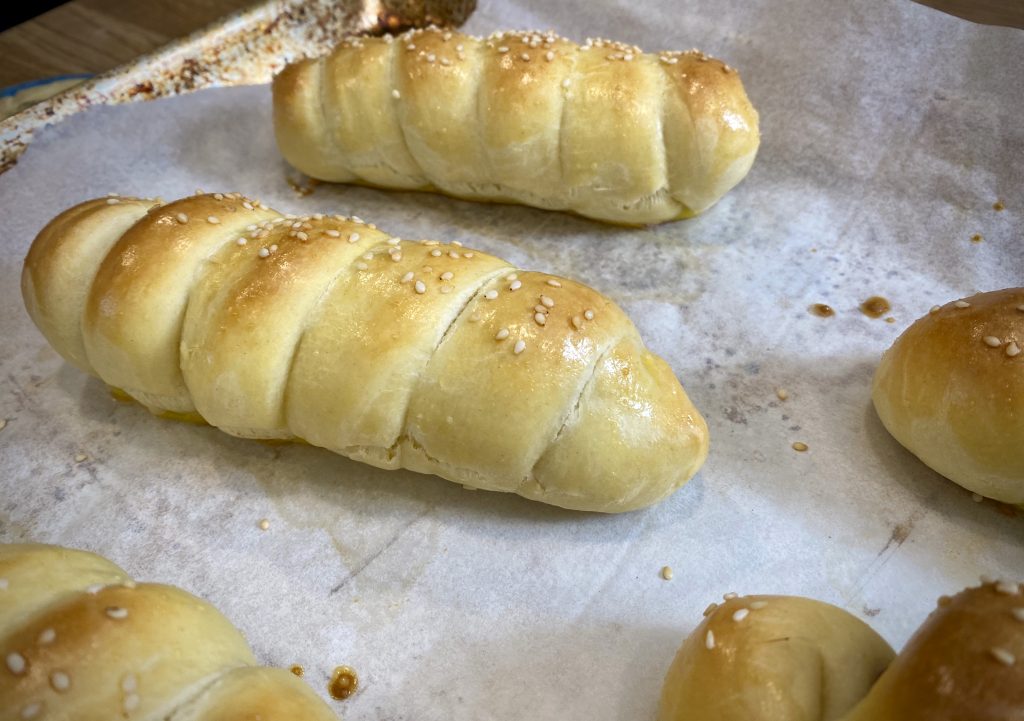
Pigs in a Brioche Blanket

February 9, 2021 by How Did You Cook That

Yeah. I know they look like little caterpillar cocoons. Don’t judge. They’re seriously delicious! And for my first attempt at brioche Pigs in a Blanket, let me tell you, they were a huge hit. Make sure to plan for making the dough up to 24 hours before serving these. This recipe uses a yeast dough that requires rising before baking.

I watched a video of Claire Saffitz making these and the craving hit me. Watch her assemble it on Vice. You’ll be entertained and get an idea of how to stretch and wrap the brioche dough.

Swap out Vienna sausages for hotdogs or bratwurst then wrap em up in a buttery brioche dough and baked till golden. Easy to make and impossible to stop eating. Super scrumptious, crowd-pleasing and perfect for game day snacks. Serve with honey mustard dipping sauce or your favorite condiments.

Print Pin

Pigs in a Brioche Blanket

Course Appetizer, Snack
Cuisine American
Keyword Bread, Hotdogs
Prep Time 45 minutes minutes
Cook Time 25 minutes minutes
Rise 18 hours hours

Ingredients

Brioche Dough

  • 2 cups all-purpose flour
  • 2 Tbsp sugar
  • 1 Tbsp kosher salt
  • 3 large eggs at room temperature
  • 8 Tbsp unsalted butter (1 full stick) cold and cut into 8-10 cubes
  • 2 Tbsp milk
  • 1/2 tsp active dry yeast

For wrapping the pigs

  • chilled and risen brioche dough
  • 8 kosher hot dogs or bratwurst
  • all-purpose flour for dusting and rolling dough
  • 1 large egg beaten with a fork or whisk
  • 1 Tbsp sesame seeds or coarse crunchy salt

Honey Mustard Sauce

  • ¾ cup sour cream
  • ¼ cup spicy brown mustard
  • ⅛ cup yellow mustard
  • 2 Tbsp honey
  • 1 tsp pepper
  • ½ tsp salt
  • 1 tsp cayenne pepper optional

Instructions

  • Do your mise en place. Measure and set out all of your ingredients. Make sure your eggs are at room temperature and butter is cut and cold.
  • In a tiny saucepan or in the microwave heat the milk until just lukewarm. 105°-110° on a food thermometer. If it's too hot it will kill your yeast.
  • Pour warm milk into a small bowl. Add yeast and whisk until dissolved. Set aside until foamy - about 5 minutes.
  • Remove the bowl of a stand mixer and add dry ingredients, flour, sugar and salt. Whisk to combine then make a well in the center. Pour in the milk/yeast mixture. Then add the 3 room temperature eggs. Mix by hand until just combined.
  • Put bowl back on stand mixer and attach the dough hook. Mix on low speed until a shaggy dough forms - about 1 minute. Increase speed to medium and mix until dough starts to wrap around the hook. Keep mixing until the dough is soft and supple. Scrape dough off the hook every so often. Mix until dough comes cleanly off the bottom and sides. Add a pinch of flour if the dough is sticking. Knead dough in mixer for about 10 minutes.
  • Keeping the mixer on medium, add the butter one piece at a time. Allow each piece of butter to fully incorporate into the dough before adding the next. This is a long process. It may take about 15 minutes before all the butter is fully mixed in.
  • Gather the dough from the bowl and gently shape into a ball. Dust lightly with flour and set into a lightly buttered bowl. Cover with plastic wrap and place in the refrigerator to rise for a minimum of 8 hours and up to 24 hours.
  • Pre-heat oven to 350°. Line a baking sheet with parchment paper.
  • Pierce the skin of each hot dog several times to prevent from bursting while baking. Lightly dust each hot dog or bratwurst with flour.
  • Take the risen dough out of the bowl and place on a clean work surface. Divide into 8 equal pieces.
  • Take 1 piece of dough at a time and roll out with your hands. Making long snake-like rolls out of each piece. About 12 inches long each.
  • Working from the middle of each hotdog and rolling outward to the ends, lay the brioche across the middle of the hot dog. Wind one end of dough around the hotdog until you reach one end. Then roll the other end of the dough outward toward the other end of the hotdog. Pinch each end of the hotdog to completely seal.
  • Repeat for all 8 pigs in a blanket.
  • Whisk the remaining egg in a bowl. Brush egg over each roll making sure to get the egg wash into all the little folds and seams. Sprinkle with sesame seeds or coarse salt.
  • Bake at 350° for 25 minutes or until golden brown.
  • Remove pigs in a blanket from oven and slice them into serving-size or bite-sized rounds. Enjoy with honey mustard dipping sauce or your choice of condiments.

Honey Mustard Dipping Sauce

  • Whisk all sauce ingredients together in a bowl until fully incorporated. Spoon over pigs in a blanket and enjoy.

Filed Under: Baking, Bites and Tastes, Sauces

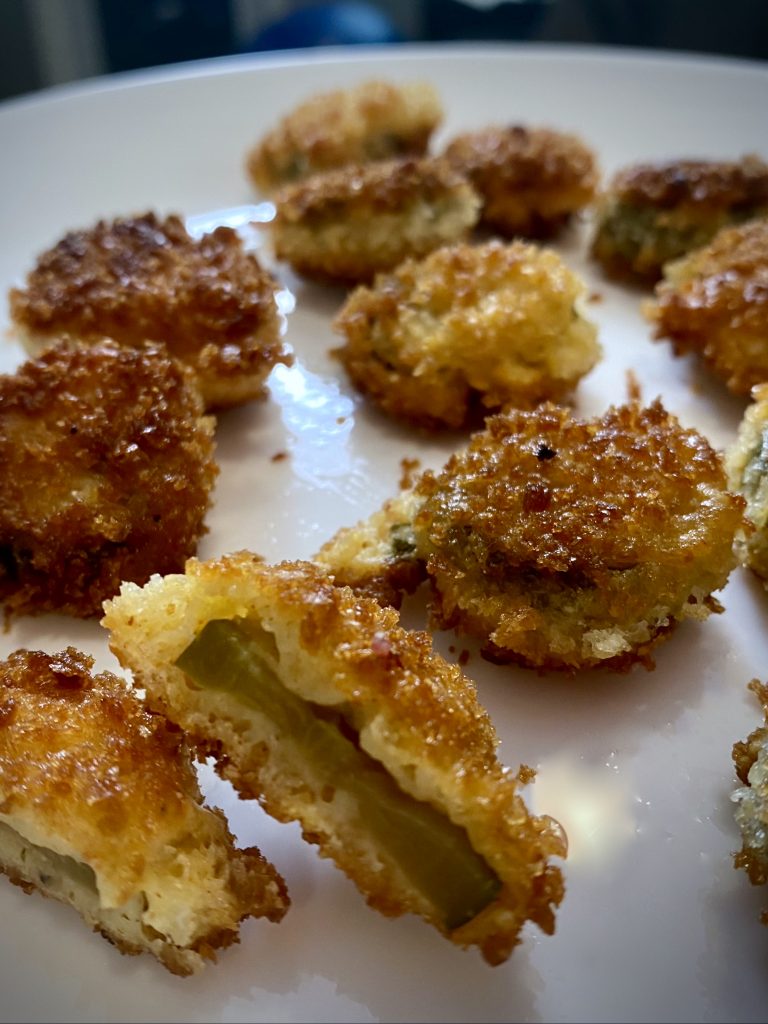
Crunchy Fried Dill Pickles

February 9, 2021 by How Did You Cook That

We’ve been experimenting with homemade dill pickle recipes since the summer of COVID 19. When we finally landed on the perfect dill pickles EVER, it just made sense to follow our hearts to batter and fry em. Enter Crunchy Fried Dill Pickles.

Oh yeah! These crunchy little rounds of fried dill pickle goodness are the perfect dinner companions for burgers or barbeque. No meat? No problem. Crunchy Fried Dill Pickles go hand in hand with vegan burgers and vegan “pulled-pork” sandwiches.

I use this very same recipe for battering fresh shrimp to make my favorite shrimp poboy sandwiches.

I hope you’ll try these fried pickles out. If you do, let me know what you think about them.

Print Pin

Crunchy Fried Dill Pickles

Easy Crunchy Deep Fried Pickles made with bread and butter dill pickles. From pan to plate in less than 30 minutes.
Course Appetizer, Snack
Cuisine American
Keyword Pickles, Vegetarian
Prep Time 15 minutes minutes
Cook Time 5 minutes minutes
Servings 4

Ingredients

  • 40 Bread & Butter dill pickles
  • 1 cup all-purpose flour
  • 1 cup milk or buttermilk
  • 1 cup panko bread crumbs
  • 1 Tbsp onion powder
  • 1 tsp baking powder
  • 1 tsp kosher salt plus more for seasoning
  • 1 tsp cayenne pepper or more, for spicy pickles
  • 1 tsp smoked paprika
  • 1 large egg lightly beaten
  • canola oil for frying

Instructions

  • Place 40 or so dill pickle coins on a paper towel and pat dry.
  • Pour panko bread crumbs into a shallow pan or pie pan. Add a bit of salt and pepper to taste. Set aside.
  • In a separate shallow pan or pie pan add flour, baking soda, salt, onion powder, cayenne, smoky paprika, salt and pepper. Whisk to combine.
  • Add milk or buttermilk and egg to flour mixture. Stir until combined and there are no lumps.
  • Drop dill pickle coins into the batter and completely coat each one. Remove to panko plate and toss to coat each one in bread crumbs. Leave the pickles in the panko for a few minutes to allow bread crumbs to stick really well.
  • While the pickles are breading up, heat canola oil in a skillet. Add enough oil to completely cover the bottom and up the sides about ½". Heat oil to about 350° or until shimmering. (Don't forget to turn on your exhaust fan!)
  • Carefully drop battered and crumbed pickle coins into the hot oil. They should brown on one side in about 60 seconds. Carefully turn with tongs or a slotted spoon and brown another 30 seconds on the other side.
  • Remove to a paper towel-lined plate to absorb excess oil.
  • Serve hot with honey mustard, ranch dressing or any sauce that floats your boat.

Filed Under: Bites and Tastes

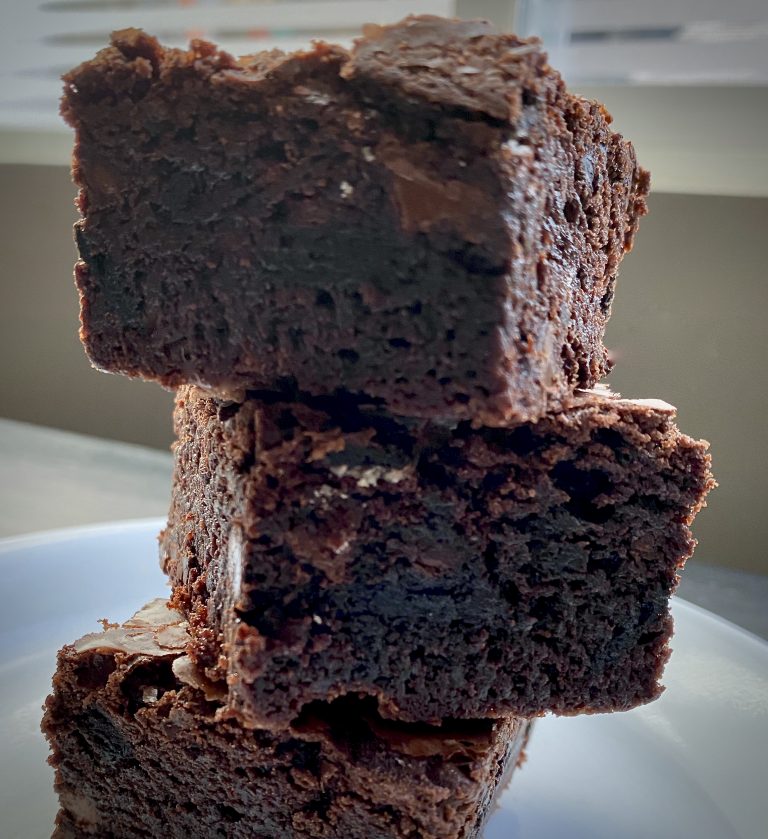
Oreo Chocolate Chunk Brownies

July 10, 2020 by How Did You Cook That

Oreo Chocolate Chunk Brownies

Oreo Chocolate Chunk Brownies are a chocolate lovers dream come true. Chewy gooey and chocolatey inside and out. These yummy squares are pure heaven. Consider making two pans if, you know, you’re planning on sharing.

I grew up taking apart my Oreos and scraping out the filling with my teeth. Always chased with an icy cold glass of milk. No dunking for me, just a chaser. Oreos are also the cookie of choice to leave on the table for Santa on Christmas Eve.

These brownies require a cold glass of milk too. It’s up to you whether to dunk or chase. No matter how you nosh, these will be the dessert that you add to the top of your list.

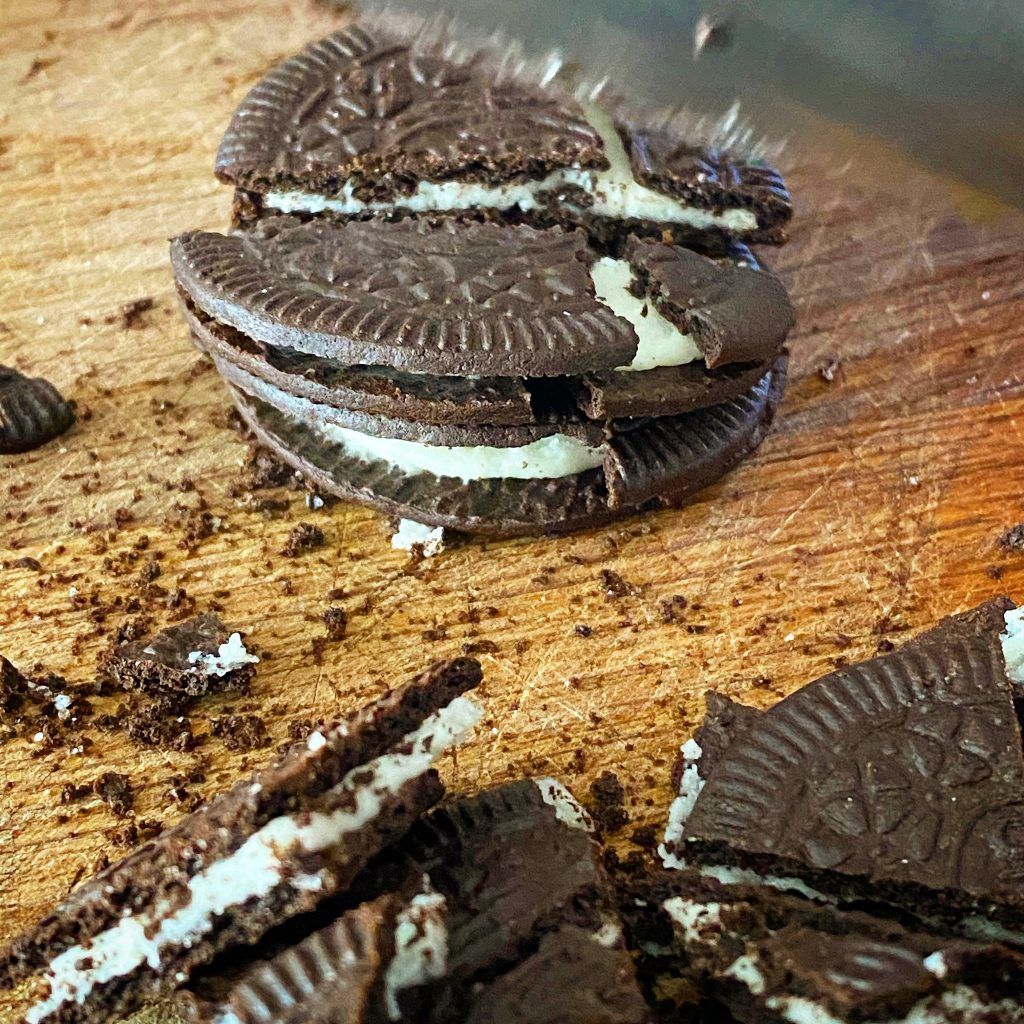
Crushed Oreos
Oreo Chocolate Chunk Brownies
Print Pin

Oreo Chocolate Chunk Brownies

Ooey gooey delicious brownies. Fudgy heavenly brownies with a rich chocolatey taste and chunks of chocolate and Oreos in every bite.
Course Dessert, Snack
Cuisine American, British
Keyword Brownies, Chocolate, Cookies
Servings 8

Ingredients

  • 1 cup unsalted butter (2 Sticks)
  • 1 cup granulated sugar
  • 12 ounces semi-sweet chocolate chunks
  • 2 cups chopped Oreos
  • 3 large eggs
  • 1 Tbsp instant espresso powder
  • 1 Tbsp pure vanilla extract
  • ⅔ cup all-purpose flour
  • 1½ tsp baking powder
  • 1 tsp salt

Instructions

  • Preheat oven to 350°. Line a 13x9-inch baking pan with parchment paper and extend it past the edges, on at least two sides. Grease paper with butter.
  • In a medium bowl, whisk together flour, baking powder, and salt. Set aside.
  • Set a heatproof, medium-sized bowl over a saucepan of simmering water. Heat butter, and chocolate chunks until melted and smooth. Set aside to cool slightly.
  • In a large bowl, whisk together the eggs, espresso powder, vanilla and sugar. Stir the egg mixture into the slightly cooled chocolate mixture. Cool to room temperature.
  • Add flour mixture to the batter. Stir most of the broken Oreos into the chocolate mixture (save a few for sprinkling on top). Then pour the brownie batter into the prepared baking pan and smooth the top with a rubber spatula. Sprinkle reserved Oreo pieces on top.
  • Bake for 25 to 35 minutes, or until toothpick inserted in center comes out clean with a few crumbs attached. Do not over bake as you want them to be fudgy! Let cool completely, then cover and chill for several hours. Chilling the brownies makes them easier to cut. Invert the chilled brownie pan onto a cutting board, peel off the parchment paper and cut into squares.

Filed Under: Baking, Bites and Tastes, Desserts

Toasted Candied Pecans

June 11, 2020 by How Did You Cook That

Candied Pecans

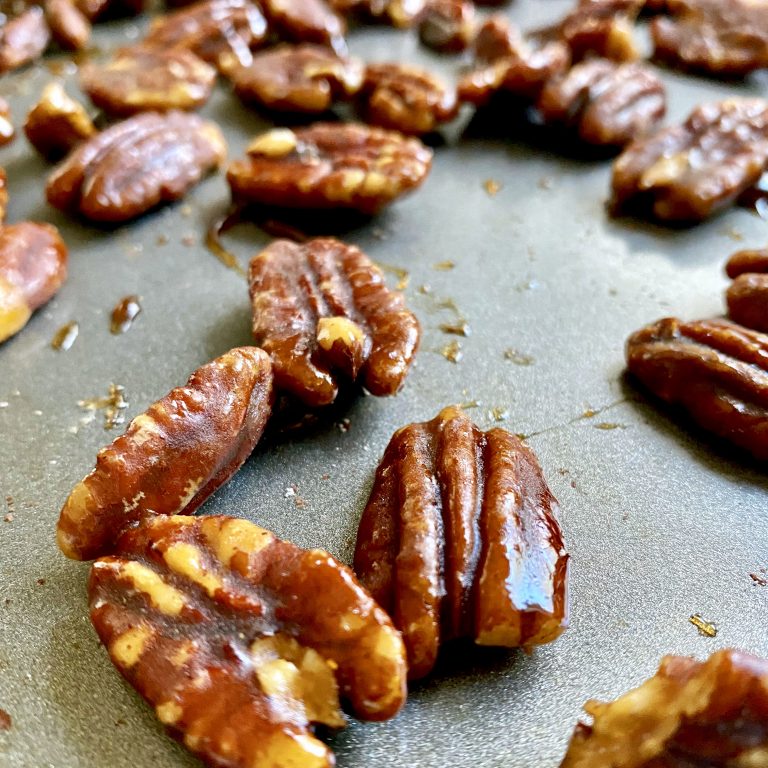
Many candied pecans recipes call for baking in the oven. Toasted candied pecans are far quicker with just a few easy steps. And you can make them any time of year without heating up the kitchen.

I’ve been making candied pecans on the stove since I learned to make them in New Orleans. Toasted candied pecans have a crackle candy coating rather than a chewy caramel or sugary praline coating. They are perfect sprinkled over ice cream or as a sweet crunchy topping for salads.

You can make these in large or small batches so easily on the stove top. It’s a great recipe when cooking for one or two. To be honest, if you keep too many of these around, you’ll never be able to keep your hands off of them. They are that good.

Toasted Candied Pecans
Print Pin

Toasted Candied Pecans

Candied pecans with a crunch; a hard candy coating rather than a chewy caramel or sugared praline coating. Perfect sprinkled over ice cream or as a sweet crunchy topping for salads.
Course Dessert, Snack
Keyword Pecans, Snack, Sweet
Prep Time 5 minutes minutes
Cook Time 5 minutes minutes
Servings 4

Ingredients

  • 1 cup whole pecans
  • ½ cup brown sugar
  • 1 tsp Kosher salt
  • ½ tsp ground cinnamon
  • 2 Tbsp water

Instructions

  • Toast pecans in a skillet, tossing with a spatula or wooden spoon, until fragrant and just toasted but not too brown or blackened. Set aside.
  • In a medium or large saucepan, combine sugar, salt, cinnamon and water.  Cook over medium heat for a minute or two, until the sugar dissolves and the mixture is really bubbling.
    Check the temperature of sugar mixture with a candy thermometer. It should read 300° in order to achieve a crackle coating on the pecans. If the temperature is too low you will have chewy, sticky pecans. (See notes below.)
  • Add the toasted pecans and cook for an additional 3 minutes, stirring to coat the pecans in the glaze.
  • Remove from the heat, and spread the pecans out on a baking sheet lined with parchment paper. Let the pecans cool completely.
  • Break apart, and enjoy.
  • Try adding a dash of cayenne to the sugar mixture or combine different spices, like cardamom, nutmeg or cloves. It's a very adaptable recipe and can easily be doubled to make larger batches.
  • Toasted candied pecans can be stored in an airtight jar for about one week. A quick and easy foodie gift to take to a host or give for the holidays.

Notes

Hard Crack:
The hard-crack stage is the highest temperature you are likely to see specified in a candy recipe. At these temperatures, there is almost no water left in the syrup. Syrup dropped into ice water will separate into hard, brittle threads that break when bent.
Hard-Crack Stage
300° F–310° F
/148° C–154° C
sugar concentration: 99%
https://www.craftybaking.com/howto/candy-sugar-syrup-temperature-chart
 

Filed Under: Bites and Tastes, Desserts

Zucchini Fritters

May 29, 2020 by How Did You Cook That

Zucchini Fritters

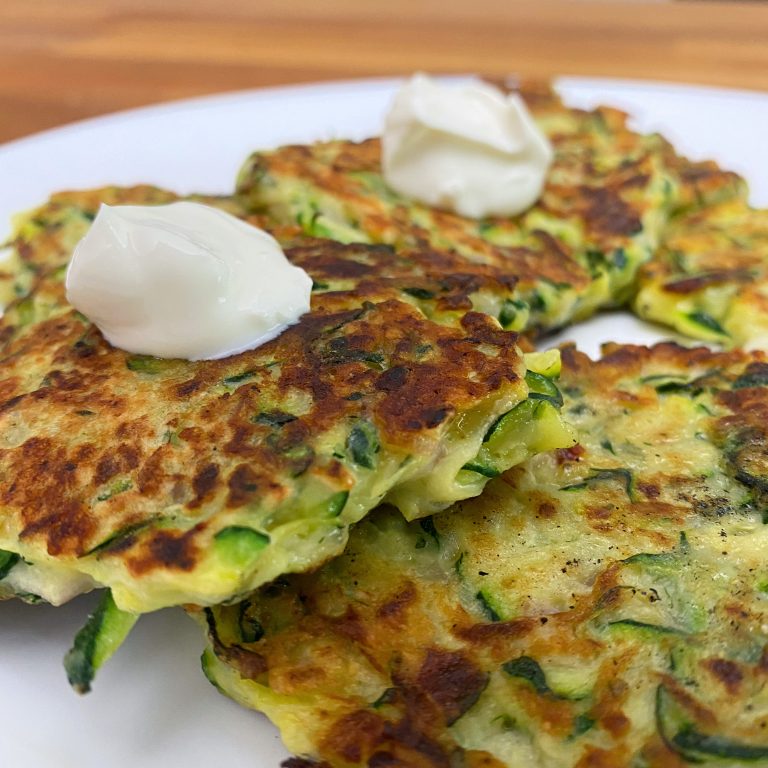
Zucchini fritters are unbelievably easy to put together and prepare. Grate zucchini, drain, squeeze and drain again then toss into a bowl with a bunch of simple fresh ingredients. Scoop zucchini “batter” onto a hot skillet. Flatten, cook. Flip, cook. Serve hot and tasty with a dollop of yogurt or sour cream. How easy it that?

Zucchini fritters are a nutritious, sugar-free way to use up a bounty of zucchini fresh from your garden. Simple fritters that are so crispy and full of flavor even your most finicky eaters will go back for seconds.

Zucchini Fritters
Print Pin

Zucchini Fritters

Zucchini fritters are a nutritious, sugar-free way to use up a bounty of zucchini fresh from your garden.
Course Appetizer
Cuisine Global
Keyword Snack, Vegetarian
Prep Time 15 minutes minutes
Cook Time 10 minutes minutes
Total Time 25 minutes minutes
Servings 4

Ingredients

  • 1½ pounds zucchini grated
  • ¼ cup flour
  • ¼ cup Parmesan cheese grated
  • 2 cloves garlic minced
  • 1 medium shallot minced
  • 1 large egg beaten
  • 2 tsp Kosher salt
  • pinch red pepper flakes
  • fresh ground black pepper to taste
  • 2 Tbsp olive oil

Instructions

  • Place grated zucchini into a colander over the sink. Add 2 tsp salt and toss to combine. Let sit for 10 minutes. Using a clean dish towel or cheese cloth, squeeze zucchini to drain completely. This may take a few squeezings. Zucchini is VERY juicy.
  • In a large bowl, combine zucchini, flour, grated Parmesan, garlic, shallot, red pepper flakes and egg; season with salt and pepper to taste.
  • Heat 2 Tbsp olive oil in a large skillet over medium high heat.
    Scoop about ¼ cup of batter for each fritter, flattening down with a spatula. Cook until the underside is nicely golden brown, about 2 minutes. Flip and cook on the other side, about 1-2 minutes longer.
    Zucchini Fritters
  • Serve immediately. Top with a dollop of sour cream or Greek yogurt and some chopped green onion or chives.

Filed Under: Bites and Tastes, Companions, Vegetarian

  • Page 1
  • Page 2
  • Page 3
  • Go to Next Page »

Primary Sidebar

Hi food lovers. Welcome to my kitchen.

If you're looking for simple dishes made with wholesome, seasonal ingredients, you've come to the right place. Grab a fork and take a bite. Dig In →

Coriander Seeds
Strawberry Rhubarb Galette
Coconut Peach Popsicles

Categories

Favorite Resources

Cook Books

What’s New

  • Roasted Garlic Tomatoes with Thyme
  • Crisp Green Salad with Sweet Honey Vinaigrette
  • Number One Ice Cream
  • Street Corn Soup
  • Egg In A Jar

Footer

  • Email
  • Facebook
  • Instagram
  • YouTube

Find Recipes

Never Miss a Recipe

Copyright © 2025 How Did You Cook That on the Foodie Pro Theme