• Skip to primary navigation
  • Skip to main content
  • Skip to primary sidebar
  • Skip to footer

How Did You Cook That

  • Recipes
    • Main Dishes
      • Street Corn Soup
      • Maple Ginger Chicken and Asparagus
      • Homemade Gnocchi with Garlic and Parmesan
      • Loaded Baked Potato Soup
      • Beef Bourguignon
      • Grilled Salmon Tacos
      • Thai Inspired Shrimp Curry Soup
      • Chicken and Sausage Gumbo
      • Cast Iron Skillet Pizza
        • Vegetarian
          • Creamy Sweet Potato Curry
          • Pan Tossed Vegetarian Noodles
          • Zucchini & Mushroom Bucatini
          • Stir Fried Baby Bok Choy
          • Roasted Red Pepper and Tomato Soup
          • Potato Leek Soup
          • Portobello “Steak” and Potatoes
          • Cheesy Cauliflower & Carrot Soup
    • Companions
      • Roasted Garlic Tomatoes with Thyme
      • Crisp Green Salad with Sweet Honey Vinaigrette
      • Zucchini Fritters
      • Easy Flat Bread
      • Animal Style French Fries (Copy Cat Version)
      • Cheesy Jalapeno Cornbread
      • Buffalo Cauliflower Bites
    • Breakfast
      • Chilaquiles Rojos with Eggs
      • Sour Cream and Onion Biscuits
      • Dutch Baby with Blueberries
      • Blueberry Lemon Muffins with Streusel Topping
      • Egg In A Jar
      • Creamy Acai Bowls
      • Baked Irish Oats with Cream
      • Fluffy Buttermilk Pancakes
      • Original French Crepes
      • Vanilla Spiced Overnight Oats
      • Seriously Delicious Waffles
      • Southern Buttermilk Biscuits
    • Sauces
      • Creamy Thousand Island Dressing
      • Spicy Mango Salsa
      • Favorite Avocado Recipes
      • Loquat Marmalade
      • Adobo Chile Aioli
    • Desserts
      • Number One Ice Cream
      • Loaded Trail Mix Cookies
      • Toasted Candied Pecans
      • Angel Food Loaf Cake
      • Easy Banana Zucchini Bread
      • Triple Chocolate Cake with Whipped Ganache Frosting
      • Key Lime Cheesecake
      • Cinnamon Sour Cream Coffee Cake
      • Zach’s Chocolate Chip Cookies
      • Strawberry Rhubarb Galette
      • Spiced Cheesecake
      • Berry Fruit Crumble
      • Banana Cinnamon Crunch Bread
    • Thirst Quenchers
      • The Forager Cocktail
      • Cucumber Cilantro Gin Tonic
      • Sunrise Glow Smoothie
      • Three Day Ginger Beer
  • Experiences
    • Los Angeles Pop Ups – Zoe Food Party
    • Los Angeles Bread Crawl
    • The Great Outdoors (A Basic Pantry List)
  • Food Muse
    • A Note About Sugar
    • No More Plastic!
    • Best Buttermilk Substitutions
    • Prepping and Storing Cilantro
    • Home Roasted Coffee
  • Sugar Loaf
    • How to Feed a Sourdough Starter
    • Sourdough Pancakes
    • Sourdough Country Bread Loaf
  • About
  • Navigation Menu: Social Icons

    • Facebook
    • Instagram

Breakfast

Egg In A Jar

July 16, 2021 by How Did You Cook That

Egg In A Jar
Egg In A Jar

On a recent trip to visit friends in Los Olivos we stopped at a cute cafe for breakfast one morning. And discovered Eggs In A Jar.

My friend and I both ordered the same dish, neither of us ever having tried eggs in a jar before. And it was very special. The presentation itself was delightful. The ingredients were all farm fresh and local from the surrounding Santa Ynez Valley. We were both hooked and I took every bite deciphering how to recreate it in my kitchen when I got home.


How To Make Egg in a jar

The thing that makes this dish stand out is the addition of purple potatoes instead of regular golden or Russet. Although, if Yukon or Russet is what you’ve got available, by all means, use them. 

Purple potatoes can be found at local farmers markets and, here in Southern California, they can be found in the produce section of stores like Whole Foods, Sprouts and other specialty-type grocery stores. They are high in antioxidants and minerals. Additionally, purple potatoes may help lower blood pressure and have a lower glycemic load than regular potatoes. They taste exactly the same as regular potatoes, but they look prettier. If you can find them, give them a try.

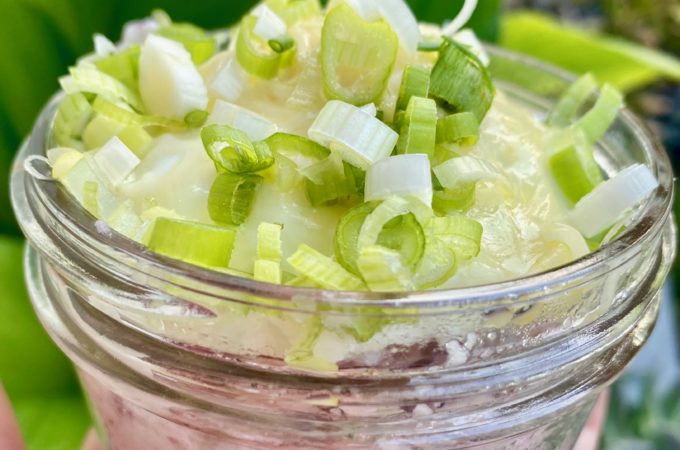
If you have small clear jars, they work best for this dish. For starters, they are cute, but the clear jar really highlights the layers of ingredients. The potatoes, cheese, eggs and scallions. Total eye-candy. (Tip: repurpose jelly jars, small condiment jars, etc. for an eclectic look of different jars on the table. Save the planet, save your money.) Instead of jars, try a small clear glass or cup.

The gist of the whole thing is simple: Herby mashed potatoes topped with gruyere (or cheese of your choice), a dollop of sour cream, a poached egg and chopped chives or scallions. It’s a tasty breakfast or brunch full of healthy ingredients plus it’s fun to eat. What more could you ask for? Maybe coffee or mimosas

Egg In A Jar
Print Pin

Egg In A Jar

Soft poached egg atop creamy, herby mashed purple potatoes. Served with a dollop of creme fraiche or sour cream, grated gruyere and chopped scallions. The whole thing fits perfectly into 4 ounce jars for a super fun breakfast or brunch.
Course Breakfast, Brunch
Cuisine American
Keyword Cheese, Eggs, Herbs, Potatoes
Total Time 35 minutes minutes
Servings 2

Ingredients

  • 8-10 petite purple potatoes, peeled, cut into 1 inch pieces
  • 5 scallions, finely chopped use white and green parts
  • 2 Tbsp shallots, minced
  • 2 organic eggs large
  • 2 tsp white vinegar
  • 1 tsp kosher salt, for poaching water
  • 4 Tbsp creme fraiche or sour cream
  • 2-4 Tbsp grated gruyere
  • salt, to taste
  • pepper, to taste

Instructions

Mashed Purple Potatoes

  • Fill a pot of water. Add 2 Tbsp kosher salt. Drop in peeled potato cubes and heat to boiling or until potatoes are fork-soft. (Tip: potatoes cook from the outside in so be sure to drop your potatoes into cold water and heat them up with the water. That way you won't have hard centers as the hot water boils the outside first.)
  • Drain potatoes and return to pan, keeping heat on lowest setting. Add 2 Tbsp butter or vegan substitute. Mash until smooth, or if you're like me, slightly chunky.
  • Stir in ½ of the chopped scallions and 1 Tbsp creme fraiche or sour cream. Salt and pepper to taste.
  • Scoop potato mixture into cups. Sprinkle with grated gruyere.
  • Set aside or in a warm oven until your eggs are poached.

Poaching Eggs

  • Fill a small sauce pan about 2 inches up the side with water. Add vinegar and 2 tsp kosher salt.
  • Heat water to just under boiling, to the point where tiny bubbles collect on the bottom of the pan.
  • While water is heating, crack each egg into an individual ramekin or small custard cup. Careful not to break the yolk.
  • When water is ready, swirl it around rapidly with a spoon to create a whirlpool, then gently slide each egg into the middle of the whirlpool. (Note: You'll need a bigger saucepan if you're poaching more than 1 or 2 eggs.) The whites will swirl around a bit but the whirlpool should contain it. RESIST the urge to touch or coax the eggs.
  • Immediately turn off the heat, cover your pan and set a timer for 5 minutes. DO NOT LIFT THE LID OR STIR THE EGGS. Trust the process and in 5 minutes you'll have perfect poached eggs.
  • After 5 minutes remove the eggs from the water with a slotted spoon and slide each one onto the top of the mashed potato mixture in the cups.
  • Top eggs with remaining creme fraiche and chopped scallions.
Filed Under: Bites and Tastes, Breakfast

Seasoned Black Beans

March 2, 2021 by How Did You Cook That

Seasoned Black Beans
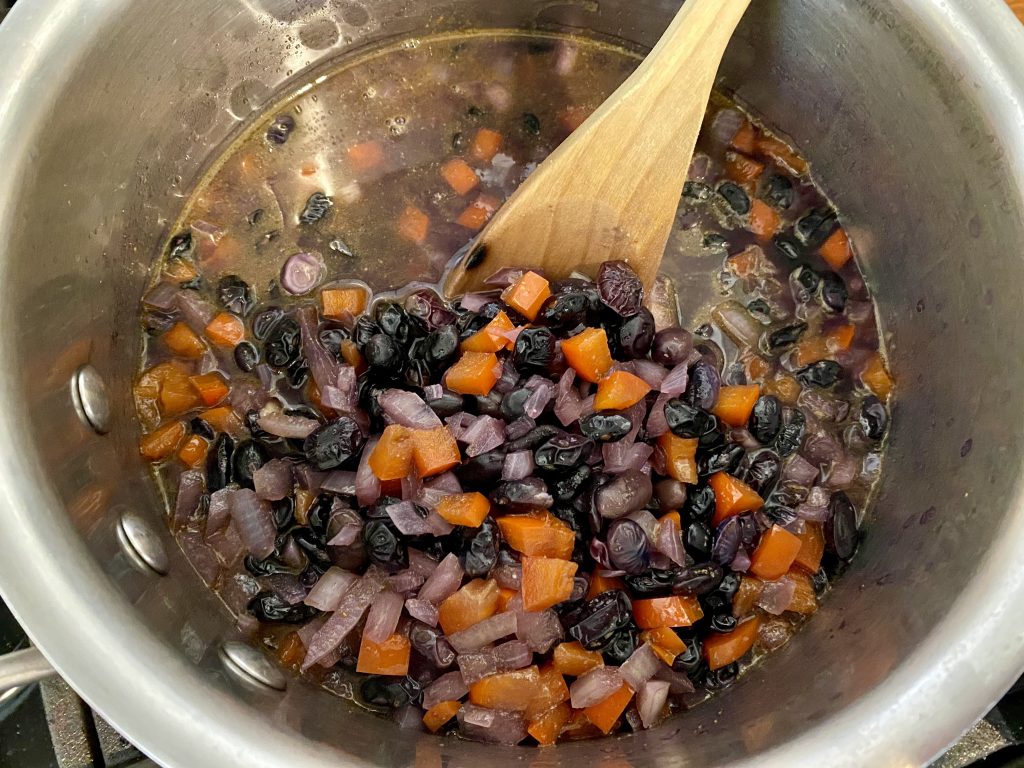
You know those cans of seasoned or Cuban style black beans at the grocery store? I used to buy those beans to keep on hand for a rainy day, but no more!  Slow-cooking dried black beans is one of the best changes I ever made to my pantry. Simmering on the stove, they soak up the savory flavors of onions, sweet red peppers and cilantro. Delicious!
 
Slow-cooking black beans allows them to develop a rich and savory flavor. Use these creamy black beans for soups, tacos, burritos, or anything you can imagine to go with beans. You can even mash them and recook them to make refried black beans. They are so versatile and once you try them, you’ll never look at those canned beans in the same way again.
Seasoned Black Beans
Print Pin

Seasoned Black Beans

Course Dinner, Side Dish
Cuisine American, Mexican
Keyword Beans
Prep Time 10 minutes minutes
Cook Time 2 hours hours
Servings 6

Ingredients

  • 2 cups small dried black beans
  • 4 cups vegetable broth chicken broth works fine too
  • 1 small red bell pepper chopped
  • 1 small yellow onion chopped
  • 2 Tbsp olive oil
  • ⅛ cup fresh cilantro finely chopped
  • 2 tsp salt
  • 1 tsp ground black pepper
  • 1½ tsp cumin
  • ½ tsp cayenne

Instructions

  • Rinse black beans. Set aside to drain.
  • In a medium saucepan heat olive oil and saute red peppers and onions until translucent.
  • *** If you make these beans in a crock-pot, add the sauteed vegetables to the crock pot and then add the rest of the ingredients.
  • Pour in vegetable broth and rinsed black beans.
  • Season with cumin, salt, pepper and cayenne.
  • Bring to a low boil then turn down heat to low. Allow beans to simmer for about an hour, stirring to make sure the beans don't stick to the bottom of the pan. Add water or more vegetable broth as needed to keep the beans nice and brothy.
  • At 1 hour add the chopped cilantro and season to taste. Simmer for another hour or until beans are soft and creamy.
  • Eat immediately or refrigerate up to 1 week.
    Beans can also be frozen for up to 3 months. Transfer the cooled and cooked beans, with the broth, to a freezer-safe bag or re-usable storage container. Remove as much air as possible.
    When freezing, consider separating beans into single serving sizes and write the date on the container.

Filed Under: Breakfast, Companions, Vegetarian

Dutch Baby with Blueberries

May 27, 2020 by How Did You Cook That

Dutch Baby

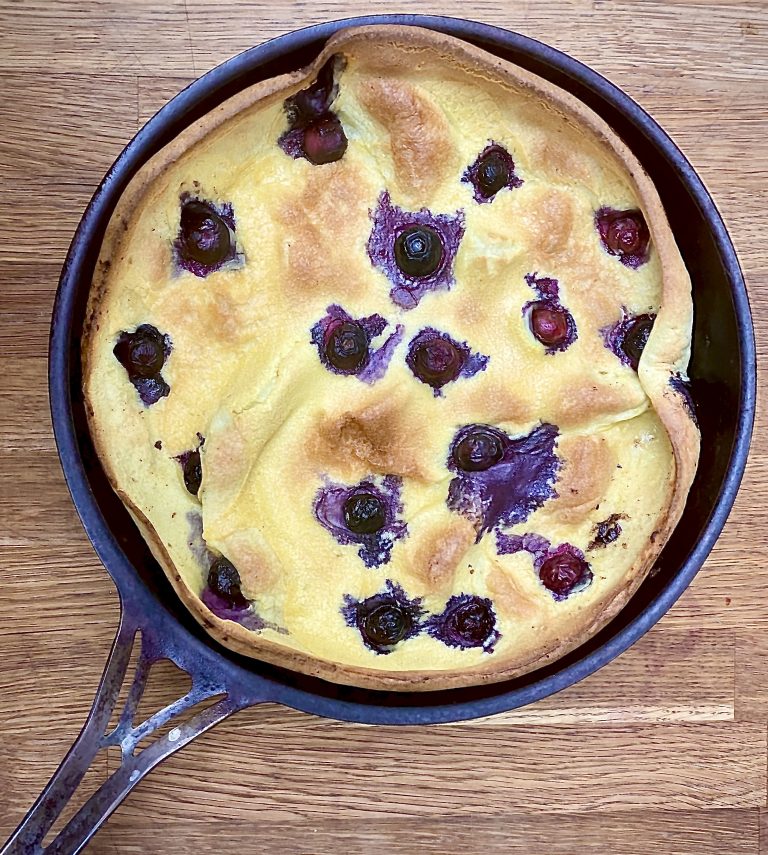
Dutch babies!  These big, fluffy, super egg-y pancakes bake up in a skillet, rising to the morning beautifully. And they are delicious. I added blueberries to these Dutch babies but you can go plain or fancy. Whatever you’re feeling.

Unlike typical pancake batter, that gets mixed in a bowl, Dutch baby batter is whirled in a blender. This recipe requires just a handful of ingredients and comes together in minutes. I made these Dutch babies with blueberries by tossing fresh blueberries into the skillet filled with batter. Then I loaded it into the oven to bake up together.

Use this recipe as a base and experiment with added ingredients. Try tossing on a bunch of fresh berries or bananas before popping the pan into the oven. If you like chocolate, shave some over the top when they come out of the oven. Coconut, powdered sugar, jam, maple syrup, the options are endless. 

Whip up a batch of Dutch babies for breakfast and see the smiles light up.

Dutch Baby
Print Pin

Dutch Baby with Blueberries

Course Breakfast
Keyword Baking, Breakfast, Brunch
Prep Time 10 minutes minutes
Cook Time 20 minutes minutes
Servings 2

Ingredients

  • ½ cup flour
  • ½ cup milk
  • 3 large eggs at room temperature
  • 4 Tbsp unsalted butter
  • 1 Tbsp sugar
  • 1 tsp vanilla
  • pinch of cinnamon, nutmeg or cardamom

Instructions

  • Pre-heat oven to 425°
  • Add flour, milk, eggs, sugar and vanilla to a blender and blend until thoroughly mixed and frothy.
    After blending be sure that the batter has come to room temperature and is not too cold. If your batter is too cold it will not rise up high in the skillet.
  • Melt 2 Tbsp butter in a cast iron skillet in the oven.
  • Take skillet out of the oven and pour enough batter into the skillet to cover the bottom. Return pan to the oven and bake for 20 minutes, until the cake is puffed and golden. Resist the urge to open the oven, checking through the oven window if possible.
    When dutch baby is puffed and golden reduce oven temperature to 300° and bake five minutes longer.
  • Remove dutch baby from the oven. Remove to a plate or platter and cut or tear into wedges.
    Turn oven back up to 425°. Melt more butter into the skillet and pour in more batter to bake another Dutch baby while you are busy demolishing the first one.
    Serve hot topped with syrup, jam, confectioners' sugar or fresh fruit.

Filed Under: Baking, Breakfast

Sour Cream and Onion Biscuits

May 19, 2020 by How Did You Cook That

Sour Cream and Onion Biscuits

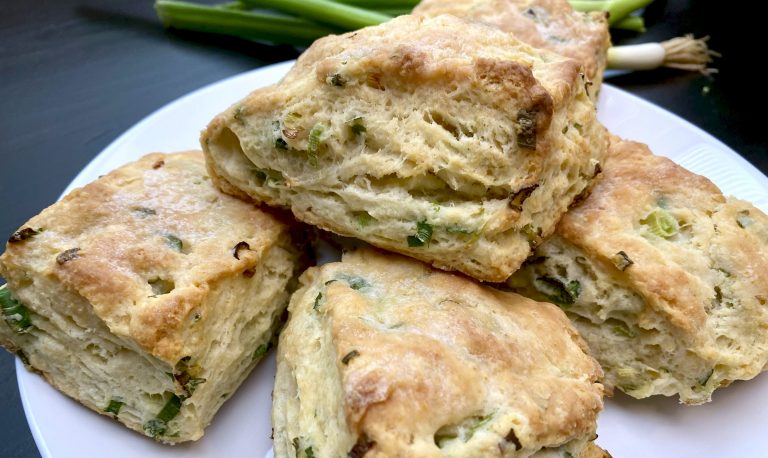
I arrived really late to the biscuit making game. All the cooks I knew turned out fluffy light biscuits in minutes. My versions were less than perfect. Not so with these Sour Cream and Onion Biscuits. These turn out perfect every time.

Bon Appetite has a terrific video of their folding method for these biscuits. It’ll make a believer out of you.

Gently folding the biscuit dough by hand makes layers in the biscuits for serious pull-apart success. Using sour cream instead of buttermilk adds just the right amount of acidity to help make light and tender biscuits.

Loads of chopped fresh green onions, and maybe an optional dash of parmesan cheese, take these sour cream and onion biscuits over the top. You’ll finish off a plate of these in no time flat.

Serve biscuits hot and fresh out of the oven with a cheesy mound of scrambled eggs.

Sour Cream and Onion Biscuits
Print Pin

Sour Cream and Onion Biscuits

Perfectly fluffy and light biscuits with a sour cream and onion flavor that's out of this world. They bake up perfectly every time.
Course Breakfast, Brunch
Keyword Baking, Biscuits
Prep Time 20 minutes minutes
Cook Time 25 minutes minutes
Total Time 45 minutes minutes
Servings 6

Ingredients

  • 10 scallions
  • 2½ cups all-purpose flour plus extra for kneading
  • 1 Tbsp Kosher salt
  • 2 tsp baking powder
  • ½ tsp baking soda
  • 2 tsp sugar
  • 1¼ cups sour cream
  • 12 Tbsp unsalted butter very cold and divided

Instructions

  • Preheat oven to 400°. Line a baking sheet with parchment paper. (I have used non stick baking sheets and no parchment paper with equal success.)
  • Coarsely chop white and light green parts of scallions.
  • Melt 2 Tbsp butter. Set aside.
  • In a large bowl combine flour, salt, baking powder, baking soda, and sugar. Whisk to combine.
  • Cut remaining cold butter into small ¼" pieces. Add to dry ingredients and toss to coat. With your fingers work butter into the flour pressing it into bits. The mixture should resemble pea-sized sand.
    Add scallions and lightly toss to combine.
  • OPTIONAL: Add 2-3 Tbsp sharp cheddar or Parmesan cheese along with the scallions for a bold flavor.
  • Make a well in the center of the flour mixture and add 1¼ cup sour cream. Mix with a fork until dough just comes together. It should be pretty shaggy.
  • Turn mixture out onto a lightly floured surface and form together with your hands until it comes back together. Keep your hands floured to keep from sticking. Pull loose mixture into the dough and knead once or twice to combine.
  • Pat dough into a rectangle about 1 inch thick, pressing bits of dough that fall back into the dough.
  • Starting at one of the short edges of the rectangle, fold dough toward the center, one third of the way. Then fold the other edge over that and pat into another rectangle. Don't worry if it's a little misshapen here. The idea is to fold and pat, fold and pat to create layers in the dough. You will do this "fold and pat" two times then pat the dough back to a 1 inch thick rectangle about 8 x 4" in size. Square it up and even the edges with a blade or pastry scraper.
  • Cut dough down the center lengthwise, then cut each half into 4 squares of dough. There should be 8 biscuits total.
  • Transfer biscuits to a baking sheet. Brush tops gently with 2 Tbsp melted butter. Don;t skip this step. It makes your biscuits golden brown and just slightly crisp on top.
  • Bake until light golden brown, 20-25 minutes.
  • Serve hot with a side of eggs.

Filed Under: Baking, Breakfast, Companions

Blueberry Lemon Muffins with Streusel Topping

May 18, 2020 by How Did You Cook That

Lemon Blueberry Streusel Muffins

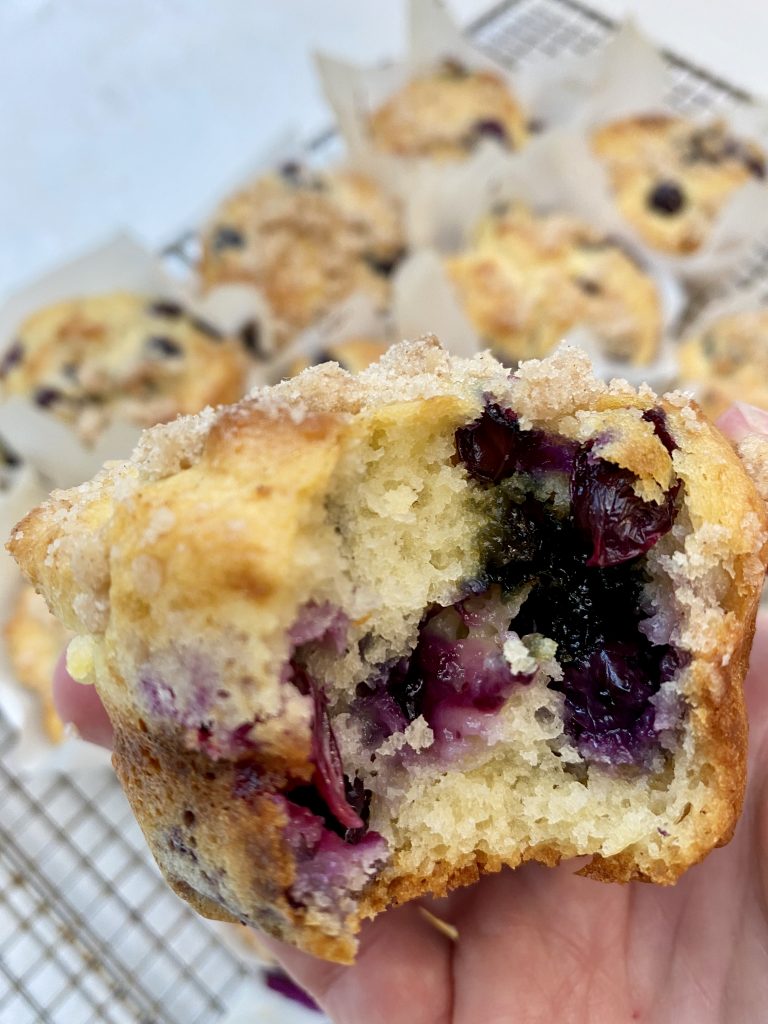
These Blueberry Lemon Muffins are decadently fluffy and loaded with blueberries. With just a hint of lemon zest and a crown of super tasty, crumbly streusel topping, these little treats are hard to resist. I love these gorgeous muffins served warm from the oven with a steaming cup of coffee.

For added visual appeal, skip the muffin liners and wrap each well of a muffin tin with parchment paper. Blueberry muffins come out of the oven looking so special and all dressed up for Sunday brunch.

Lemon Blueberry Streusel Muffins
Print Pin

Blueberry Lemon Muffins with Streusel Topping

Decadent, delicious and oh, so pretty. These blueberry muffins with lemon zest and a streusel topping will keep you coming back for more. This adaptable recipe works well with fresh or frozen blueberries. Try it with raspberries or blackberries too.
Course Breakfast, Dessert
Keyword Baking, Muffins
Prep Time 25 minutes minutes
Cook Time 20 minutes minutes
Servings 8

Equipment

  • muffin pan
  • parchment paper or muffin liners (optional)

Ingredients

Streusel Topping

  • ½ cup all-purpose flour
  • ¼ cup sugar
  • 1 tsp cinnamon
  • ½ tsp nutmeg
  • 3 Tbsp butter melted

Muffins

  • 2½ cups all-purpose flour
  • 1 Tbsp baking powder
  • 1 tsp baking soda
  • ½ tsp salt
  • 2 large eggs
  • 1 cup sugar
  • ½ cup butter melted
  • 1 tsp lemon zest
  • 3 Tbsp lemon juice
  • 1 cup whole milk or buttermilk I use Saco Buttermilk Powder
  • 1 Tbsp vanilla extract
  • 2 cups blueberries if using frozen, do not thaw

Instructions

Streusel Topping

  • In a medium bowl, whisk together the flour, sugar, cinnamon and nutmeg.
  • Drizzle in the melted butter and toss until crumbles form. Set aside.

Blueberry Muffins

  • Adjust the oven rack to just above center.
    Preheat oven to 400º.
    To make parchment paper liners cut 5" x 5" squares of parchment paper and line your muffin pan. (Check out this great how-to at The Kitchn)
    If not using cupcake/muffin liners, make sure to spray the cupcake tin generously with baking spray.
    Lemon Blueberry Streusel Muffins
  • In a large bowl, whisk together the flour, baking powder, baking soda, and salt. Set aside.
  • In a separate bowl, whisk together the eggs, sugar, melted butter, lemon zest, and lemon juice. Add milk/buttermilk and vanilla.
  • Gradually add the dry ingredients to the wet mixture and stir with a rubber spatula until just combined. Lumps are ok. Gently fold in the blueberries.
  • Divide the batter into the muffin cups (about 2½ Tablespoons in each) Top with extra blueberries. Evenly sprinkle streusel over each muffin.
  • Bake for 20-25 minutes at 400º. You can do a toothpick test at 20 minutes and see if it comes out clean.
    Remove from the oven and cool for 5 minutes before removing muffins from the pan.
  • Serve warm. In the rare chance that you have any left over, they will keep in the refrigerator for up to 1 week.

Filed Under: Baking, Bites and Tastes, Breakfast, Desserts

Sourdough Pancakes

May 10, 2020 by How Did You Cook That

Sourdough Pancakes

Anyone who knows me knows how much I love to bake bread. My friends and family are now used to the jars of fermenting yeast on my kitchen shelves. But sometimes, those jars of wild yeast seem to multiply and the discarded sourdough often gets…well…discarded.

I really hate that. Reuse, re-purpose, recycle is my mantra and I try to stick to that principle whenever I can. One of the ways I re-purpose my discarded wild yeast is to make sourdough pancakes. I feed my wild yeast starter in the morning, so using it for that day’s breakfast makes perfect sense to me.

If you make sourdough bread at home and have a starter or two on the shelf, try this recipe and see how you like the flavor of your pancakes. They are yeasty-good and a bit heavier than typical pancakes. That’s because sourdough starters are often fed with heavier flours like rye and whole wheat. You can always lighten it up a bit by adding less starter and a bit more all-purpose flour.

Sourdough Pancakes
Print Pin

Sourdough Pancakes

Prep Time 10 minutes minutes
Cook Time 10 minutes minutes
Total Time 20 minutes minutes
Servings 4
Cost $8

Ingredients

  • 2 large eggs
  • maple syrup
  • 1½ cups whole milk reduced fat is ok too
  • ¼ cup Greek yogurt or sour cream optional
  • 1 cup sourdough starter stirred down
  • 1 tsp vanilla
  • 1½ cups all-purpose flour also use whole wheat, einkhorn or any mix of flours you like
  • 1 tsp baking soda
  • 1 tsp baking powder
  • 2 tsp Kosher salt
  • ⅛ cup granulated sugar or raw, brown sugar-very lightly packed
  • ¼ cup (½ stick) butter melted

Instructions

  • Heat the maple syrup. Because pouring cold syrup over a stack of steaming hot pancakes makes no sense at all!
  • Sift together flour, baking soda, baking powder, salt, and sugar.
  • Beat eggs in a medium bowl. Add milk, yogurt or sour cream, sourdough starter, and vanilla to the eggs. Mix just to combine. Do not over mix.
  • Add dry ingredients to the egg mixture, stirring to combine. Lumps are ok. They help to create the pockets of air that make pancakes fluffy.
  • Stir in melted butter. Set bowl aside and wait about 30 minutes to let the batter rise a bit.
  • Make some coffee, gather up some toppings or take a shower. 🙂
  • Lightly spray a skillet and heat on medium high until sizzling. Turn heat down to medium and drop the batter in spoonfuls onto the skillet. Cook until light brown and bubbles start to appear on top, then flip to cook the other side, about 1 minute. Flip only once.
  • You might need to adjust the amount of milk depending on the stiffness of your sourdough starter and your preferred batter consistency. The above ingredients work well for my sourdough starter; if you’re using a stiff starter, you might want to add around 1/2 cup more milk.

Filed Under: Baking, Breakfast, Desserts

Chilaquiles Rojos with Eggs

May 7, 2020 by How Did You Cook That

Chilaquiles Rojos

Breakfast is my favorite meal of the day. And Mexican food is one of my favorite cuisines. So when I’m eating out, Chilaquiles Rojas is the first thing I order from the breakfast menu.

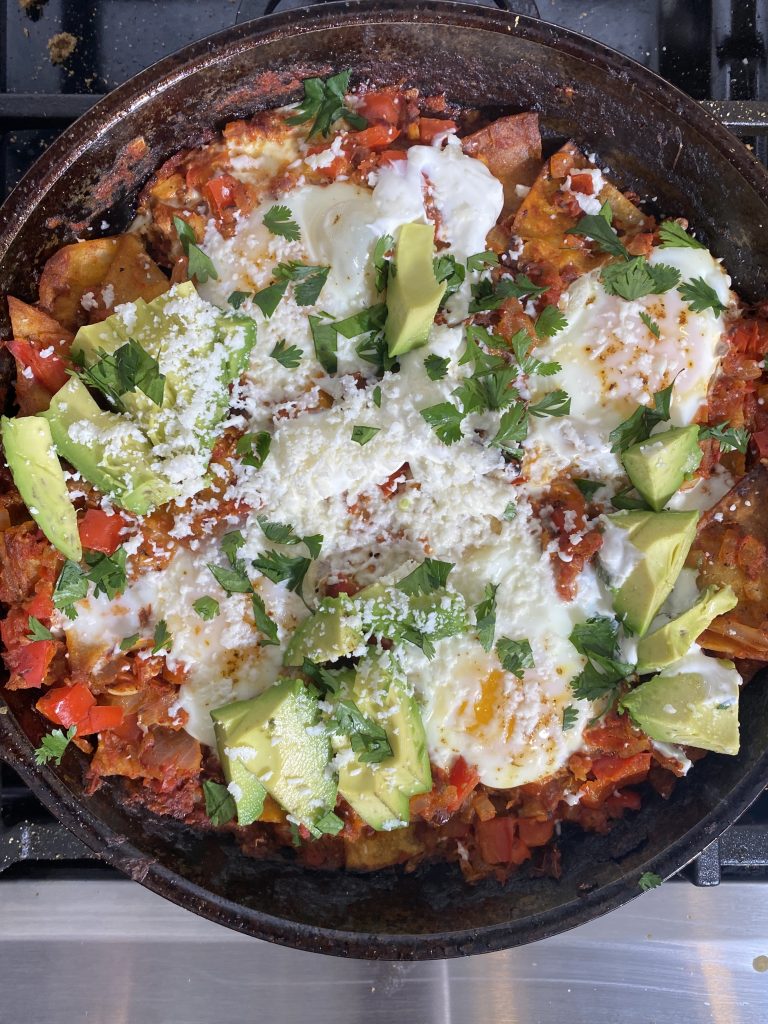
Crunchy tortillas surrounded by smoky red chili sauce and topped with fried eggs. Oh, and the crema and cotija drizzled over it. Seriously, the stuff dreams are made of.

Somehow I thought this dish was magical and must be prepared by angels in the kitchen. Then one day I created chilaquiles in my own kitchen and changed breakfast at home, forever. Holy smokes! These are so easy to make. Chilaquiles are totally customizable too. Egg or no egg, refried beans, shredded chicken, extra chiles and avocado. All are up for grabs. Just use whatever you’ve got on hand.

This chilaquiles recipe gets a bold flavor from charring the onions, tomatoes and garlic in the oven before adding it to the sauce. It’s the perfect dish to make for weekend guests, just waking up from a night of merriment (and a few cocktails).

Mix up a pitcher of Bloody Maria’s to go alongside this yummy meal and enjoy every single bite.

Chilaquiles Rojos
Print Pin

Chilaquiles Rojas with Eggs

The name Chilaquiles comes from the Nahuatl language, meaning chilis and greens. Fried tortilla triangles, rich red chile sauce, eggs and cream come together to make a delicious Mexican breakfast platter.
Course Breakfast, Brunch, Dinner
Cuisine Mexican
Keyword Chilaquiles, Eggs
Prep Time 30 minutes minutes
Cook Time 20 minutes minutes
Total Time 50 minutes minutes
Servings 4

Ingredients

  • 12 fresh corn tortillas
  • 1½ pounds (about 3) large tomatoes Roma tomatoes are fine too
  • 1 medium red onion
  • 1 whole head garlic
  • olive oil for drizzling over tomatoes and garlic
  • ¼ cup canola oil for frying tortillas
  • 1 can chipotle chiles in adobo remove 3 chiles and store the rest of the can for later
  • 1 Tbsp canola or peanut oil
  • 1¼ cup vegetable or chicken broth
  • 4 large eggs
  • 1 bunch fresh cilantro optional
  • 2 avocados optional
  • 1 pint Mexican crema or sour cream optional
  • 8 ounces queso fresco or cotija optional
  • refried beans optional

Instructions

  • Move an oven rack to the top position. Pre-heat oven to 400°.
  • Cut the top off of the garlic head and drizzle with a little olive oil. Set garlic in an oven safe dish and put in pre-heated oven for 5 minutes while you are prepping your tomatoes and onion.
  • Cut the tomatoes in half. Cut the onion into 1 inch wedges. Place in a 9 x 9 oven dish, drizzle with a little olive oil and put on the rack next to the garlic. Broil for another 15 minutes.
  • While the vegetables are roasting, cut tortillas into triangle shaped wedges. Heat ¼ cup of oil in an oven safe skillet until shimmering. Fry the tortilla wedges in batches until golden and crispy. Remove to a paper towel lined plate and set aside.
  • Remove vegetables from the oven and allow to cool for a few minutes.
    (Do not turn off the oven.)
    Press the garlic head and squeeze the cloves out of their skins.
  • Place tomatoes, onions, garlic cloves, 3 chipotles in adobo and ½ cup broth in a food processor or blender and pulse until just blended but not pureed.
  • Heat 1 Tbsp oil in a skillet and add the sauce to the skillet. Stir over medium heat for about 10 minutes adding broth as needed to get the sauce to the consistency of a juicy, chunky salsa.
  • Add the tortilla chips and stir carefully to coat the chips. Cook until the tortillas are heated through but not broken, about 3 minutes. Taste and season with salt as needed.
  • Make 4 little wells in the salsa. Break each egg into each well and cook for 1 minute, then place the skillet in the oven for another minute until eggs are cooked to your preference.
  • Remove from oven and serve hot from the skillet, family-style.
  • You can top it all with crema, cotija, cilantro, avocado, refried beans or anything else you like OR serve the toppings in bowls for your guests to make up their own plates.

Filed Under: Breakfast

Easy Banana Zucchini Bread

May 7, 2020 by How Did You Cook That

Banana Zucchini Bread

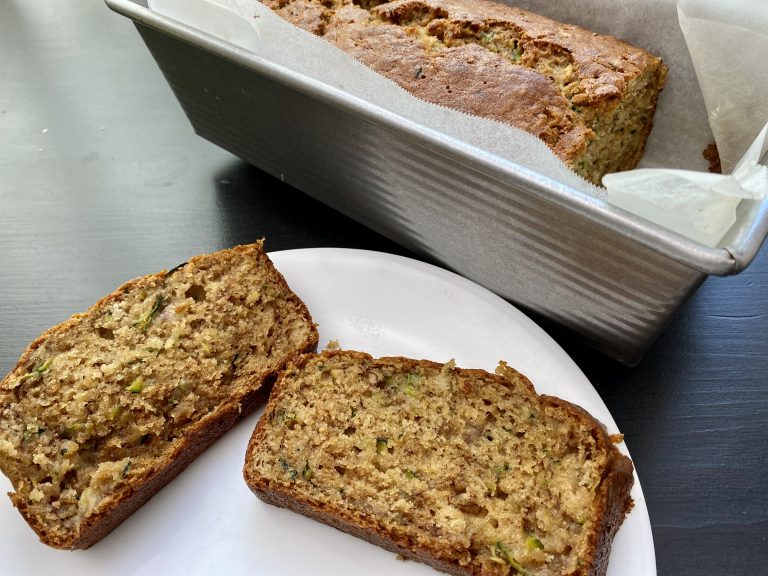
This Easy Banana Zucchini Bread recipe lives up to its name. And it’s so moist and delicious, you might just eat the whole pan in one sitting. 

This quick bread is easy to make and the added spices will make your kitchen smell heavenly. You’re gonna love this recipe.

Banana Zucchini Bread packs a one-two punch using your over-ripe bananas and the surplus of zucchini in the garden at the same time.

I love this time of summer in the garden.  It’s when I get to bake up loaves of delicious banana zucchini bread to share with friends.

Banana Zucchini Bread
Print Pin

Easy Banana Zucchini Bread

Easy Banana Zucchini Bread is the perfect way to use up all that zucchini in the garden plus any over-ripe bananas on the counter.
Course Brunch, Dessert, Snack
Keyword Banana, Cake
Prep Time 10 minutes minutes
Cook Time 50 minutes minutes
Total Time 1 hour hour

Ingredients

  • 1¾ cup all-purpose flour
  • 1½ tsp baking powder
  • ½ tsp baking soda
  • 1 tsp Kosher salt
  • 1 Tbsp ground cinnamon
  • ½ tsp cardamom
  • 2 ripe bananas
  • 2 cups grated zucchini
  • 3 Tbsp coconut oil
  • 2 large eggs lightly beaten
  • 1 tsp vanilla extract
  • ¾ cup granulated sugar

Instructions

  • Preheat oven to 355 °.
  • Prepare 9x5 bread pan. Cover with parchment paper and lightly coat with butter or baking spray. Dust with flour. Set aside.
  • In a bowl combine flour, cinnamon, cardamom, baking soda, baking powder and salt. Set aside.
  • In a medium bowl mix together sugar and eggs until well combined.
  • In a large bowl mash the bananas with a fork. Grate the zucchini and add to the bowl. (No need to press out the water from the zucchini. You want that for a super moist bread)
    Add sugar and eggs. Stir to combine. Add coconut oil and vanilla. Give it one more stir to combine all the ingredients.
  • Gradually add the flour mixture while stirring and mix together to combine. Don't over mix. It's ok if there are a few lumps.
  • Pour batter into prepared loaf pan. Bake 40-50 minutes until top is brown and slightly splitting. It should spring back when touched. Or do the toothpick thing and see if it comes out clean.
  • Let bread cool before slicing. This quick bread will keep in the refrigerator for about 4 days. It freezes easily and will keep frozen for up to 4 months.

Filed Under: Baking, Bites and Tastes, Breakfast, Desserts

Cinnamon Sour Cream Coffee Cake

March 13, 2020 by How Did You Cook That

Cinnamon Sour Cream Coffee Cake

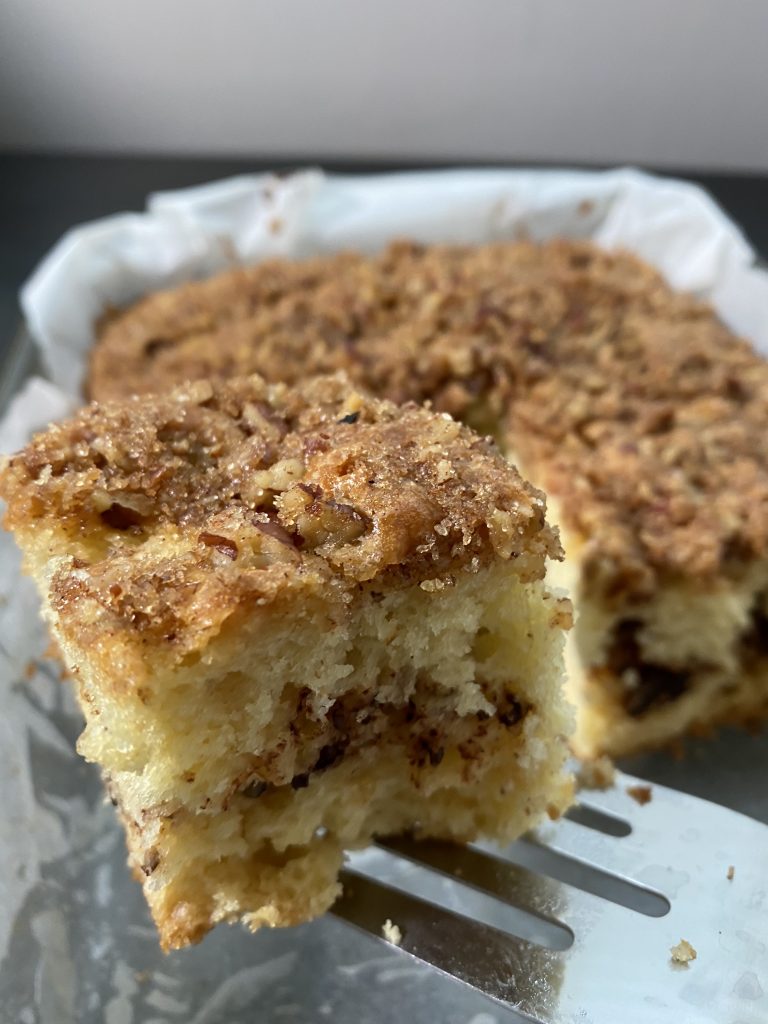
I baked up a pan of this cinnamon sour cream coffee cake on a rainy afternoon when I wanted…needed a sweet bite to nosh with my afternoon coffee. This cake is perfect for a quick afternoon baking sesh but it’s also ideal for brunch or an after-dinner treat.

Think of this cake as crumb cake meets quick bread. It’s a tender, not-too-sweet version of that little golden cinnamon cake that’s in the bakery case at Starbucks. This coffee cake is MUCH better and it’s always in stock. The cinnamon crumb topping is sprinkled inside and over the top, so it’s loaded with flavor and spice. There is  more than a cup of sour cream in this cake which makes it perfectly tender and moist. This cake will last in the refrigerator for up to 4 days. In my kitchen, it was gone before it had even completely cooled.

Cinnamon Sour Cream Coffee Cake
Print Pin

Cinnamon Sour Cream Coffee Cake

Make this tender and easy cinnamon sour cream coffee cake. Topped with pecans and cinnamon and blended with sour cream for a super moist, delicious cake.
Course Breakfast, Brunch, Dessert
Keyword Cake, Coffee, Sweet
Prep Time 15 minutes minutes
Cook Time 35 minutes minutes
Total Time 50 minutes minutes
Servings 8

Ingredients

Coffee Cake

  • 2 cups all-purpose flour
  • 1 tsp baking powder
  • 1 tsp baking soda
  • ½ tsp salt
  • 1¼ cups sour cream at room temperature
  • 1 cup granulated sugar
  • ½ cup salted butter (1 stick) at room temperature
  • 2 large eggs at room temperature
  • 2 tsp vanilla extract

Cinnamon & Pecan Crumb Topping

  • ¼ cup granulated sugar
  • ¼ cup brown sugar very lighted packed
  • 1½ cup pecan pieces chopped or crushed with rolling pin
  • 2 Tbsp butter VERY soft
  • 2 tsp ground cinnamon
  • ½ tsp ground nutmeg
  • ⅛ tsp cardamom

Instructions

  • Preheat oven to 350º.
    Spray a 9×13 baking dish with cooking spray. Set aside for later.
    In a medium bowl, combine the flour, baking powder, baking soda, and salt and whisk; set aside.
  • In a small bowl toss together the brown sugar, ¼ cup of granulated sugar, pecans, cinnamon, salt, nutmeg, cardamom and melted butter. Set aside.
  • In a medium bowl, combine the flour, baking powder, baking soda, and salt and whisk. Set aside.
  • In a mixer beat the butter and sugar together on medium speed for 2-3 minutes until the mixture is light and fluffy.
    Add the eggs one at a time, fully mixing before adding the next egg. Add the vanilla.
    Mix on medium-low, and add one-third of the flour mixture. Combine well, then add half of the sour cream. Alternate dry ingredients and sour cream blending well between each, adding another one-third of the flour mixture. Add the remaining sour cream, and finally the last portion of the flour mixture. Batter will be quite thick.
  • Spoon about half of the batter into the prepared baking dish.
    Then sprinkle half of the set aside cinnamon pecan mixture evenly over the batter.
    Drop the remaining cake batter in dollops over the cinnamon pecan mixture and carefully spread to cover.
    Sprinkle remaining cinnamon pecan mixture on top of the cake batter.
  • Bake the cake for 35-40 minutes or until a toothpick comes out without any wet cake batter.
    Remove from the oven and allow the cake to cool before slicing and serving.

Filed Under: Baking, Bites and Tastes, Breakfast, Companions, Desserts

Fluffy Buttermilk Pancakes

January 24, 2020 by How Did You Cook That

Fluffy Buttermilk Pancakes

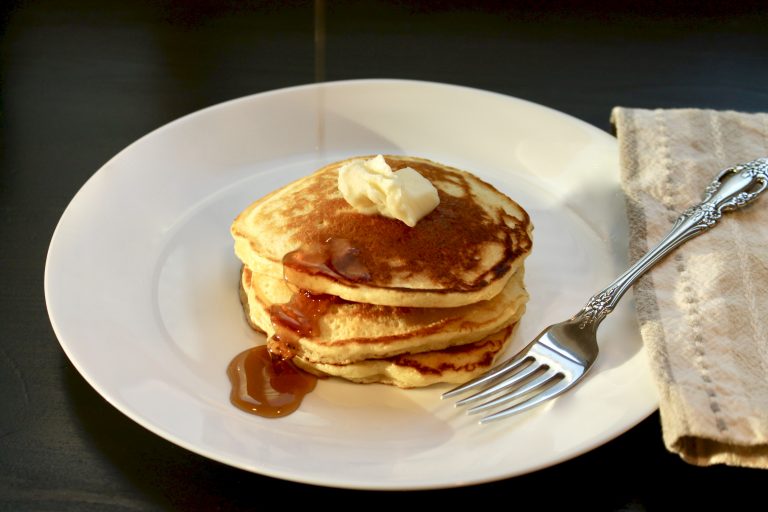
These satisfying pancakes turn out incredibly fluffy and delicious with very little effort. Separating the eggs and using buttermilk may, at first glance, make this recipe appear daunting but stick around, it’s not as complicated as all that.

It seems like every time I’m in the mood for buttermilk pancakes there is no buttermilk in the refrigerator. Well I’m here to tell you, I’ve figured out some solutions to that problem. Options include:

  1. Mix 2/3 cup plain Greek yogurt with milk to equal 1 cup of liquid.
  2. Mix 1 Tbsp of lemon juice with 1 cup of milk.
  3. Keep a container of powdered buttermilk (from the Saco Pantry) in your fridge for just such a moment as this. You can find it in the baking aisle of your local grocery store.

When you get to the egg separating step…just separate the egg. That’s it. No whisking, no frothing no beating. Just separate and set aside for a minute.

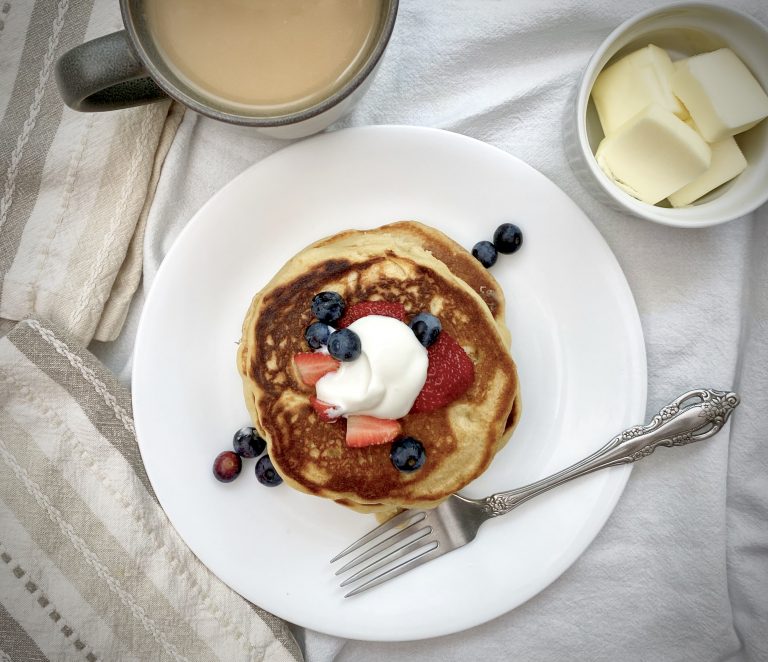
Be sure to heat your maple syrup before serving. Why go through the motions of whipping up a batch of fluffy yummy hotcakes just to throw cold refrigerated maple syrup at them? Heat it up. Eat ’em up.

Fluffy Buttermilk Pancakes
Print Pin

Fluffy Buttermilk Pancakes

These satisfying pancakes turn out incredibly fluffy and delicious with very little effort.
Course Breakfast, Brunch
Keyword Buttermilk, Pancakes
Total Time 30 minutes minutes
Servings 2

Equipment

  • Skillet

Ingredients

  • 1¼ cup all-purpose flour
  • 1 Tbsp sugar
  • 1 tsp Kosher salt
  • ½ tsp baking powder
  • ½ tsp baking soda
  • 1 large egg, separated
  • 5 Tbsp unsalted butter, melted and at room temperature
  • 1 cup buttermilk
  • ¼ cup milk
  • maple syrup
  • spray oil or canola for pan

Instructions

  • Combine flour, sugar, salt, baking powder, and baking soda in a large bowl.
  • In a separate smaller bowl, combine the egg yolk, buttermilk, and milk. Stir together to mix. Add the melted butter and whisk until well combined.
  • Pour the milk mixture into the flour mixture and stir until just combined. Add the egg white (no whisking needed) and stir together to make a thick batter. (Do not over-mix. Small lumps provide pockets of air that lift the pancakes to heavenly fluffiness.) Set batter aside for 5 minutes.
  • Heat a large skillet over medium-high heat. When hot, lightly brush canola oil over pan. After about 20 seconds, when the oil just starts to shimmer, lower the heat to medium-low and drop in 2-3 spoonfuls of pancake batter for each pancake.
  • Cook for about 2 minutes. When the batter gets bubble-y, it's close to flip time. Lift up an edge of one pancake to see if it's golden brown, then flip and cook on the other side for 2 to 2 more minutes.
  • Remove to plates and serve with your favorite toppings or hot maple syrup.
  • Note: If you want to add blueberries or chocolate chips to the recipe, just drop them in when you add the milk mixture to the flour.

Filed Under: Breakfast

  • Page 1
  • Page 2
  • Go to Next Page »

Primary Sidebar

Hi food lovers. Welcome to my kitchen.

If you're looking for simple dishes made with wholesome, seasonal ingredients, you've come to the right place. Grab a fork and take a bite. Dig In →

Coriander Seeds
Strawberry Rhubarb Galette
Coconut Peach Popsicles

Categories

Favorite Resources

Cook Books

What’s New

  • Roasted Garlic Tomatoes with Thyme
  • Crisp Green Salad with Sweet Honey Vinaigrette
  • Number One Ice Cream
  • Street Corn Soup
  • Egg In A Jar

Footer

  • Email
  • Facebook
  • Instagram
  • YouTube

Find Recipes

Never Miss a Recipe

Copyright © 2025 How Did You Cook That on the Foodie Pro Theme