• Skip to primary navigation
  • Skip to main content
  • Skip to primary sidebar
  • Skip to footer

How Did You Cook That

  • Recipes
    • Main Dishes
      • Street Corn Soup
      • Maple Ginger Chicken and Asparagus
      • Homemade Gnocchi with Garlic and Parmesan
      • Loaded Baked Potato Soup
      • Beef Bourguignon
      • Grilled Salmon Tacos
      • Thai Inspired Shrimp Curry Soup
      • Chicken and Sausage Gumbo
      • Cast Iron Skillet Pizza
        • Vegetarian
          • Creamy Sweet Potato Curry
          • Pan Tossed Vegetarian Noodles
          • Zucchini & Mushroom Bucatini
          • Stir Fried Baby Bok Choy
          • Roasted Red Pepper and Tomato Soup
          • Potato Leek Soup
          • Portobello “Steak” and Potatoes
          • Cheesy Cauliflower & Carrot Soup
    • Companions
      • Roasted Garlic Tomatoes with Thyme
      • Crisp Green Salad with Sweet Honey Vinaigrette
      • Zucchini Fritters
      • Easy Flat Bread
      • Animal Style French Fries (Copy Cat Version)
      • Cheesy Jalapeno Cornbread
      • Buffalo Cauliflower Bites
    • Breakfast
      • Chilaquiles Rojos with Eggs
      • Sour Cream and Onion Biscuits
      • Dutch Baby with Blueberries
      • Blueberry Lemon Muffins with Streusel Topping
      • Egg In A Jar
      • Creamy Acai Bowls
      • Baked Irish Oats with Cream
      • Fluffy Buttermilk Pancakes
      • Original French Crepes
      • Vanilla Spiced Overnight Oats
      • Seriously Delicious Waffles
      • Southern Buttermilk Biscuits
    • Sauces
      • Creamy Thousand Island Dressing
      • Spicy Mango Salsa
      • Favorite Avocado Recipes
      • Loquat Marmalade
      • Adobo Chile Aioli
    • Desserts
      • Number One Ice Cream
      • Loaded Trail Mix Cookies
      • Toasted Candied Pecans
      • Angel Food Loaf Cake
      • Easy Banana Zucchini Bread
      • Triple Chocolate Cake with Whipped Ganache Frosting
      • Key Lime Cheesecake
      • Cinnamon Sour Cream Coffee Cake
      • Zach’s Chocolate Chip Cookies
      • Strawberry Rhubarb Galette
      • Spiced Cheesecake
      • Berry Fruit Crumble
      • Banana Cinnamon Crunch Bread
    • Thirst Quenchers
      • The Forager Cocktail
      • Cucumber Cilantro Gin Tonic
      • Sunrise Glow Smoothie
      • Three Day Ginger Beer
  • Experiences
    • Los Angeles Pop Ups – Zoe Food Party
    • Los Angeles Bread Crawl
    • The Great Outdoors (A Basic Pantry List)
  • Food Muse
    • A Note About Sugar
    • No More Plastic!
    • Best Buttermilk Substitutions
    • Prepping and Storing Cilantro
    • Home Roasted Coffee
  • Sugar Loaf
    • How to Feed a Sourdough Starter
    • Sourdough Pancakes
    • Sourdough Country Bread Loaf
  • About
  • Navigation Menu: Social Icons

    • Facebook
    • Instagram

Baking

A Note About Sugar

February 26, 2020 by How Did You Cook That

Brown Sugar

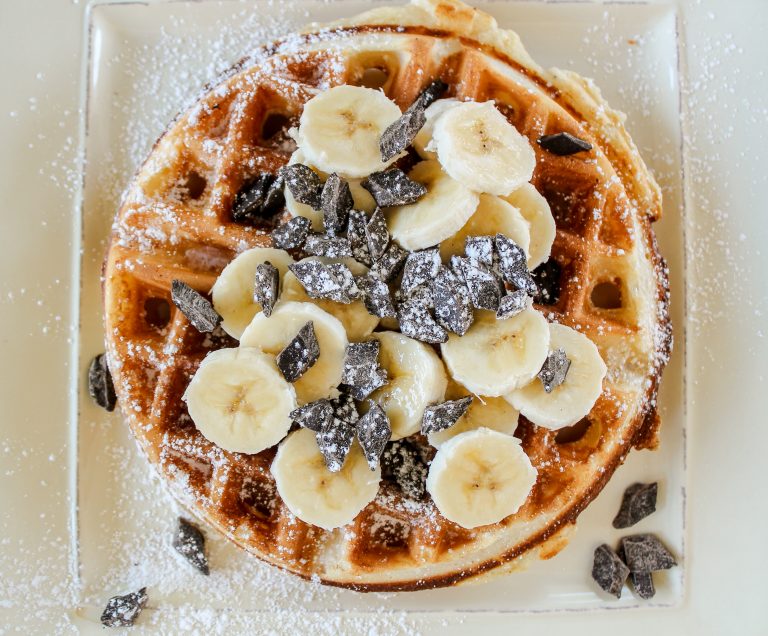
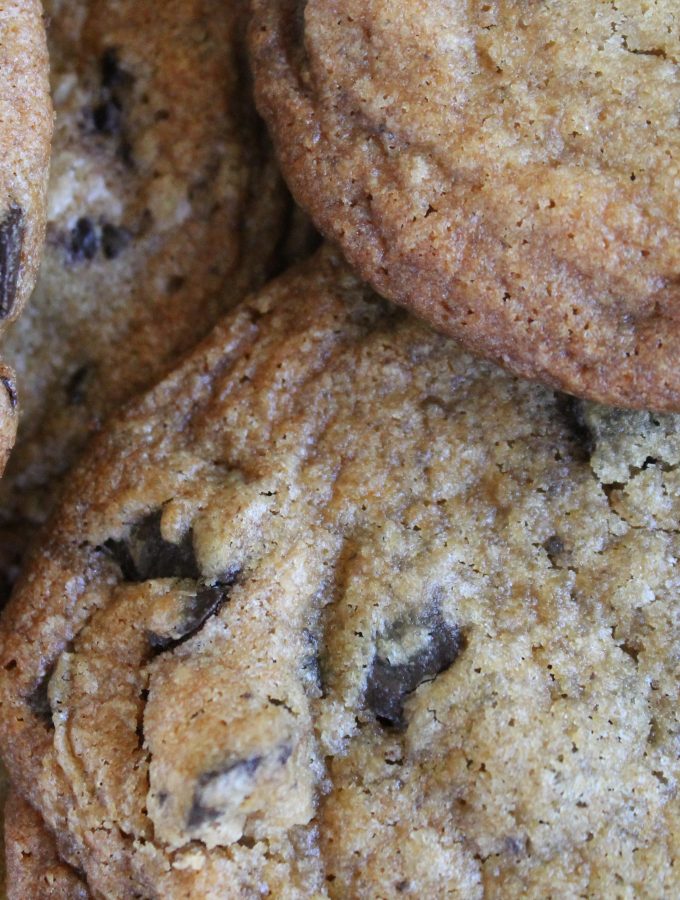
I love making, and eating,  desserts. If it’s sweet, I’m in. Ice cream, cookies, pies and cakes. Oh, yes! Brown sugar swirled around in a creamy cup of coffee; give me more! The truth is, sugar seduces me.

Too often I take sugar’s availability for granted, not considering its origins. But know this: there is a dark underbelly to sugar.

My BFF likes to say; “Once you know better, you do better.” It’s a piece of a Maya Angelou quote. So now I know better, and for that reason, I try to do better. I’ve heard the truth about sugar’s origins.  And now I work to make responsible choices when sweetening my own recipes.

Sugar’s dark history is not that well-known. In fact, there are times that it’s ignored for the sake of satisfying our all too common human addiction. Who wants to be interrupted mid-lick into a chocolate ice cream cone by thoughts of human trafficking and forced labor? Very few people want to talk about the sugar industry’s dark side.  Furthermore, there are people who argue about sugar’s origins and defend it’s sordid past. And when I set out to learn more, I found that there wasn’t much information published on the subject.

History tells the story of tens of thousands of slave ships carrying millions of captive Africans to the New World. Many who survived the brutal journey were, at once, forced to plant, grow, cut, and process endless fields of sugar cane for harvest. All for the plantation owner’s profit.

In America, the sugar industry shaped systems of labor and capital from the very beginning of slavery.

In the early years of America’s foundation, sugar plantations exploded all along the Mississippi River. This development happened partly because of the abundance of rich alluvial soil, partly because of the arrival of knowledgeable European planters, and totally on the beaten down, backs of enslaved men, women and children. Understanding history should teach us to be better, however, in this case, it has not. The inhumane reality is this: Forced labor advanced the profits of the sugar industry and is still advancing those profits today.

Currently, in the Dominican Republic, tens of thousands of Haitians toil to produce sugar in labor camps under the watchful eyes of armed guards. Haitian laborers grow and harvest sugarcane for less than $1 per 12 to 14-hour workday. Promises of steady pay entice thousands to cross the border into the DR each year, right into the hands of traffickers. They are often starving, stripped of citizenship papers, and forced to work in slave-like conditions producing cane juice for export to sugar factories, candy makers, markets and restaurants around the world.

Once I knew about this devastating human story I started to pause every time I put something sweet in my mouth. I had become aware that the economic powerhouse built on the exploitation and abuse of enslaved human beings was my regular resource for the essential ingredient I used in my own recipes. My ideas about sugar turned from sweet to bitter in an instant.

United States sugar farming is heavily subsidized. 80% of the sugar we consume is produced domestically. Production in the US often involves large amounts of herbicides and pesticides, and contributes to air pollution and contaminated water. Bad for our bodies, bad for our planet.

So, what is my response to this?  Do I want to continue using sugar at all?  If I do use sugar, where can I go to buy it?  What are the alternatives?

The good news I found for myself is this: the US does import about 20 percent of its sugar from tropical and developing countries. And much of that sugar is organic and sustainably farmed. Good to know. However, sugar cane farmers in less developed countries experience very low world market prices, which leads to poverty and malnutrition. Not good for them.

So, then, what IS the good news? Fair Trade.

I discovered that purchasing sugar products from farmers in developing countries who have a Fair Trade certification can help promote economic and environmental stability. Authentic Fair Trade products are stamped with a certificate right on the package, just like organic certification. And, of course, you can confirm on the world wide web that the product you are interested in purchasing is the real deal.

When buyers committed to Fair Trade products, pay farmers a fair price, that allows the farmers to care for their families and invest in organic and sustainable agriculture training and certification.

It’s taken me some hunting and a willingness to pay a little more for the sugar products I buy. No more blinding white Domino sugar for me. Today I work to do better, learn more and to be kinder to my fellow humans and planet Earth. And everyday I am open to new challenges and applying change to the way I think and act.

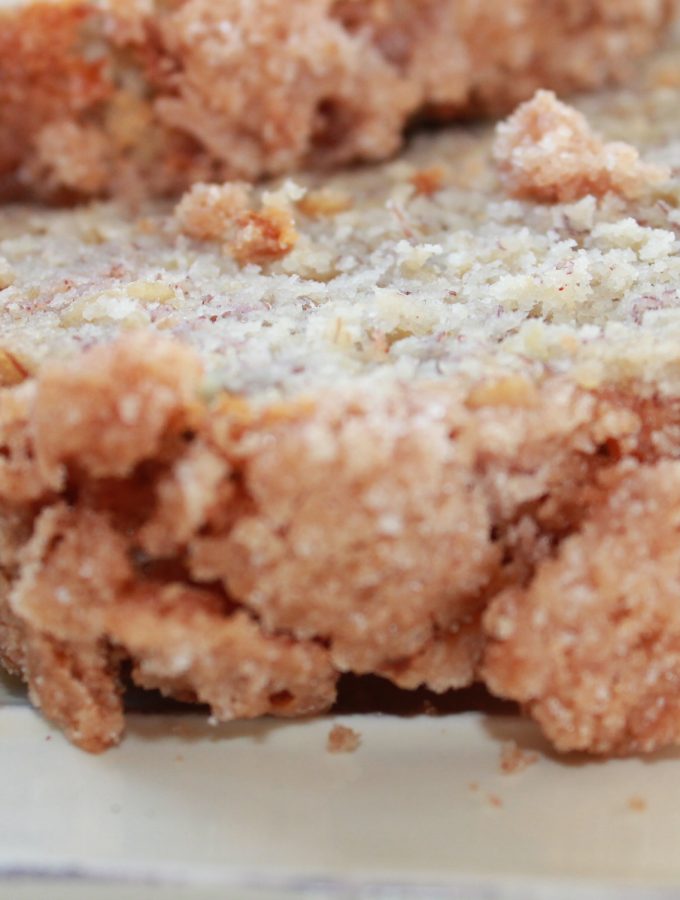
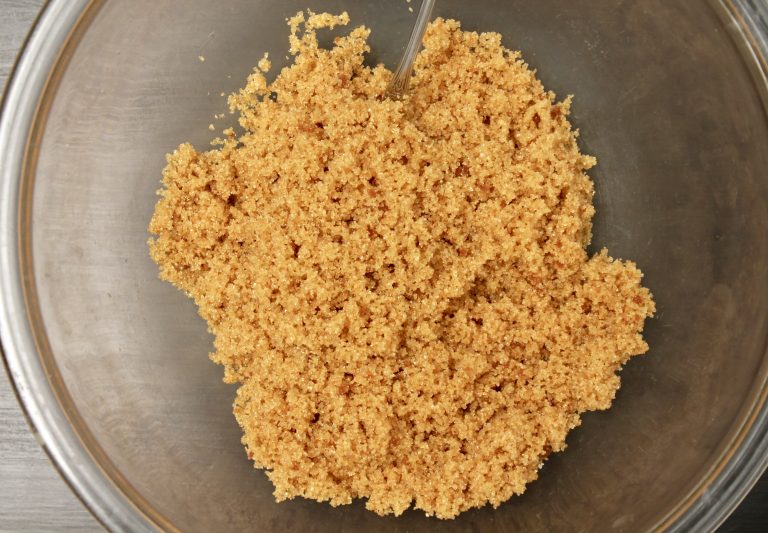
Currently I am using Wholesome Organic Sugar products. Their sugar and molasses is delicious, pure and clean. Their products are grown by farmer-owned cooperatives in Paraguay, Costa Rica, Peru, Malawi, Zambia, and the Philippines.

If you are committed to cooking and baking with Fair Trade products and using organic sugar, I’d love to hear about it and what you are using and enjoying.


Filed Under: Baking, Desserts

Strawberry Rhubarb Galette

January 10, 2020 by How Did You Cook That

Strawberry Rhubarb Galette

The first time I saw a galette prepared was on a show with Martha Stewart. Of course, Martha just rolled out this simple, rustic flat tart in no time. All the while calling it a galette. A what? It sounds so…FRENCH, doesn’t it? 

A galette is a French pastry similar to a tart or a pie. It’s essentially pastry dough wrapped over a filling made from fruit, sugar, and butter. No pie pan required; just a flat baking sheet or stone.  This strawberry rhubarb galette really is as simple as Martha Stewart made it look on camera.

Every spring food blogs picturing beautiful galettes pop up all over the internet.  I love how rustic and golden brown they look. Oozing with juicy fruits of all kinds. This particular recipe uses strawberries and rhubarb, but any fruit that you have in season will work perfectly. The crust, or “pate brisee”, is quick to make. It can be made ahead and keeps in the fridge for up to 3 months.

A rustic fruit galette is the perfect treat to make when you have more fresh fruit than you know what to do with. Easy, delicious and decadent served on a warm day topped with a scoop of homemade ice cream.

Strawberry Rhubarb Galette
Print Pin

Strawberry Rhubarb Galette

The recipe for the galette crust is adapted from Martha Stewart's Pate Brisee. It is a great one to have on hand for most of your quick pastry recipes. The fresh fruit is just "icing on the cake".
Course Dessert
Keyword Baking, fruit, Pastries
Total Time 1 hour hour 15 minutes minutes
Servings 8

Equipment

  • Baking Sheet
  • Parchment Paper
  • Food processor

Ingredients

Pate Brisee - 1 Pastry Crust

  • 1¼ cups all-purpose flour
  • 1 tsp salt
  • 1½ tsp sugar
  • ½ cup unsalted butter 2 sticks, chilled and cut into small pieces
  • 3-4 Tbsp ice water

Fruit Filling

  • 1½ cups sliced strawberries
  • 1½ cups rhubarb cut on the diagonal into 1 inch pieces
  • ¾ cup granulated sugar plus extra for dusting crust
  • 1 egg beaten
  • 1 tsp salt
  • 1 tsp vanilla
  • 2 Tbsp fresh lemon juice
  • 1 Tbsp lemon zest
  • 3 Tbsp rolled oats

Instructions

Galette Dough

  • In a food processor, combine flour, salt, and sugar. Add butter, and pulse until the mixture resembles coarse meal, 8 to 10 seconds.
  • With machine running, add ice water in a slow, steady stream through feed tube. Pulse until dough holds together without being wet or sticky; be careful not to process more than 30 seconds. To test, squeeze a small amount together: If it is crumbly, add more ice water, 1 tablespoon at a time.
  • Form dough into a ball. Flatten ball into a disc and wrap in plastic. Transfer to the refrigerator and chill at least 1 hour. Dough may be stored, frozen, up to 1 month.

Fruit Filling

  • Mix together sugar, salt, lemon juice and lemon zest. ( 1 or 2 Tbsp of bourbon or Grand Marnier are a delicious option here, if you like)
  • Leave the fruit to macerate in the sugar for about an hour.
  • Drain the liquid and reserve.
  • Stir the vanilla into the fruit.
  • Roll out the cold dough on a lightly floured surface. Roll into a large, round-ish circle about ¼ inch thick. Do not worry if it's not perfect.
  • Preheat the oven to 350°
  • Line a baking sheet with parchment paper.
  • Place dough on the baking sheet and sprinkle bottom of with rolled oats. (The rolled oats will absorb the fruit juice so you will not have a soggy crust.)
  • Spoon the fruit into the middle of the dough leaving a 2-inch border. Fold the edges into the center and over the fruit.
  • Brush folded dough with the egg wash. Dust with about a tablespoon of sugar and bake for approximately 45 minutes, or until the center is bubbly and the edges of the crust are golden brown.
  • While the galette is baking, take the reserved juices and heat in a saucepan until very thick.
  • Remove the baked galette from the oven and drizzle with the reserved syrup.
  • Serve warm, or room temperature.
  • Galettes are completely adaptable. Simply swap out the strawberries and rhubarb for any fruit that is in season.
    Blueberry Galette

Filed Under: Baking, Desserts

Baked Irish Oats with Cream

January 8, 2020 by How Did You Cook That

Oatmeal Steel Cut Oats

Adapted from NYT Cooking recipe contributor, Melissa Clark, this baked Irish oatmeal is a serious home run. The aroma and creamy texture are like a southern-style rice pudding. For that reason this oatmeal is almost like eating dessert for breakfast.

Your mouth will water when you pull these oats hot from the oven. Farm fresh butter, golden cream and caramelized sugar make this is a decadent breakfast or brunch treat.  The recipe calls for toasting the oats in butter before baking them. This gives them a wonderful nutty flavor and aroma. Vanilla, fresh-grated nutmeg, cardamom and cinnamon add flavor and depth making this baked oatmeal a true crowd-pleaser

Oatmeal Steel Cut Oats
Print Pin

Baked Steel Cut Irish Oats with Cream

Baked Steel Cut Irish Oats with Cream
Course Breakfast, Side Dish
Keyword Baking, Cereal, Oatmeal
Total Time 1 hour hour 30 minutes minutes
Servings 4

Equipment

  • 3 Quart Baking Dish

Ingredients

  • 3 1/2 Tbsp salted butter or vegan butter (I like Miyoko's and Earth Balance) plus extra for greasing baking dish
  • 3 1/4 cups boiling water
  • 1 cup steel-cut oats
  • 1/2 cup heavy cream or coconut cream for a scrumptious vegan alternative plus more for serving
  • 1/2 cup coarse Demerara sugar or brown sugar
  • 1 tsp fresh grated nutmeg
  • 1 tsp cardamom
  • 1 tsp cinnamon
  • 1/2 tsp Kosher salt

Instructions

  • Heat oven to 375 degrees. Butter a 3-quart round or square baking dish.
  • Cut 1 Tbsp butter into small cubes, and put them in the refrigerator until needed.
  • In a large skillet, melt remaining 2 1/2 Tbsp butter. Add the oats and sauté until they smell nutty and toasted, 2 to 4 minutes. Stir in the nutmeg, cardamom and cinnamon, and sauté for another minute, until fragrant. Spoon oats into the buttered baking pan and stir in the boiling water, cream and salt. The mixture will be very soupy.
  • Bake oats for 40 minutes, then give them a stir. They should still be a bit soupy. Sprinkle sugar all over the top of the oats. Toss in cubed butter pieces. Continue to bake for 15 to 20 minutes longer, until the top is glazed and bubbling.
  • Sprinkle oatmeal with toasted pecans, bananas or flaky sea salt, if you like. Serve oats with cream and sugar on the side.

Notes

I assembled these oats the night before, mixing all of the ingredients together up through step 3.
Refrigerate oat and cream mixture overnight. In the morning put baking dish of oats in 375 degree oven and bake for an extra 10 minutes than the recipe says.

Filed Under: Baking, Breakfast, Companions

Seriously Delicious Waffles

June 10, 2019 by How Did You Cook That

Breakfast Waffles

In my family waffles are a huge favorite. When I was a kid I grew up on Mom’s Bisquick waffles with warmed Log Cabin syrup. She had this really cool round cast iron waffle maker. It was one of her “signature” kitchen appliances. It was a cool tool that, on it’s own, delivered ok waffles but they were lacking the loftiness and crispy-on-the-outside goodness that I had tasted for a treat at Sunday brunch buffets.

When I left home I had no idea that “other cooks” made waffle or pancake mix from scratch. I thought all hotcakes and waffles came from a box in the baking aisle at the grocery store. And my own results at home were underwhelming, leaving me with soft, flimsy cakes that just passed as breakfast or an occasional dinner when pressed for time. Boring, in other words.

Then it hit me that I needed to up my game on this old favorite. The kids always loved them but they, like me, didn’t know better at the time. My quest for more led me to this, now basic building block for every waffle that is made in my kitchen. These waffles are perfect, light, lofty and deliciously crispy on the outside. No more flimsy. No more soggy.

I use real maple syrup now too. And just like those early days of Bisquick and Log Cabin, the syrup on my table is still heated and still served warm.

Seriously Delicious Waffles
Print Pin

Seriously Delicious Waffles

These are the loftiest, crispiest, easiest waffles ever. The mix works well for pancakes too. Just leave out the cornstarch.
Course Breakfast, Dessert, Dinner
Keyword Baking, Waffles
Total Time 20 minutes minutes
Servings 4

Equipment

  • Waffle Iron

Ingredients

  • 1 cup all-purpose flour
  • 2/3 cup cornstarch
  • 1/2 tsp baking powder
  • 1/4 tsp baking soda
  • 1 tsp salt
  • 1 1/4 cup buttermilk
  • 1/3 cup vegetable oil
  • 2 eggs
  • 2 tsp sugar
  • 1 tsp vanilla extract
  • 1/2 tsp nutmeg
  • Butter - for spread
  • Pure maple syrup - for serving
  • Powdered sugar - for serving
  • Fresh fruit - for serving
  • Chocolate syrup or chocolate chips - for serving

Instructions

  • In a mixing bowl combine the flour, cornstarch, baking powder, baking soda and salt. Mix briefly to combine.
  • Add the buttermilk, vegetable oil, eggs, sugar, vanilla and nutmeg. Mix well.
  • Warm your maple syrup. Pre-heat the waffle iron. DO NOT oil your waffle iron. there is plenty of oil in the batter to keep these lovelies from sticking.
  • Pour yourself a cup of coffee and catch up with your kids or your sweetheart while you let the batter sit and ferment for 30 minutes.
  • Pour about 1/4 cup of batter onto your heated waffle iron. Follow cooking instructions for your particular model.
  • Serve with whatever your heart desires. Simple goodness with warmed maple syrup is my go-to, but whatever you've got on hand will do nicely to make this a special treat. Try whipped cream, fresh fruit, chocolate, fried chicken and spicy Korean seasonings. Pretty much anything goes. Eat long and prosper.

Filed Under: Baking, Breakfast, Desserts, Main Dishes

Banana Cinnamon Crunch Bread

May 9, 2019 by How Did You Cook That

Bread Dessert Bake

Have you got some bananas ripening to a golden brown on your counter? Well then, it’s time for some banana bread.

This crunchy-topped loaf of banana bread is the best thing since…well, you know. Cinnamon crunchy goodness on top of sweet gooey banana and cinnamon filling is so good!  This bread has some chewiness to it, created by the oats added to batter. Cinnamon, banana and oats come together for scrumptious twist on an all-time favorite quick bread.

Bread Dessert Bake
Print Pin

Banana Cinnamon Crunch Bread

Banana Bread with a crunchy cinnamon topping
Prep Time 15 minutes minutes
Cook Time 1 hour hour
Servings 8
Calories 225kcal

Ingredients

  • 3-4 Ripe bananas
  • 2 large eggs
  • 1/3 cup coconut milk Substitute cow's milk if coconut milk is unavailable
  • 1/4 cup canola oil
  • 1 tsp pure vanilla
  • 1 1/2 cup all-purpose flour
  • 3/4 cup quick oats For a nuttier, chewier version, use regular rolled oats
  • 2/3 cup sugar Granulated
  • 2 tsp baking powder
  • 1/4 tsp baking soda
  • 1 tsp Kosher salt
  • 1/2 cup OPTIONAL: chopped pecans or walnuts

Topping

  • 1/2 cup brown sugar, loose, not packed Granulated sugar will work for this step too
  • 1/4 cup all-purpose flour
  • 2 Tbsp softened butter
  • 1 1/2 tsp cinnamon

Instructions

  • Preheat oven to 350°
  • Grease 9x5 loaf pan with butter.
  • In a medium bowl combine flour, oats, sugar, baking soda, baking powder, salt.
  • In a large bowl mash the bananas then combine eggs, coconut milk, vanilla and canola oil.
  • Add dry ingredients to the wet mixture and stir until just combined.
  • Make the topping by combining flour, cinnamon, butter and sugar and mix until it resembles wet sand.
  • Pour half of the batter into loaf pan.
    Sprinkle half of cinnamon mixture over the top.
    Cover with remaining batter.
    Sprinkle remaining cinnamon topping over the batter.
  • Bake at 350° for 50-60 minutes. Stick in a toothpick and see if it’s clean.

Filed Under: Baking, Breakfast, Desserts

Southern Buttermilk Biscuits

April 28, 2019 by How Did You Cook That

When I first moved out of my parent’s home and ventured out on my own I was armed with packages of Top Ramen and blue boxes of Kraft macaroni and cheese. Seriously. That was the extent of my cooking knowledge. 

Then I moved to Houston where the women were incredulous that I didn’t know a thing about baking biscuits, let alone roll out the dough. They quickly set out to instruct me in the fine art of southern biscuit making. I wasn’t the best student but one thing I did learn was that 85 year old Texas women swear like no women I had ever met before.  I never did bake biscuits that resembled anything but 10 year old hardtack.

Then one day…

I was visiting my daughter and she started baking up biscuits for breakfast. Just like that! Pulling out flour and butter and rolling out dough like she does this every morning. What?! She can make biscuits? I had to have her teach me the sacred magic.

We pulsed, patted, rolled, cut and laughed for hours at the memories of our beloved Nanno yelling at each of us in the kitchen whenever we couldn’t master her “simplest” recipes.

And guess what? I actually baked this flaky delectable treat on the first try. It is so easy, so quick and tastes like heaven dripping with honey or fresh berry preserves. Load them with peaches and cream and you’ve got the best summer dessert on the block.

Please let me know about your experience baking these biscuits. Or any other family food experiences that make you smile.

Print Pin

Southern Buttermilk Biscuits

Perfect buttery, flaky biscuits that are high and lofty. These traditional southern biscuits come out just right, every time.
Course Breakfast, Dinner, Lunch
Keyword Baking, Biscuits
Total Time 30 minutes minutes
Servings 8

Ingredients

  • 2 1/2 cup all-purpose flour
  • 1 cup cold buttermilk
  • 1 1/2 Tbsp baking powder
  • 1 tsp salt
  • 1 tsp sugar
  • 8 Tbsp unsalted butter frozen and cut into cubes
  • 2-3 Tbsp salted butter melted, for brushing on top

Instructions

  • Preheat oven to 425°.
  • Sift flour, baking powder, sugar and salt into a large mixing bowl. Transfer to a food processor (or leave in the bowl and cut butter in by hand with a pastry blender or two butter knives). Add cubed frozen butter and pulse 6 or 7 times until it becomes a loose crumble. Place crumbled dough back in large mixing bowl, dig a little "well" into the center of it, add buttermilk and stir with a spatula until it forms a rough ball. The dough will be a little sticky.
  • Turn the dough out onto a floured surface and roll it into a rough rectangle, about an inch thick. Fold it over and gently roll it down again. Repeat 6 times.
  • Roll out the dough one more time into a rectangle. Cut dough into round biscuits using a floured drinking glass or biscuit cutter. PRESS CUTTER STRAIGHT DOWN INTO DOUGH. Do not twist cutter because it will crimp the edges of the biscuit tight and it will not rise. Your biscuits will be flat, not flaky. Press leftover dough together and roll again to make additional biscuits until dough is used up.
  • Place biscuits on a baking sheet and into the pre-heated 425° oven. Make sure biscuits are touching each other. Bake until golden brown, for about 15 minutes. Remove from oven, brush with melted butter and serve warm with honey or fresh fruit preserves.

Filed Under: Baking, Breakfast

Spiced Cheesecake

April 28, 2019 by How Did You Cook That

baking cheesecake dessert

This Spiced Cream Cheesecake looks like a million bucks and tastes even better. It is a dessert that is far easier to pull off than it looks and when I share it at parties there is more than one comment of, “Look! Someone brought a cheesecake from Cheesecake Factory!” But you’ll have the last laugh when that same guest takes a bite and says, “Oh! This is 1,000 times more delicious than ______________________!”

I top my cheesecake with sweet sour cream because my mom and grandmother topped their cakes that way. Some traditions are tough to let go of.

baking cheesecake dessert
Print Pin

Spiced Cheesecake

Spiced Cheesecake with a ginger snap crust and fresh grated nutmeg
Course Dessert
Keyword Cheesecake, Dessert
Total Time 2 hours hours 35 minutes minutes
Servings 8

Ingredients

Crust

  • 1 1/2 cup Ginger Snaps I use Whole Foods Ginger Snaps
  • 1/4 cup Granulated sugar
  • 1/4 cup Ground almond meal or ground pecans I have also used a combination of nuts for interesting flavor variety
  • 5 Tbsp Melted butter
  • 1 pinch Kosher salt

Filling

  • 5 large eggs, separated yolks from whites
  • 3 8 oz pkg cream cheese, at room temperature MUST BE AT ROOM TEMPERATURE. If your cream cheese is cold it will not incorporate and you will not have a smooth cheesecake.
  • 1 1/2 cup granulated sugar, divided set aside 1/4 cup of sugar
  • 1/4 cup all-purpose flour sifted
  • 1 cup sour cream
  • 2 1/2 Tbsp lemon juice
  • 1 1/2 tsp pure vanilla extract
  • 1 tsp Kosher salt
  • 1/4 tsp fresh ground nutmeg I use whole nutmeg and grate with a rasp. You can find this in the bulk spice section of Sprouts or Whole Foods

Instructions

  • MAKE THE CRUST
    Crush the ginger snaps with a rolling pin.
    If using pecans or almonds, rather than almond meal, pulse the pecans or almonds in a food processor until fine.
    Combine crushed ginger snaps, sugar, ground nuts or almond meal, and salt in a bowl.
    Drizzle melted butter and stir until evenly moistened. Press into the bottom and up the sides (as far as it'll go) of a lightly buttered 10-inch springform pan.
    Refrigerate for at least 1 hour to set.
  • Preheat oven to 325°
  • MAKE THE FILLING
    In a large mixing bowl or the bowl of a stand mixer, combine cream cheese, 1 cup of sugar, and salt and beat until smooth.
    Add flour and egg yolks and mix thoroughly. Stir in sour cream, lemon juice, vanilla and nutmeg and beat until smooth.
    In a separate bowl, beat egg whites with remaining 1/4 cup sugar until it forms stiff peaks.
    Fold thoroughly into cream cheese mixture; no need to be too gentle with it, just be sure the whites are evenly incorporated.
    Pour into chilled crust.
  • Bake cheesecake for 1 hour 15 minutes or until top is puffed and lightly golden brown. There will be cracks in the top, but your sour cream topping will fill that in.
    Without opening the oven door, turn the oven off, and let the cheesecake cool inside for 1 hour. DO NOT take the cheesecake immediately out of the hot oven or it will fall.
    After an hour, remove cheesecake and heat oven to 450°.
    While the cheesecake is cooling, make the sour cream topping by whisking the sour cream, 1/4 C. sugar and vanilla together until smooth.
    Once the cheesecake has cooled on the counter for an hour, pour the sour cream mixture over top. Using a rubber spatula, smooth out the surface.
    Place back into the oven (remember the oven should now read 450° F) and bake for about 10 minutes. Remove from the oven and place on a cooling rack to let cool to room temperature.
    Refrigerate the cheesecake overnight to set.
    DON’T PUT THE CHEESECAKE IN THE FRIDGE UNTIL IT HAS COMPLETELY COOLED. THE DRASTIC TEMPERATURE CHANGE WILL CAUSE IT TO CRACK.
  • To serve, sprinkle top with ground nutmeg, shaved chocolate or pile on cherries or berries.

Filed Under: Baking, Desserts

Berry Fruit Crumble

April 25, 2019 by How Did You Cook That

Warm days of summer are already here in Southern California. I love wandering the Farmers Market and grabbing a basket of plump juicy blueberries to gobble down before I even get to the parking lot.
This recipe is perfect for bringing out the delectable sweet and tart combination of these perfect summer berries.


Filed Under: Baking, Desserts

Zach’s Chocolate Chip Cookies

April 25, 2019 by How Did You Cook That

Cookies Bake Recipe

This recipe is dedicated to it’s Number 1 fan, Zach. He requests the ingredient list more often than anyone, and for good reason. Most of the ingredients are usually on hand in your fridge or pantry and, if not, they are readily available at most local markets. Whipping it together and dropping the dough onto a cookie sheet is simple and only takes minutes. Not to mention how much it really impresses the roommates.

Cookies Bake Recipe
Print Pin

Chocolate Chip Cookies

Satisfy your chocolate chip cookie craving with minimal effort and few ingredients.
Course Dessert
Cuisine Cookies
Keyword Baking
Prep Time 30 minutes minutes
Cook Time 20 minutes minutes
Total Time 30 minutes minutes
Servings 12 people
Cost $12

Ingredients

  • 2 sticks butter softened
  • 2 1/2 cup all-purpose flour
  • 1 cup granulated sugar
  • 3/4 cup light brown sugar lightly packed
  • 1 tsp pure vanilla extract
  • 1 tsp baking soda
  • 1 egg lightly beaten
  • 8 oz bittersweet chocolate chunks I use chunks. Chips have wax as an ingredient.

Instructions

  • Preheat oven to 350º.
    Using a mixer fitted with paddle attachment, beat softened butter, granulated sugar, brown sugar, and vanilla on medium-high speed until super light and fluffy, 3–5 minutes.
 (You can also do this by hand with a wooden spoon and a large mixing bowl.)
    Blend in beaten egg.

    Using a spatula, scrape down sides of bowl. With mixer on low speed, slowly add flour and baking soda, followed by chocolate chunks, and beat just to blend.
    Drop dough in ping pong sized balls onto cookie sheet and bake in 350º oven for 15-20 minutes.
    Pour yourself a cup of hot tea and enjoy!

Lorem ipsum dolor sit amet, consectetur adipiscing elit. Ut elit tellus, luctus nec ullamcorper mattis, pulvinar dapibus leo.

Filed Under: Baking, Desserts

  • « Go to Previous Page
  • Page 1
  • Page 2
  • Page 3

Primary Sidebar

Hi food lovers. Welcome to my kitchen.

If you're looking for simple dishes made with wholesome, seasonal ingredients, you've come to the right place. Grab a fork and take a bite. Dig In →

Coriander Seeds
Strawberry Rhubarb Galette
Coconut Peach Popsicles

Categories

Favorite Resources

Cook Books

What’s New

  • Roasted Garlic Tomatoes with Thyme
  • Crisp Green Salad with Sweet Honey Vinaigrette
  • Number One Ice Cream
  • Street Corn Soup
  • Egg In A Jar

Footer

  • Email
  • Facebook
  • Instagram
  • YouTube

Find Recipes

Never Miss a Recipe

Copyright © 2025 How Did You Cook That on the Foodie Pro Theme